Salted caramel apple empanadas
Fine, I will give out my recipe! But be warned with great empanadas come great responsibilities! In other words, once you make these for your friends or family you’ll be obligated to make more. Ask me how I know! That said, I never bothered to write down the recipe, I’ve always made it by “feel,” but since I’ve shared pictures twice now of the result I keep getting the request for it.
There are two parts to this and for the BEST results you’ll want to devote two days to the work. It’s not that it will take two days to make it all, you just want the apple filling chilled and the dough cold. So one day to make the filling and dough, the next day to do all the assembly and cooking.
Please remember, if you do not adequately chill the filling or the dough you’ll end up with a disaster, trust me I know first hand. All in all, the dough takes ~20 minutes, the filling takes another 30-45 minutes (if you go with the quick version), the actual making of the empanadas can take anywhere from 30 minutes to an hour depending on how comfortable you are working with the dough, and cooking takes anywhere from 18-25 minutes depending on the oven!
First, for the filling you will need:
- 4 large Granny smith apples (they are the only apples firm enough to not turn into goo when you cook them!)
- 2 Tbsp butter
- 1/2 tsp nutmeg
- 1/2 tsp allspice
- 2 Tbsp cinnamon powder (Yes, Tbsp you want flavor and there is a apple to cinnamon ratio to maintain here)
- 1 cup brown sugar (light or dark, your choice)
- 1 can sweetened condensed milk (14 oz)
- 1 Tbsp vanilla extract (I use the mexican version, the taste is different)
- 1 Tbsp coarse ground salt (kosher salt works)
- 1 tsp regular table salt
For the dough you will need:
- 3 cups all purpose flour
- 1 tsp salt
- 1/4 to 1/2 cup sugar (be warned, the more sugar the harder the dough will be to work with!)
- 1 Tbsp ground cinnamon (pumpkin-pie spice works here too)
- 8 ounces (or 2 sticks!) of butter
- 2 eggs
- 2-4 Tbsp whole milk (half and half will work or whatever kind you want to use, but the extra fat is worth it, trust me).
For the topping you will need:
- 1 whisked egg (or substitute with ~ 2-3 Tbsp melted butter)
- 5 Tbsp brown sugar
- 1 Tbsp ground cinnamon
Now that you have all the ingredients let’s cover how to cook. For those who hate long text, I’ll try to summarize here (I’m in this boat too, don’t worry), then write a more detailed guide with some pictures below. I’ve made life even easier by bolding and or underlining what I think are the important bits.
For filling:
- Peel, core, and dice apples
- In a large saucepan, add butter, apples, and sugar over medium or medium-low heat.
- Once sugar has melted and apples are slightly browned, add condensed milk, spices, and vanilla. Heat until thickened and sauce is smooth (or slightly chunky if time is limited)
- Chill for 1-2 hours minimum, overnight if possible
For dough:
- Add dry ingredients into a food processor and mix.
- Add eggs and slices of butter (the thinner the better) while pulsing the mixer as you add to incorporate the butter and eggs.
- Add milk while pulsing until you have a crumbly dough, if it looks well incorporated you added too much milk.
- Lightly knead dough and split into two balls.
- Flatten balls into disks and chill for 30 minutes minimum before use. Parchment paper between disks and the plate/storage container will keep them from sticking to everything.
To make the empanadas:
- Roll dough into thin flat sheet.
- Cut into circles (using a circle cutter if possible)
- Add small amount of filling to center, you’ve probably already added too much (trust me).
- Fold over and seal edges with a fork.
- Apply butter or egg wash and sprinkle with cinnamon/sugar mix.
- Place on greased baking sheet or silicone baking mat (my preference)
- Chill for 30 minutes. Or for best results place in freezer for 20-30 minutes.
- Heat oven to 375 F and bake for 18-25 minutes depending on oven or until lightly browned
- For optimal non-mouth burning consumption cool for 5-10 minutes.
- Makes 12-16 empanadas depending on how thin you roll the dough and how large they are.
Now for anyone who prefers a lot of detail to the instructions (I’m more of a skim and take my chances kind of person myself, but more power to you!) let’s cover this in more detail.
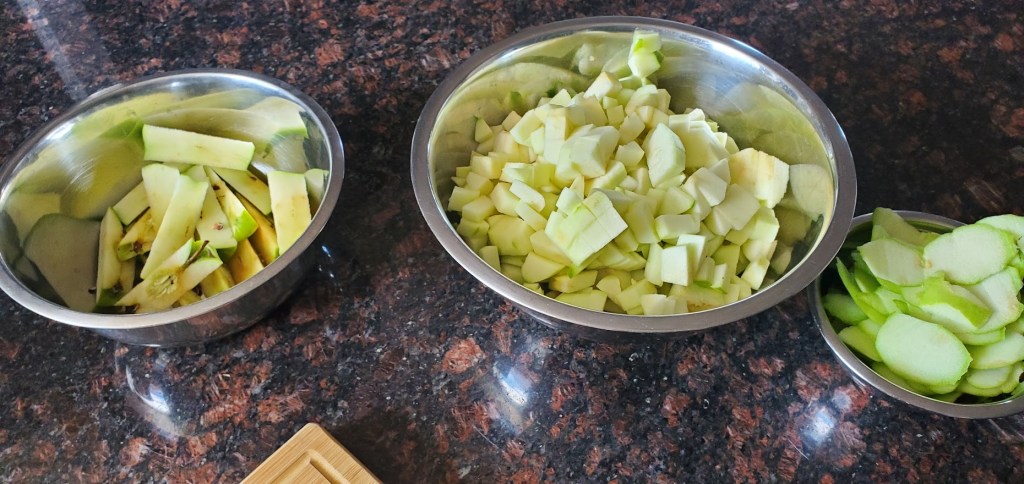
For the apples, you want to peel, core, and slice. I rough peel with a knife because no one has time to use a peeler (or at least I do not) then cut in half, slice out the core and cut into chunks. Below is a shot of how I remove the apple core after peeling. I save the peels because I like eating them, but you can toss them if that’s not your thing. I’m weird, I know. Note in the photo below I doubled the recipe because I made twice the dough, you only really need four apples if you’re not doubling like I did.

Next you’ll want to heat in a saucepan the butter, over a low-medium heat. You don’t want to burn the butter, trust me. For best results brown the butter slightly so it comes out looking like a caramel color before you add the apples. Next, add apples to the butter in the pan and gently fold the apples into the butter so you lightly coat everything. Add the table salt here and cook until apples are slightly softened.
Once the sugar has melted, you should have a somewhat sauce looking liquid at the bottom of the pan. Now we add the spices, the vanilla and the sweetened condensed milk. Now, technically speaking (and I won’t tell if you don’t) this makes our “caramel” ACTUALLY dulce de leche, but I won’t tell if you don’t and Salted dulce de leche apple empanadas is a mouthful, so I call them salted caramel apple empanadas for short. There is a difference, but again I won’t tell if you don’t. Also note, I like my salted caramel on the salty side, but I gave a “less” salted version here. If you prefer yours salty like me, you’ll want to add a bit more of the kosher (or course ground) salt and season to taste.
Now for the somewhat long part, heat and stir mixture until the sauce is reduced. The apples will add a lot of liquid to the mix and it will probably look “chunky” or gritty for a longer amount of time than you would expect. Personally I like to cook off some of the liquid, but I don’t mind leaving the sauce a little chunky. If you prefer smooth well incorporated sauce you’ll spend the next hour or more stirring. In a perfect world this will take up to two or even three hours, but again you don’t have to if you don’t mind a chunky filling. Notice I said you could use either style of brown sugar, that it doesn’t matter. Brown sugar is just regular sugar with molasses added, the ratio of the two ingredients is what makes it light brown or dark brown, so use whichever you prefer! The darker the brown sugar, the darker the sauce will be and it will have a sweeter taste to it (from the added molasses).
Alternatively if you want a very smooth sauce, you can make the sauce separate and add it to the cooked apples, using the same steps listed above minus the apples. Then you can incorporate the cooked apples once the sauce is done (notice I said cooked). This will speed up cook time, but only slightly so the real the added bonus is you’ll have the option of leftover sauce to top/dip your empanadas. I do this when I have enough time, but since I’m in a rush this holiday season I cooked mine for ~30 minutes and opted for a almost gritty sauce, once it cooks in the oven though you’ll never know, trust me I’m an expert lazy person. I also like having the combined flavors the apple, the caramel sauce, it’s just a great dance of flavors and I don’t like separating them because it’s not the same. Okay, okay, I’m also very lazy…

In the photo above everything looks well incorporated and the sauce looks, well saucy, but once it chills the sugar will fall out of suspension because I didn’t cook it long enough. You’ll see what I mean when I add the photo of the filling step. So again, cook until you have a caramel colored thick sauce, if it’s too thin you’ll end up with a mess when we get to the filling step, so the thicker the better as long as it’s not a rock when it comes time to use. Notice the apples are still in chunk form, granny smith apples are the best for this purpose so I would highly recommend you avoid other apples. Just don’t do it, no one wants to put all that effort into this only to end up with applesauce.
Once done, let the sauce cool and store in the fridge for a minimum of 1-2 hours, but overnight will give you the best results. All good things to those who wait or something like that. Note, if you store overnight and didn’t cook it enough (like I did not) you’ll end up with some liquid separation from the sauce, totally normal and just drain it away afterwards (or don’t, but it will thin the filling), then mix before using.
Now we can talk about the dough. I’ve learned a lot working with this dough, so let me help you so you don’t make the same mistakes I made! I now opt to use the lower end of the sugar I listed. The more sugar you add the harder the dough will be to work with. The filling and topping will more than counteract the semi-sweet dough (it’s lightly sweet, think almost sugar cookie). I’ve tried subbing in brown sugar, don’t trust me. You can add cinnamon, cocoa powder, or whatever else you want to flavor the dough with. I prefer going with cinnamon and sometimes a splash of vanilla, but if you’re not feeling adventurous, then just stick with the cinnamon or no spices. The plain version is just as good, trust me I’ve used it many times and still use it from time to time.
Add all the dry ingredients to the food processor and pulse the mix. You don’t want to overmix so pulses will be just fine until you have a working dough. Trust me on this there’s science here that I won’t bore you with. Next, add in the eggs and a few slices of butter, pulse and keep adding slices of butter until it’s all added in. You’ll want to cut the butter sticks into quarters at least (I go with eighths and add two at a time) and pulse for a second or two as you add. Your dough should start looking like a brown sand-ish texture.
Next you can add in the milk. Add one tablespoon at a time and pulse in between until it’s incorporated this may take a couple of seconds, but no more than 10-15 seconds per tablespoon. In the end you should find a mostly dough that looks like it’s about to fall apart but mostly holds its shape. If it looks liquid or well mixed, you’ve added too much so please don’t. I find that 2 tablespoons works (mostly) for the regular dough, if you’ve added cinnamon or other spices/flavoring a third tablespoon may be needed, I don’t think I’ve ever had to use four, but you may. Unfortunately I don’t have photos of this step, but you should have a somewhat crumbly looking dough. That is normal and just go with it, trust me.
Now empty the dough onto a work surface that has been lightly floured (to keep it from sticking). I have a countertop to do this on, but you can do it on a baking sheet in a pinch. Knead the dough until it is well mixed and holding together (incorporate the pieces that were falling off basically). Split into two even chunks and roll into a ball. Flatten both balls and store in the fridge until use (30 minutes minum, overnight for best results). You can also freeze this dough if not using it right away. I store mine on a parchment paper covered plate, with parchment paper between dough disks. If I’m storing overnight, I light to lightly cover this in aluminum foil, but it’s probably not needed.
Time to do some assembly! Take out one disk, if it is hard and not very dough like, don’t freak out. It just needs to warm a bit, there is a fine dance we’re about to do with the dough where it needs to be warm enough to be a dough, but cool enough to work with. If you find yourself with a rock hard lump, start by kneading it until it softens. Remain calm, it will break apart and you will think you did something horribly wrong, but you didn’t the butter is solid so the dough is now solid, once the butter warms the dough will be pliable again. This could five or so minutes, but I managed to get something workable in just a few minutes and mine were pretty solid to start.

Like the photo above, you want to lightly dust the work area with flour. Using a rolling pin you’ll roll the dough disk into a thin dough sheet. Sometimes I will oil the rolling pin lightly with some butter or non-stick spray, it keeps the dough from sticking to it as I work. How thick you roll the dough is up to you and I wish I had advice, but there is another delicate dance between too thin to work with and too thick so you end up with a cookie instead of pastry shell. You’ll have to find what works best for you. Once the dough is rolled thin enough you’ll cut into circles. Tip I’ve learned the hard way. The dough will soften as you work, so once you cut a few circles and need to rework the remaining dough I suggest taking the dough from around the circles, rolling it into a light ball and tossing it in the freezer to chill. It won’t be in long enough to freeze, but it will keep the butter from softening so much that the dough becomes super difficult to work with.
Now we can assemble our empanadas! Another pro-tip since you’re reading this long ass recipe, take the rolling pin and lightly roll the circle into more of an oblong shape (think stretched circle) this will thin the dough out more, but also give you more room for filling and sealing. I like to stuff my empanadas as much as possible so once I discovered this I was a very happy person.
Next you’ll add a little filling to the center of the disk, again no photos sorry! Maybe I’ll update when I do more, but these steps have to go somewhat quick because the butter softens as you go so time is your enemy here. The amount of filling you add is far less than you would think (or at least far less than I thought when I started). So half a tablespoon or so will do and that may be too much, you’re about to find out.
Now fold over the circle, if you have a elongated shape like I suggested I folded from the narrow ends so my fold was half way along the longer sides. Then you need to seal the empanada before you bake. You can do a fancy fold over pattern, but I’ve never been good at that so I opt instead for the fork method. Press down along the edge (it’s okay you can press pretty hard here, just try not to pierce the dough) and seal the empanada shut. If you’re like me and want to overfill I recommend doing a single press and the middle, then the sides, and finally press the areas in between to help keep the filling in. If some filling leaks out you’ve overstuffed and what’s worse you won’t have a good seal. Not to fear though I have a tip for that too.
Now that you have the empanada sealed you can use your butter or egg wash and dust with the cinnamon and sugar mix. Below is what mine look like and you can probably tell from the photo, they are stuffed. The filling is the best part though, so I don’t feel bad about this. I also use a silicone baking mat instead of buttering the tray. It makes life so easy and they are incredibly cheap, invest in these, trust me, nothing sticks to these so the empanadas come off perfect every single time.

Now here is where I learned another important bit of information. These will almost certainly fall apart when I bake them (crack open significantly) because I’ve stuffed them to the point of exploding with filling. Yet, this year I ended up with almost three dozen empanadas and not one of them fell apart. The secret? Stick the whole try in the freezer for 20-30 minutes before baking. The dough will be nice and firm when it bakes so I can almost guarantee no cracking when it comes out of the oven. This increases the baking time slightly (because they are going in basically frozen, or at least very chilled), but only by about 5 minutes (which I included in the time range above FYI). If you don’t want to do that or don’t have space, you can chill in the refrigerator for the same amount of time (minimum!), then it’s time to bake.
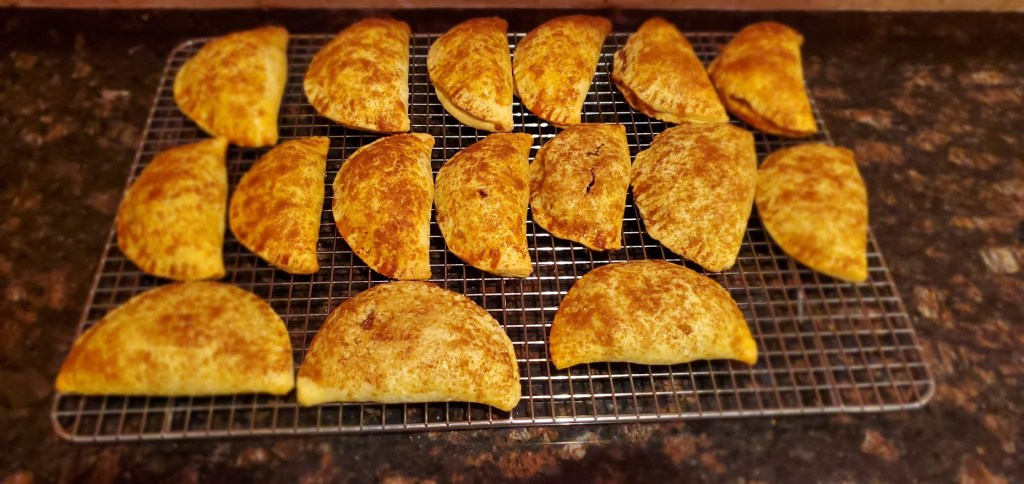
Preheat the oven to 375 degrees Fahrenheit (190 C) and bake for 18-25 minutes, 25 minutes will be closer to the time you need if you chill them in the freezer before baking. Toss them in the oven and bake until they are a nice brown color or firm to the touch. To cool I like to transfer them immediately to a cooling rack for about 5-10 minutes before eating. You’ll end up with something like below! Notice I said the recipe makes 12-16 and I have 16 here, that’s probably the maximum you’ll be able to make (again mostly depending on size) and it may take a bit of practice to learn to work with the dough.
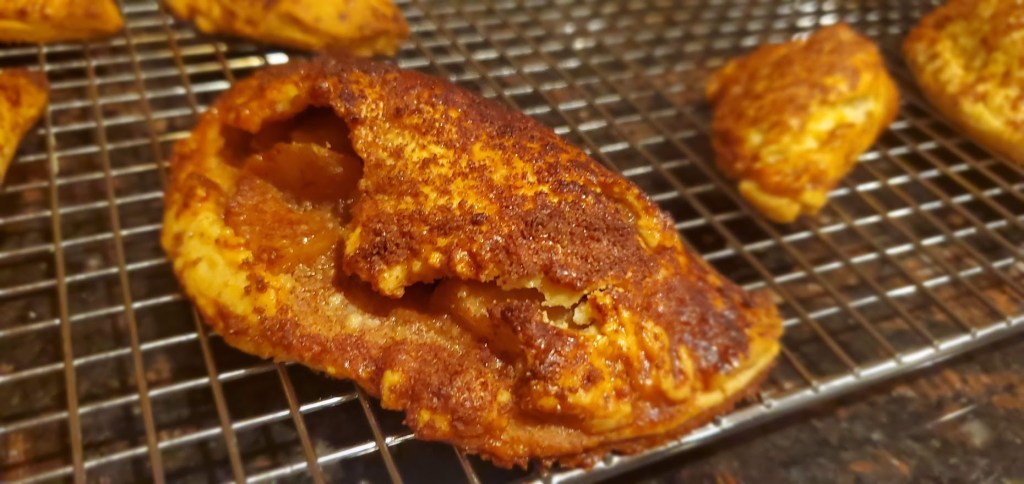
Here’s a close up of what you should be looking for from the oven

If you didn’t freeze yours or want to know what I mean by cracking, I have an example from a previous batch I made that I chilled in the fridge before cooking. It is still just as good, but it doesn’t look as “pretty.”
And there you have it, my secret recipe for your use. Now a quick disclaimer, everyone has different tastes, your tastes may not be my tastes. You may want something more sweet or something less sweet, you can (and should!) adjust the recipe to make it your own. I will say I have yet to come across someone who has not liked my empanadas, so as far as a good starting point goes, this is not a bad place to begin if you’re new to baking or new to empanadas!
Pro-tip: Nothing beats eating a pastry fresh out of the oven, but after these cool, just pop them in the microwave for 10-15 seconds and it’s like they were made fresh all over again.
Storage: I forgot to mention storage! You can store these at room temp in an airtight container (it’s what I do anyway) and they will stay good for at least a week, probably more, but they’ve honestly never lasted long enough to figure out the shelf life.
Good luck and if you find any new combinations, tips, or tricks you’ve picked up feel free to share! Happy eating!


But enough about us, what about you?