PC build part eight, closing the loop
As promised this is the grand finale to the custom water cooling hard tube build saga. As in, the computer is back up and running… finally. It’s been a journey, but I’m hopeful that the latest mods will keep me from having any more problems that I need to stop my work and fix. I mean modding your computer for fun is one thing, needing to do it is a whole other thing. Still, I’m thankful for the little pause and I got to make a few needed changes/upgrades while the computer was down so it isn’t all that terrible.
First things first, if you’re new around here you can find the complete computer build story in the handy computer building category (here). For everyone else, a quick recap since it’s been a few days since we last visited the build. The AIO watercooler I had installed clogged, this was the second time this happened in less than two years so the custom water cooling solution seemed to be the best bet to solve the problem. After a lot of planning, a lot of metal working, and some frustrating experiences with learning how to bend hard tubing, I completed the loop, leak tested, found a leak, diagnosed the leak, fixed the leak, and that was the end of the story until today.
Now this wasn’t without it’s “oh crap” moments. In particular putting the case back on I realized that one tube in particular was going to run right into it, thankfully it didn’t but the gap between the tube and case is non-existent. We can get into more detail about that in a minute, let’s go through the logical order of things first. The loop was done, we pressure tested it, it held pressure just fine (finally) so all that was left to do was fill and clear out the air in the lines. Easier said than done!
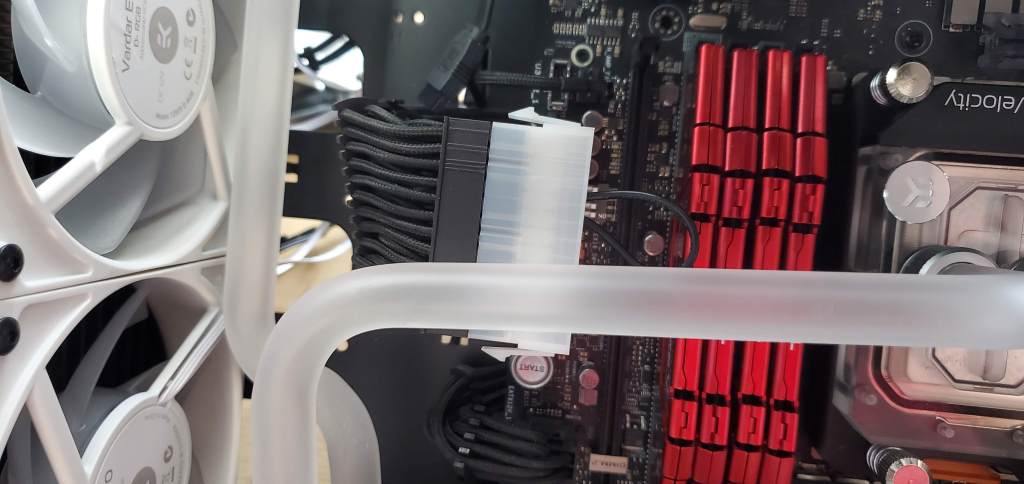
Since the computer needs to be turned on and off repeatedly and electronics and water do not mix, we need a way to run the computer safely. That’s where this guy (white plug) comes in! It’s a jumper that turns on power to everything by bridging two connections (you can see the single black wire hanging out on the white side of the clip). You could theoretically do this yourself with a piece of wire, but the part is like ~$2 USD, just buy the thing, it saves a lot of headaches. With this, all I need to do is flip the power switch to the power supply and all the peripherals come online, but the motherboard remains off! This is important since if somehow something leaks it won’t get ruined. Also I suspect turning the computer off and on repeatedly like that wouldn’t be good for anything.
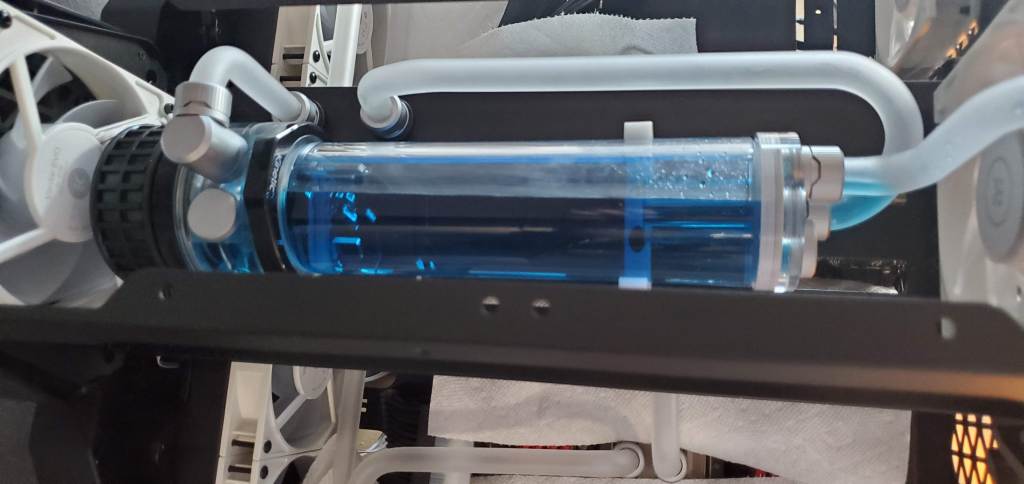
Now we were ready to add in the coolant. I went with a blue coolant since the lines are frosted and it just makes everything feel… cold. I thought it would be a fun little theme to go with the new design. This is where all that planning comes in handy. The fill plug in the back of the computer and the drain plug on the passthrough theoretically mean that I can drain and fill the computer without taking off the covers, a neat trick when I need to drain the loop in ~6 months for the first check. I could go longer in theory, but I’m an anxious person, so that’s not how I do things. After the first check maybe, but definitely not out of the box like that. Below is a shot of the fill process.
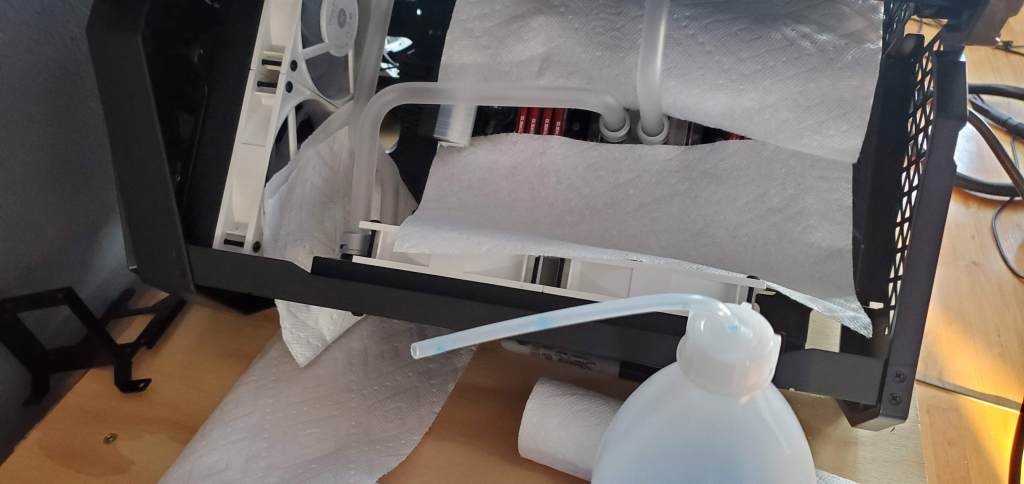
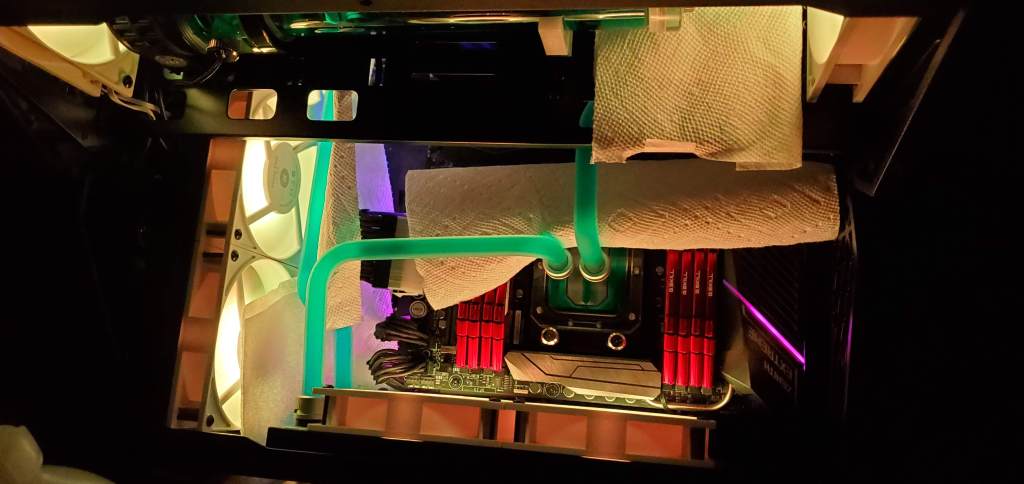
Now as I mentioned I’m an anxious person, so even though I leak tested the loop already, I threw down some paper towels just to be on the safe side. I figure it’s better to be over cautious than under 99% of the time and I really don’t have money for a new computer if I screw this up so paper towels seem to be a good failsafe. If you decide to not use a pressure tester this would be the way to check for leaks. Using white paper towels is preferable because the color will show if it does leak. While I had an accidental minor spill (or rather squirt from the fill bottle), everything remained dry otherwise. It was still good piece of mind.
I could’ve used a funnel to fill the loop, but I opted for the fill bottle and it was worth it. 10/10 highly recommend. 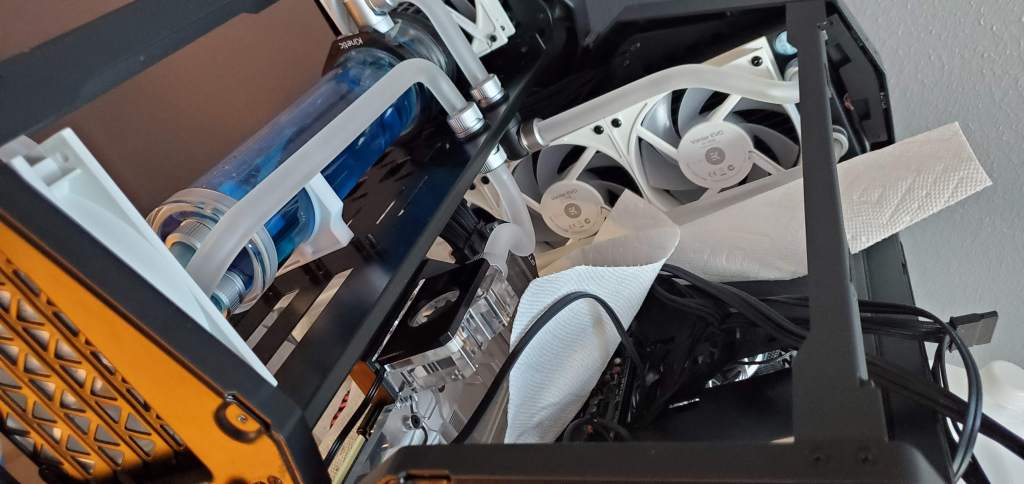
More paper towels before the first run.
Anyway you turn it on, the liquid drains from the pump fairly quickly since there’s no liquid in the radiators or lines, and you shut it off, refill, and repeat until the water level is constant in the reservoir. There will be foam!

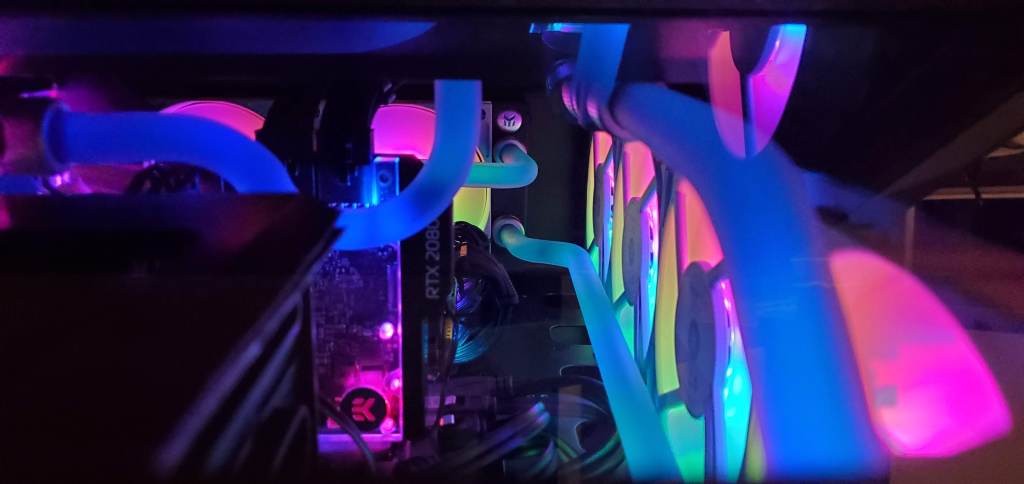
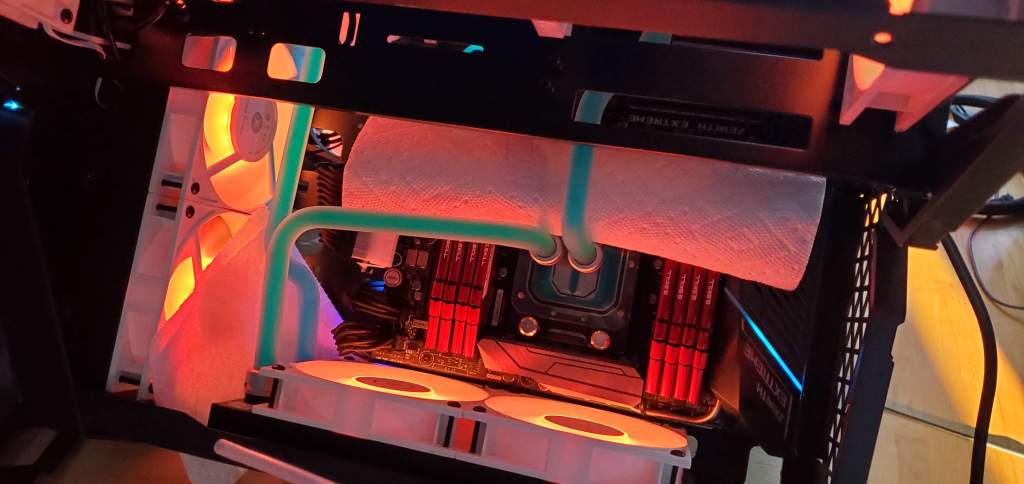
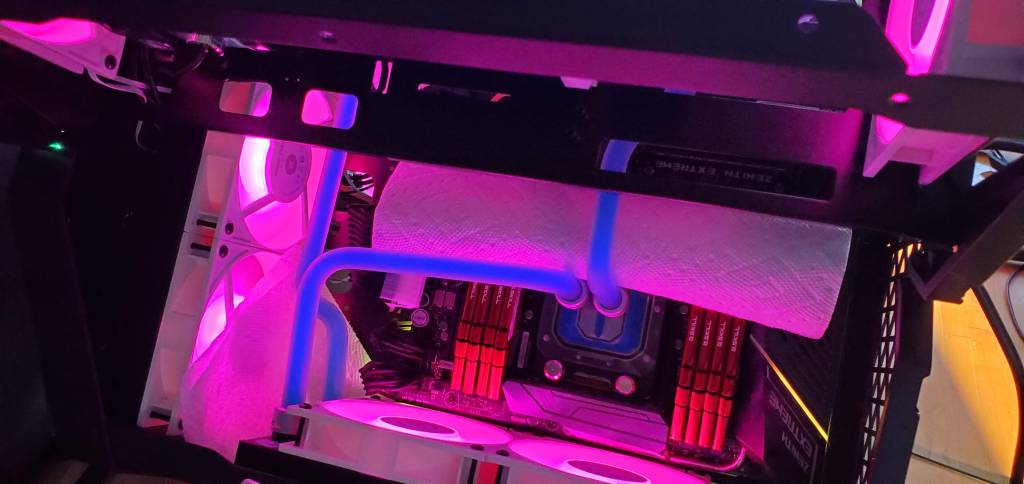
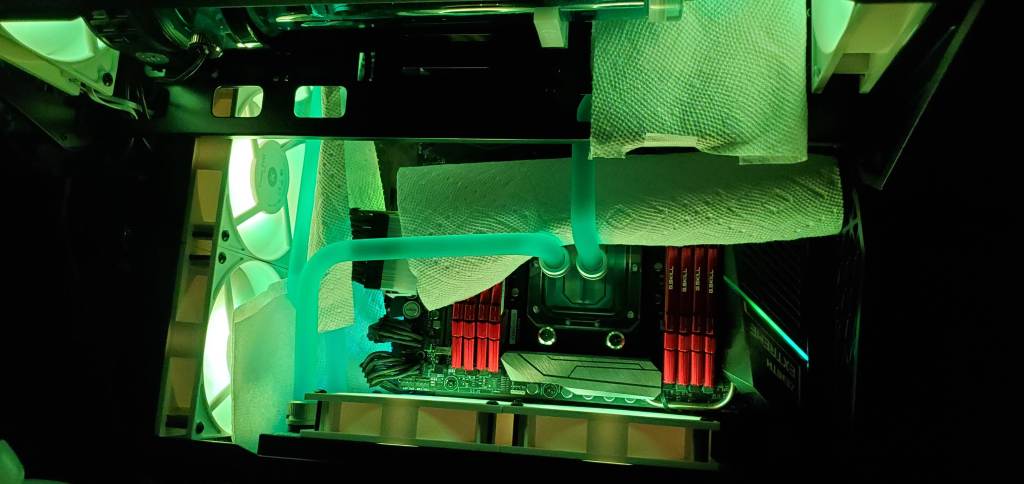
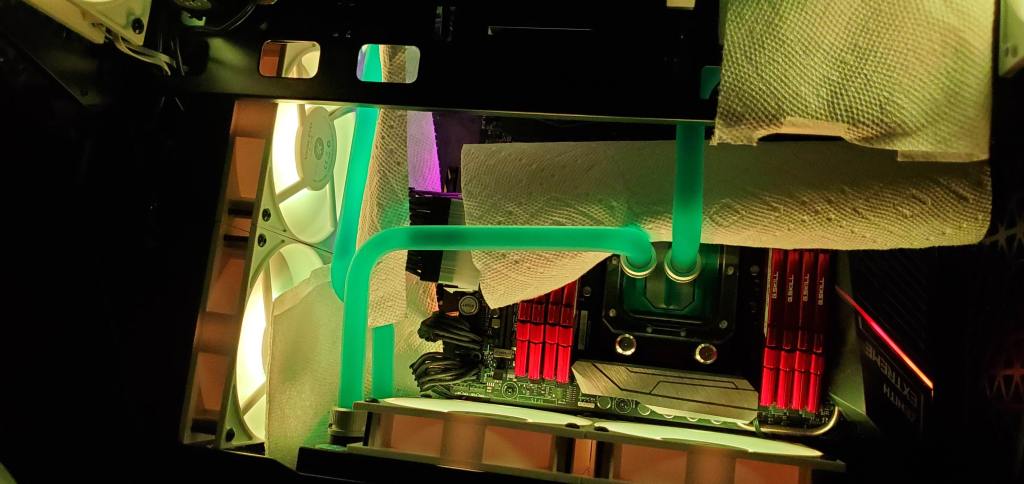
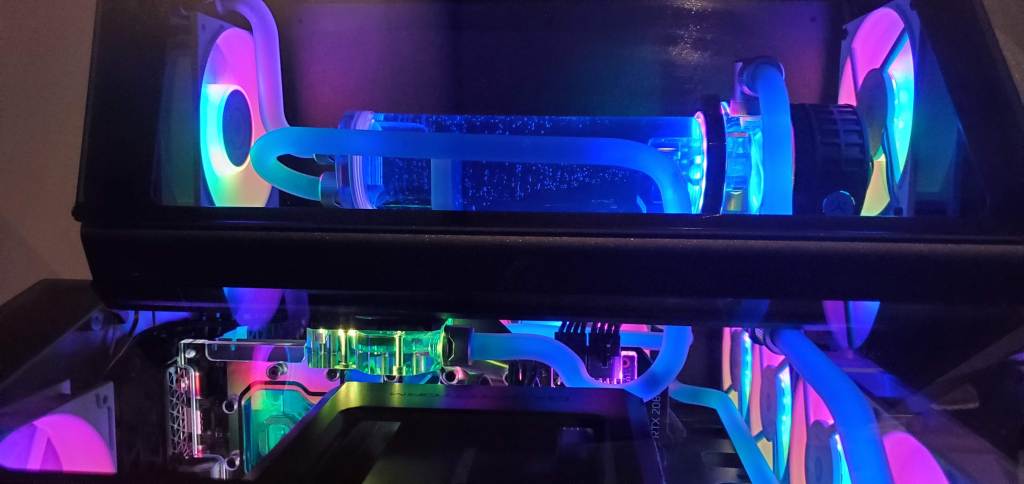
Since the power turns on everything attached to the motherboard, including the pump, fans, LED, etc (strangely enough the LED’s controlled by the motherboard didn’t come on or only one thing attached to it came on intermittently, I assume it’s a low power draw thing since the 24 pin power was disconnected from the motherboard (the things with the white clip attached in the first photo above). This gave me a chance to make sure that my fans and LEDs were all working properly and I’m happy to report that they were. This was also a fun chance to see the color cycling and the effect on way the coolant looked in the tubes. I really like how purple made it pop, more so than blue even which was interesting. Warning, lots of LED lighting photos ahead, but it’s also a good chance to see the loop filled!


This was a process, mostly because there is air in the system and it needs a little help to work its way out. By that I mean physically jiggling the case and (gently) banging it to free the bubbles. It was also nerve-wracking to do since even with the covers off the case easily weighs more than my cat when she doesn’t want me to pick her up. If you own a cat you know what I’m talking about.
Since the graphics card was most visible, it was easy to see the air bubbles I needed to work out here. 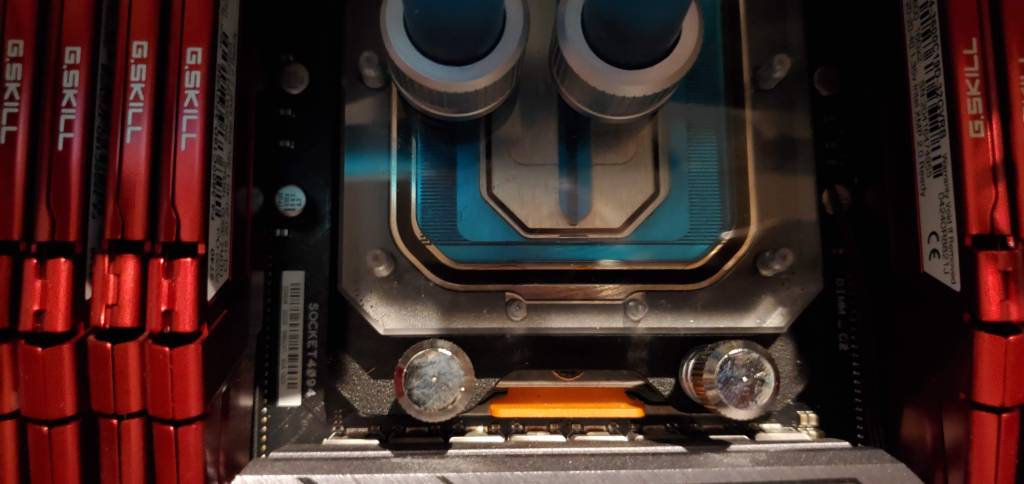
This surprisingly looked air bubble free 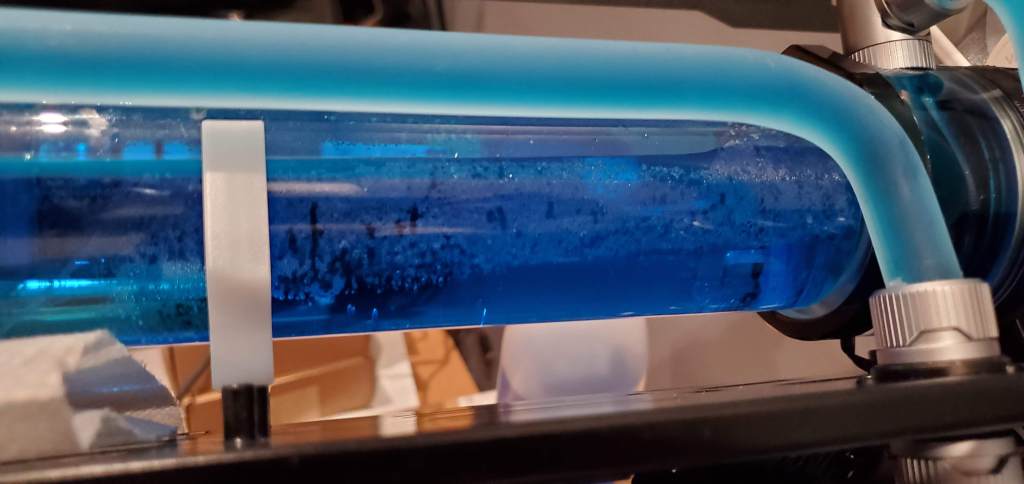
Just some shots of the coolant in the tubes, why not? 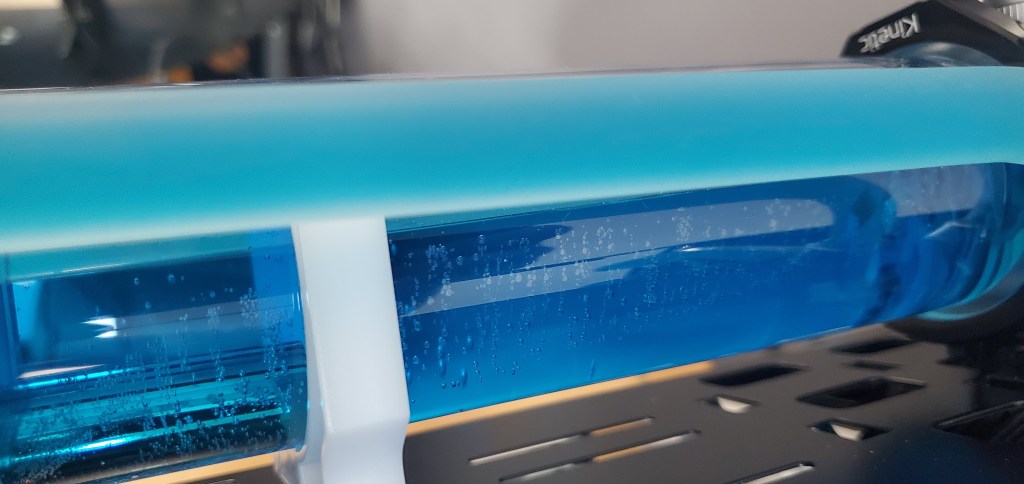
Another view 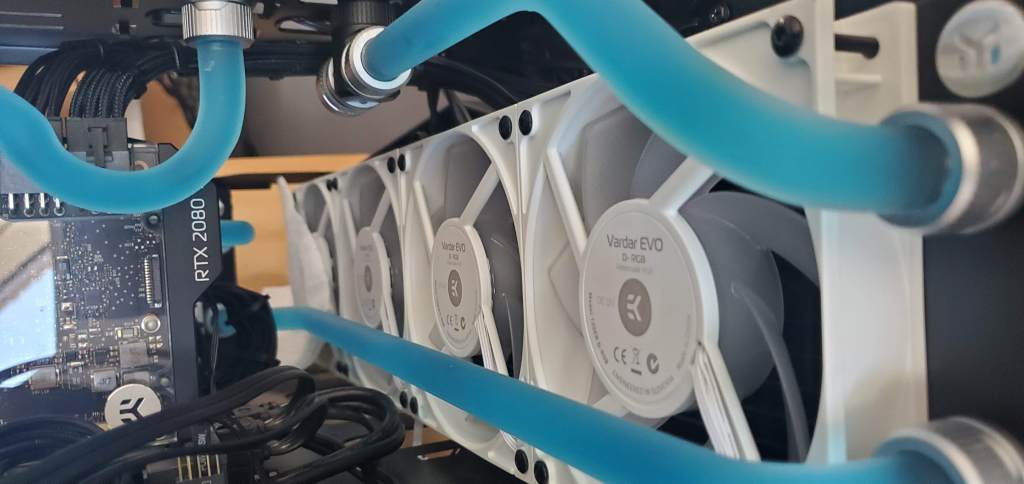
And another view 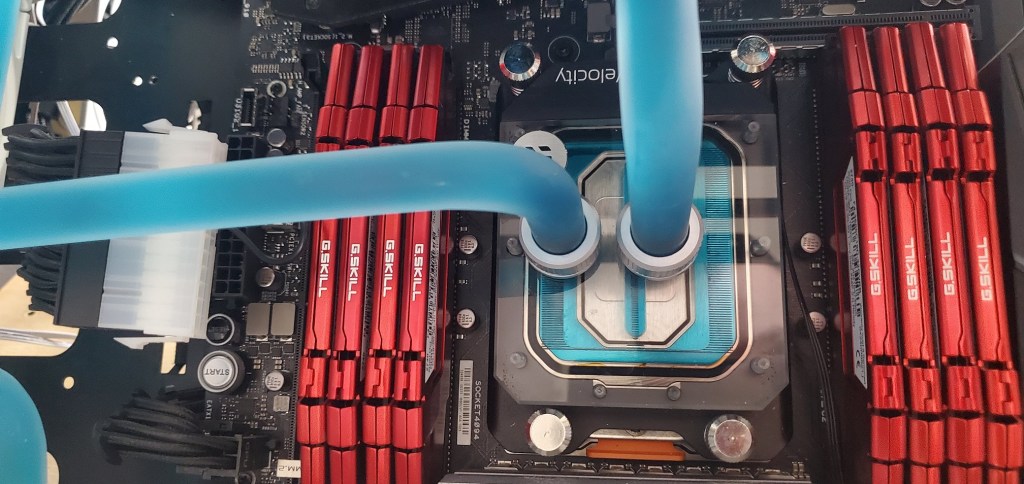
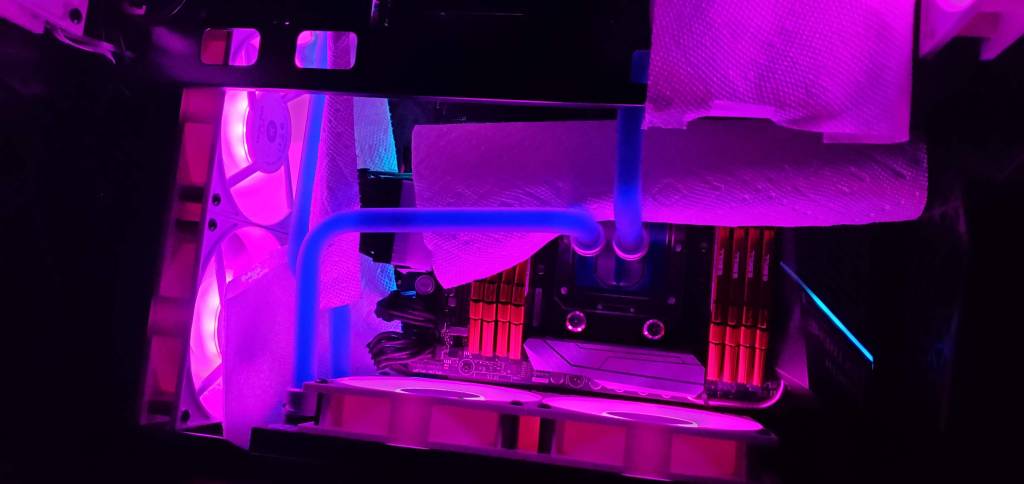
Another CPU shot. 
And from above.
Now that everything was done, I could put the hard drive bay back into the case (the one I heavily modified) and hopefully use it for the first time in two weeks or so without worrying about it overheating (probably longer than two weeks now that I think about it, wow). But first a quick detour!
I don’t announce this kind of thing, but I had (have) a birthday in the past (or next) 6-8 weeks. I don’t normally do anything special for it and I try not to post personally identifying information online anyway so don’t feel bad if you had no idea. However, this year I did something different and instead of just ignoring it, I bought a few gifts for myself that were frivolous. Yes, you could argue that the watercooling setup was frivolous, but I need the computer, I need it working correctly, and this seemed like the best option so I justify it that way. This on the other hand, there was no reason for it, I just wanted something nice. So I bought myself a new mouse and keyboard. The old mouse was nice, but felt weird in my hand (too big almost, but my hands are pretty big, so maybe it’s just me) so I really wanted something different.
Since I went with white fans in the computer, I decided to get a white keyboard, but I couldn’t get the one I wanted in white! So instead I spent a few extra dollars and got a keycap set that were white and super cool. Of course, I had to install them myself. Let’s just say it took forever! The instructions didn’t give me much to go off of and I couldn’t figure out the order, but once I did life was easy. Afterwards I noticed the packages were stamped 1,2,3,4 so that would’ve saved me time, but hindsight is 20/20. They organize their keys going left from right, top to bottom with one exception the + and enter on the number pad. So once I figured that out it was cake. It still took upwards of an hour to get it all done, but it could’ve been worse had I not figured out the order.

Forgot to get a before photo, so you get to see before with the space bar already repaced 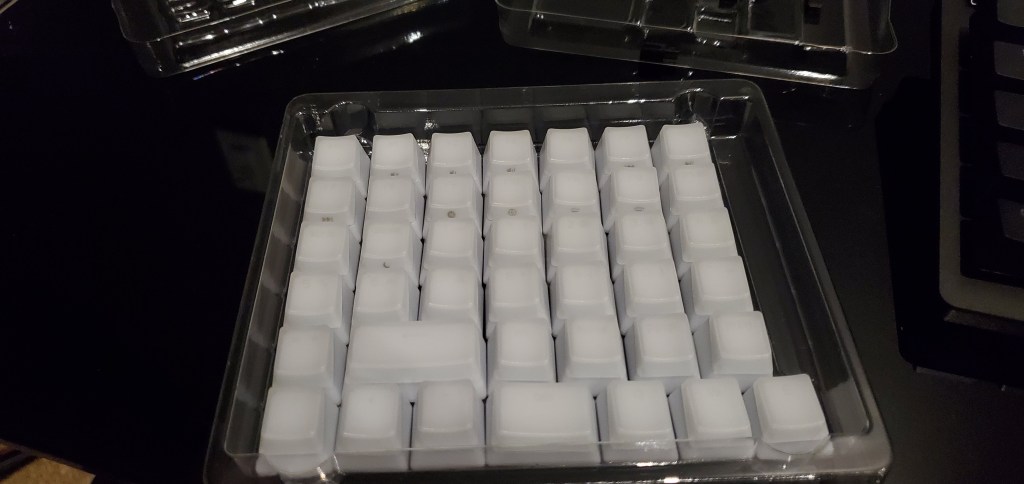
One of the new keycap containers (1 of 4, but I only needed 3 since the fourth was for the UK) 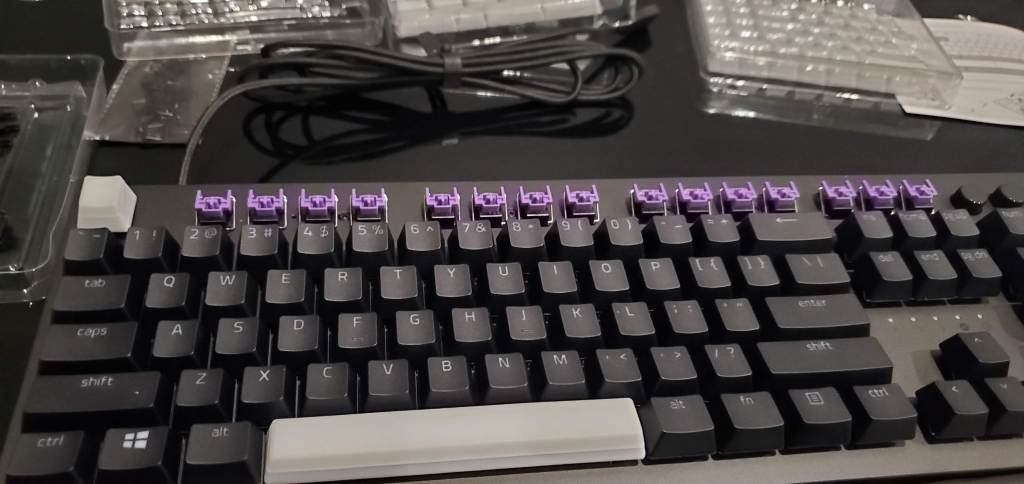
Caps went left to right and top to bottom, once I knew that I could pull a bunch at a time and put the new ones in. 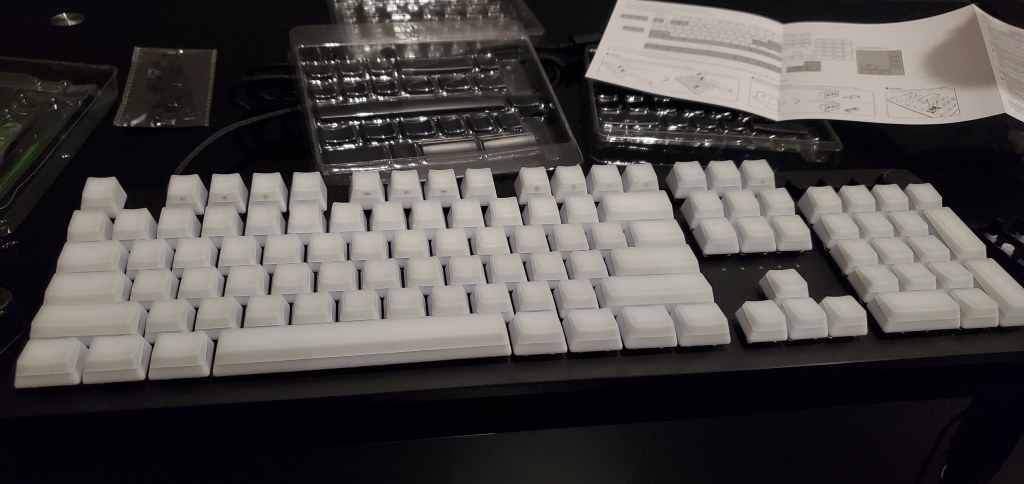
And done! The lights let you see what the key is, so with them off it just looks like a white block without lettering.
The tricky thing was I couldn’t tell which key was which unless I held it up to the light, but I only needed to check the individual packages to figure out which was next in the order (again they were numbered, I’m just an idiot). The big keys (spacebar, shift, etc) have added braces you need to manually insert then install the key, it was a pain and I you can install them the wrong way if you don’t pay close attention, trust me I did it twice and I was worried I would break a key getting it out. The only thing I’m not particularly fond of is that the keys have a line through them (seen above). Because part of the key is opaque, and the top bit with the hidden lettering is not. Not a huge deal and the keys feel smooth enough that I don’t think I would notice, but you can see it visually which is slightly disappointing. I still wouldn’t change them though, they are awesome looking. The old keys had a weird font to them anyway and I didn’t like it, it felt like a font for a child, which I was glad to be rid of since the new keys don’t have the same font. So like I said without the LED lighting you can’t read them, but once the LEDs are on you can.
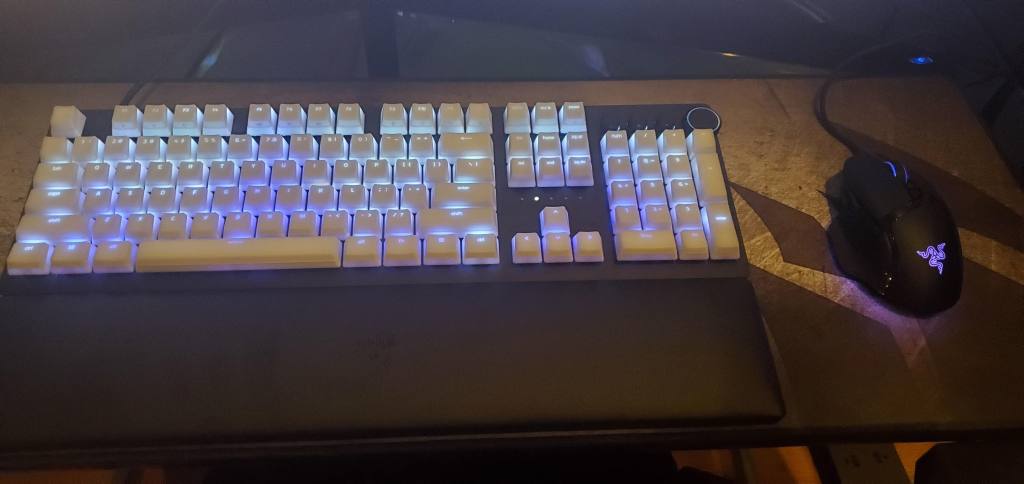
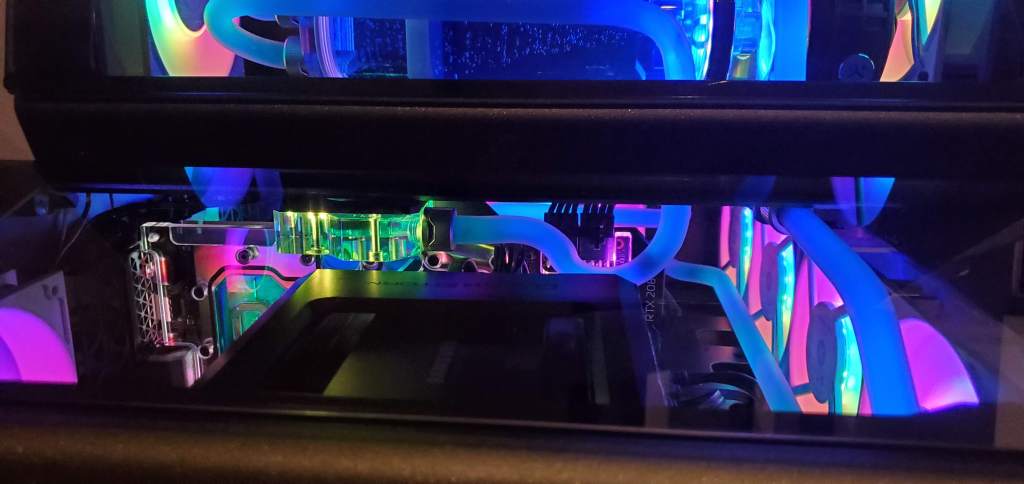
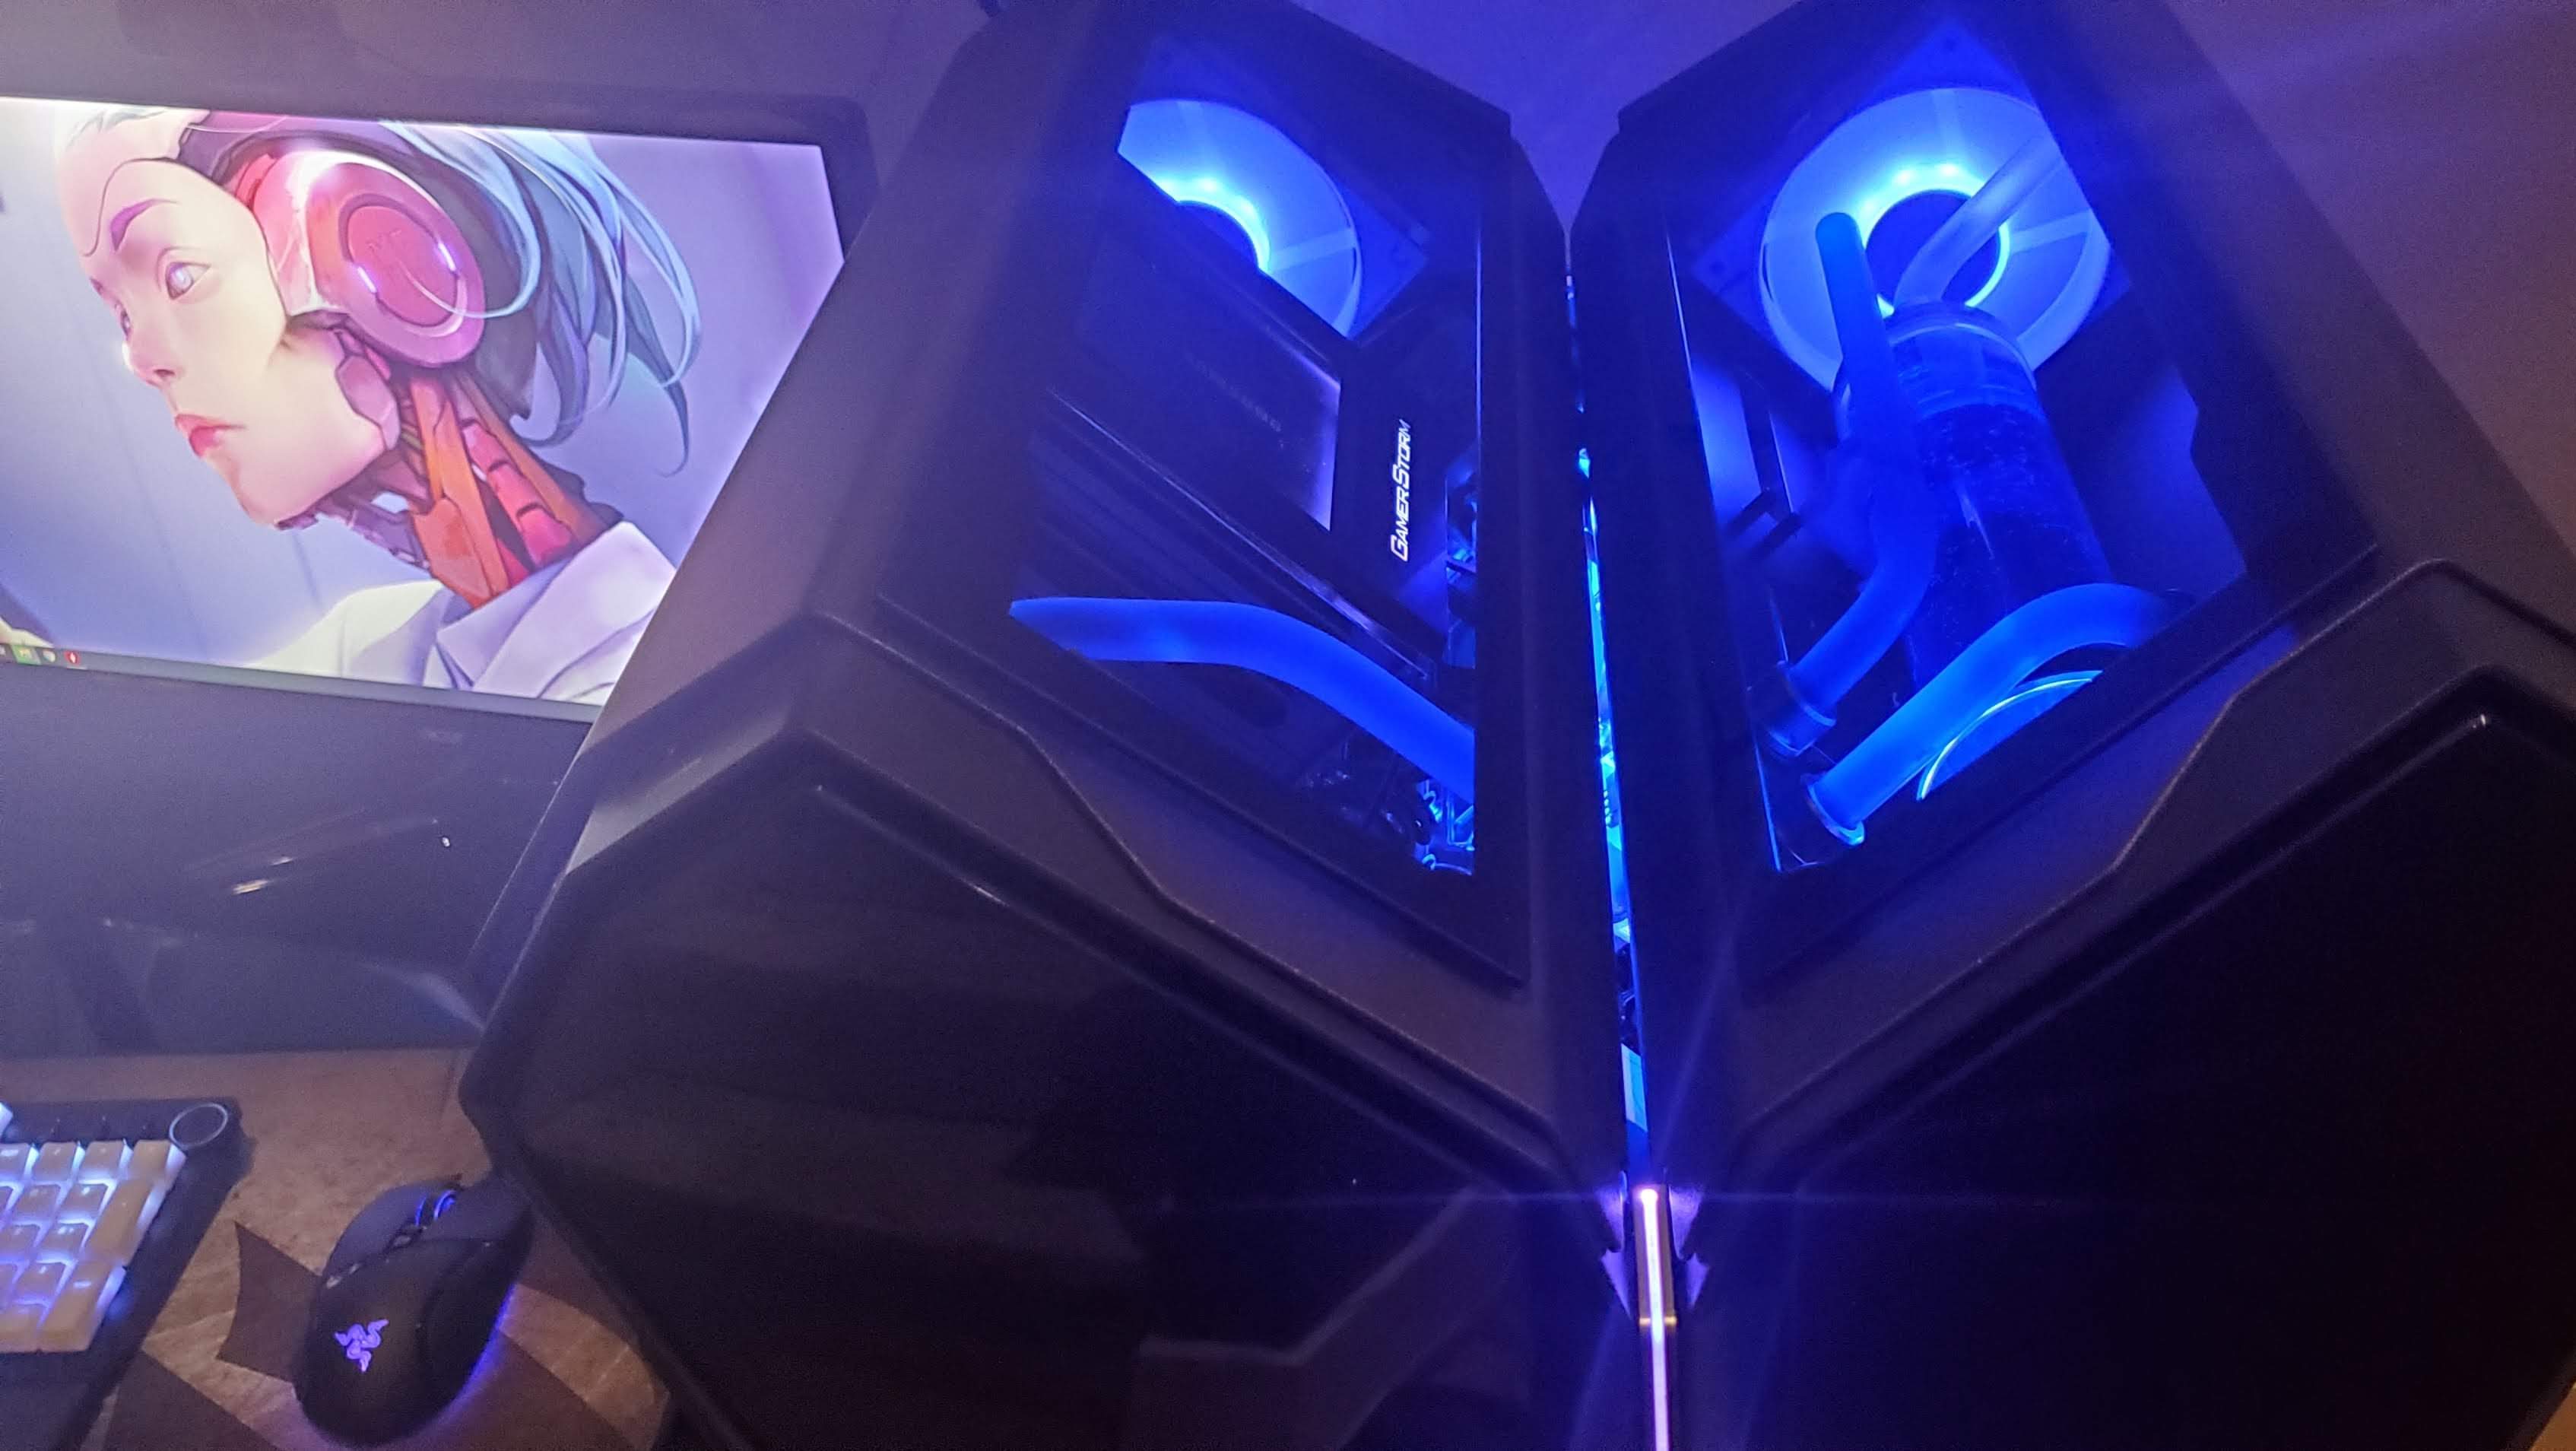
Now that photo is after I turned on the computer and got everything up and running again, but let’s take a look at the photos from the first boot. Oh side note, I used that white jumper once the covers were on to verify that I didn’t bump a line and cause a leak, it also gave me a chance to make sure I didn’t accidentally disconnect one of the LED lights (which thanks to the adaptors to get the fans to play nice with icue, was super easy to do). Thankfully I was being paranoid, no leaks and all the fans came on, so I could plug it in, clean it up and get everything polished nicely. First actual boot changed the color scheme of the fan LED’s to something more dramatic, which I think looked awesome so I grabbed a bunch of photos. Keep in mind this is with the case on and the glass in place. I’m running the quadstellar case from Deepcool, which isn’t being made anymore, but has magnetic glass plates that clip over the exposed openings.
I also want to remind everyone when we look at the photos that the side with the hard drives was completely blocked off because of the rack used to hold them all. Since I modified that, it’s much easier to see in the case. That said, let’s take a look! Notice in the first and second photo the tube coming from the passthrough that runs to the radiator looks very close to the top of the case, it is damn near touching. I got incredibly lucky with that, it never occured to me that was going to be an issue.
The bottom panel would’ve been completely black had I not modified it to be more open. 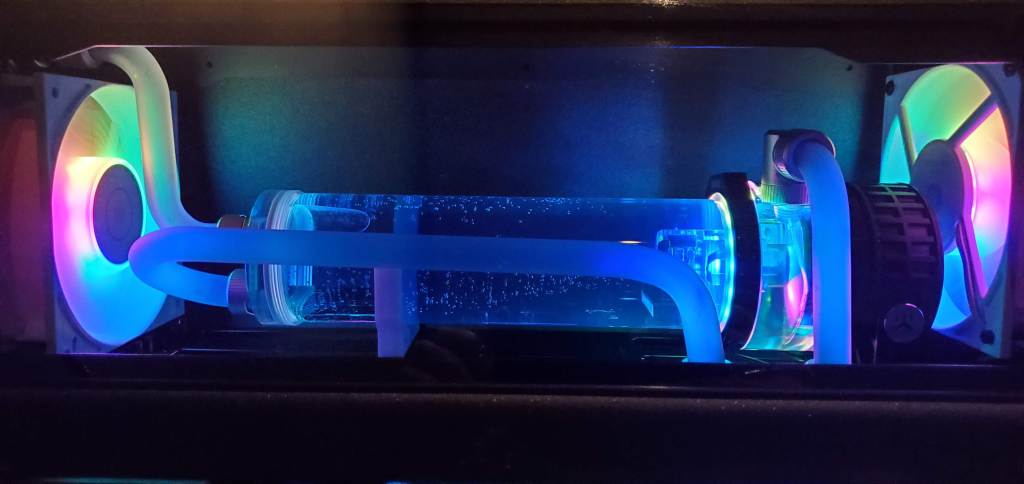
The back fan (left) I installed custom since it wasn’t designed to go there, but it gives the case a nice symmetric lighting, which I love. 
You can see the two glass plates that clip in place in this photo pretty clearly. 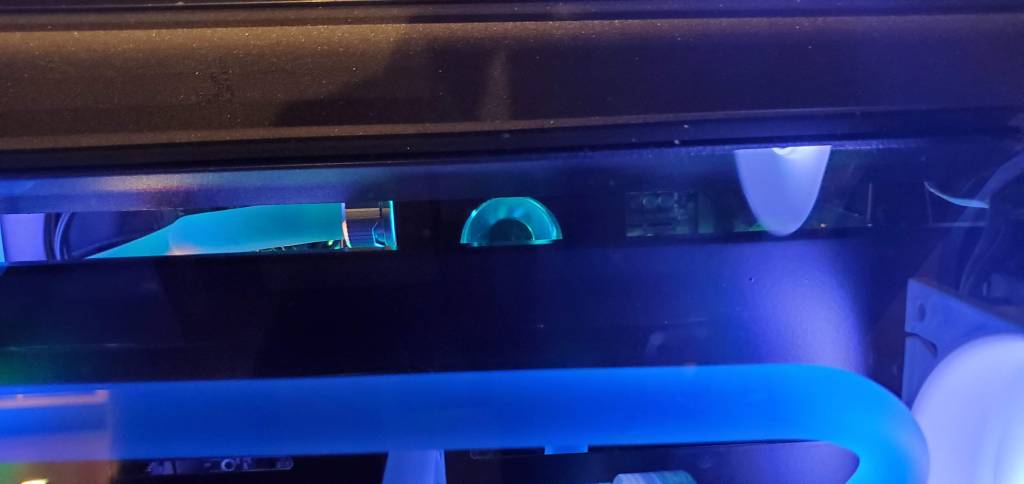
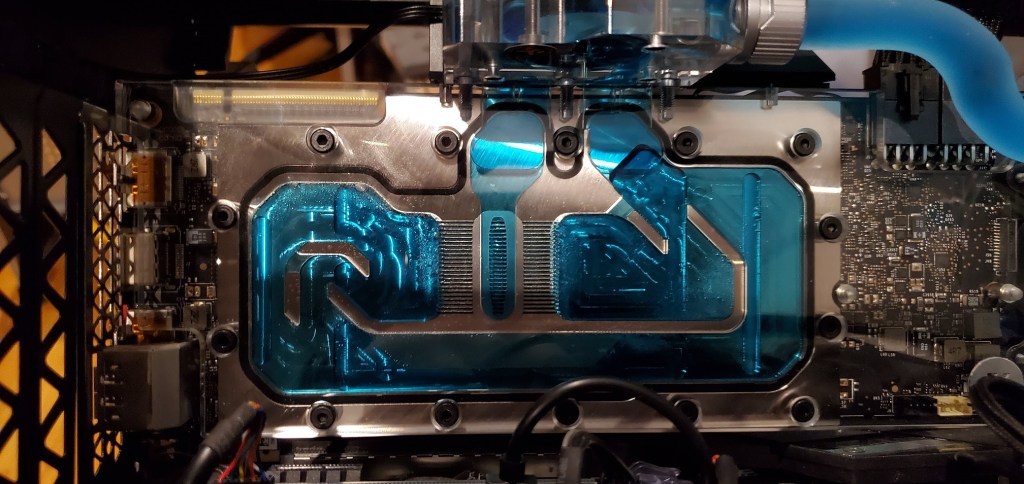
I was worried the flow indicator was going to be obscured, but there it is! 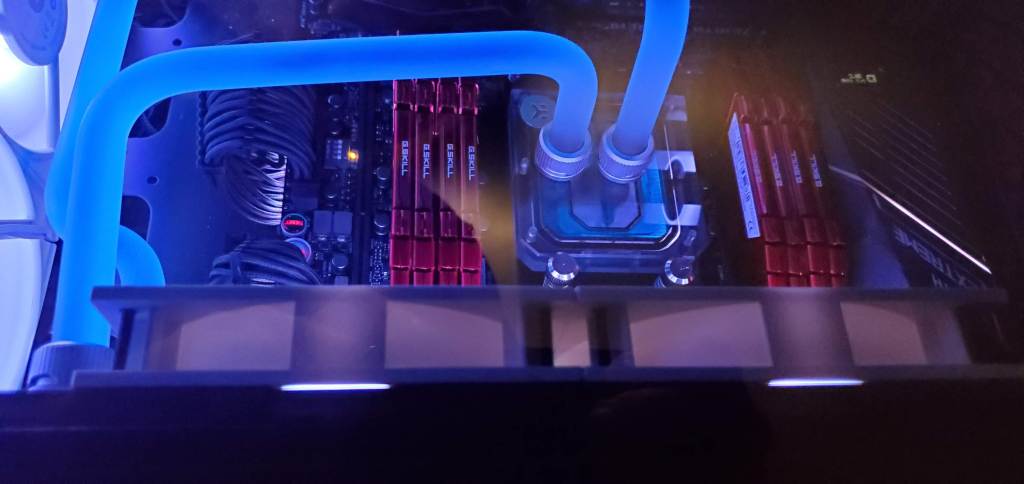
The CPU just chillin’ The “artistic” shot I seem to really like.
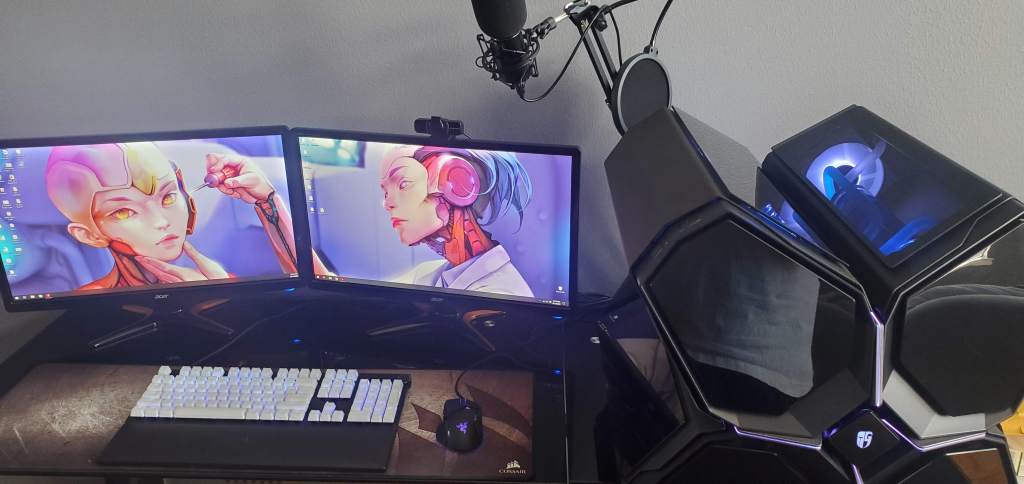
Since it’s all finished, I decided to adjust the colors to a blue that shifts to a white, it just gives everything a “cold” look which I think is… cool. Since we’re done, I can share a quick shot of the full setup. From the photo below you can see the glass panels I’m talking about.
So yeah, a lot of this just got done last night and I spent a huge amount of time finishing it, but now it’s all done! Currently it’s idling at about 33 degrees C, which is a little higher than I was expecting, but that could be for a lot of reasons. From my reading it could be because the air still needs to work its way out of the system, so the temps should drop in a few days. Alternatively it could be because the CPU waterblock wasn’t seated correctly. This would be the unfortunate option, but it’s a possibility I guess and one that I’ll need to keep an eye on. I would hate to have to reseat the waterblock, but if it needs to happen, it needs to happen.
Even with the temps slightly elevated, I stress tested it with cinebench to see just how hot it would get. It got up to the high 50’s and I think it peaked at 61 degrees, which after 10 minutes of being at 100% full load across cores is not bad I guess. After it finished it almost immediately dropped back to the low 30’s so that was nice. I’ll be keeping an eye on it since the max temp 68 C before it starts to throttle. The GPU on the other hand is doing great, I stress tested that as well and it kept its cool (literally) reaching low 40’s so I suspect the CPU needs a little bit of love, but it’s not hurting anything at the moment so I’m just going to keep an eye on it for now.
I learned a lot from this build and I plan on doing a condensed version of these posts for anyone just getting started, maybe tomorrow or sometime during the next week, not sure yet. In any case, I really hope that documenting all this has inspired at least a few of you to go off and do something similar. Yes, it’s a little scary, but if you take your time and spread it out, it’s not so bad.


But enough about us, what about you?