How to 3D print… yourself!
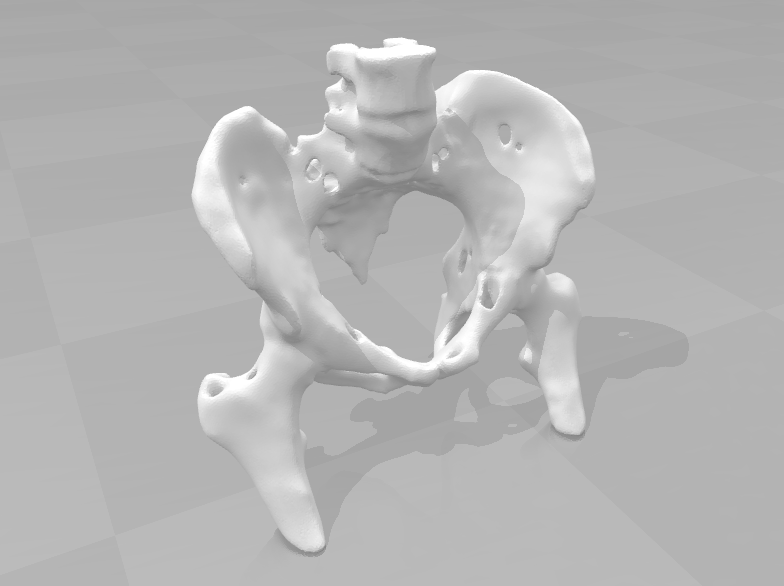
Ever have an MRI or a CT done and thought, “I really wish I could do something with that.” Well you’re in luck! Today we’re going to do a quick rundown on how to take a medical scan and convert it to a workable 3D model. Something you could 3D print for example! As with everything else I do around here, this is done with free software so the only limitation is your access to medical scans, but we can get into a work around.
Why should your doctor have all the fun? They’re your medical scans and you should be able to use them how you want! Well I’ve got good news, the first is that you are entitled to your medical records, if you want a copy of that MRI or CT you had done (or anything else for that matter) all you have to do is request it. The process is different depending on where you are/the hospital, but the result is the same. You’ll get a DVD with the files loaded on it along with a free software that lets you view them yourself.
That’s all fine, but we want to do something with this, not just stare at it (although who could really blame you for staring? It’s pretty freaking cool). So for this, we can use some software called 3DSlicer. * Slaps the side of the software * This bad boy can process so much data!
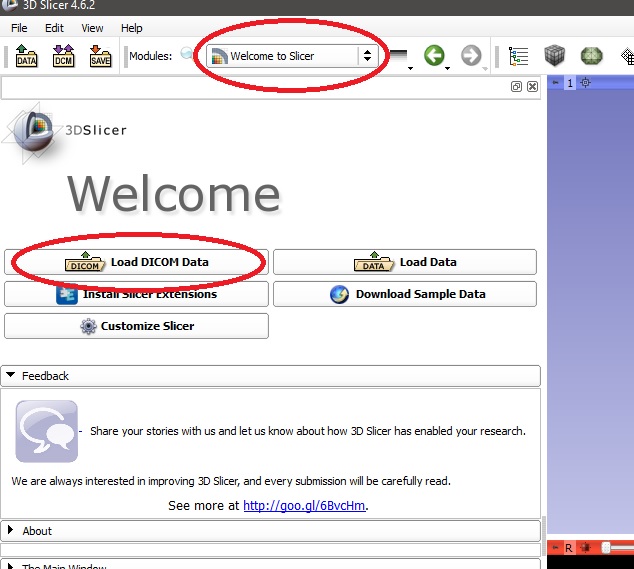
For this demo I’m going to use a human knee. Why not use my spine? Well I didn’t save step by step pictures, but I did create a tutorial to do this using a knee. It wasn’t my knee, but we’ll get to what I mean by that soon too! First we simply open the software.
Most medical scans are going to be in DICOM format which stands for Digital Imaging and Communications in Medicine. It’s a very standard file type that we use and 3D slicer can handle that and a lot of other stuff! The first step (now that you’ve opened the software) is to import our DICOM file. To do that we have a lovely button to click front and center that says load DICOM file (it really doesn’t get any easier than that).
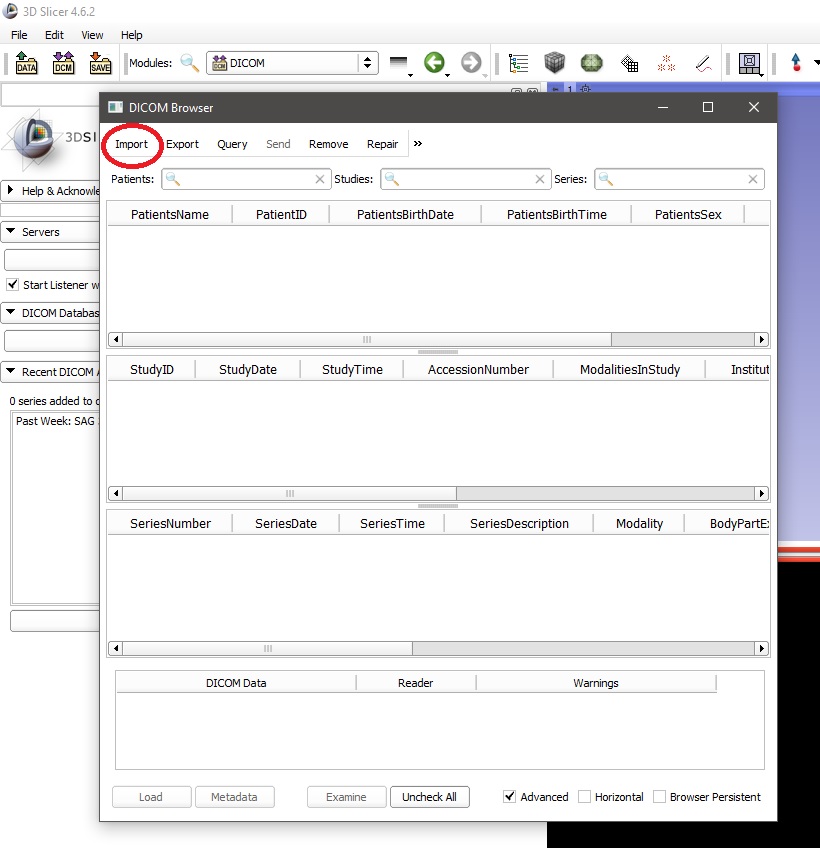
You’ll get a little popup that may seem overwhelming at first, but it’s okay just click the import button (circled in red).
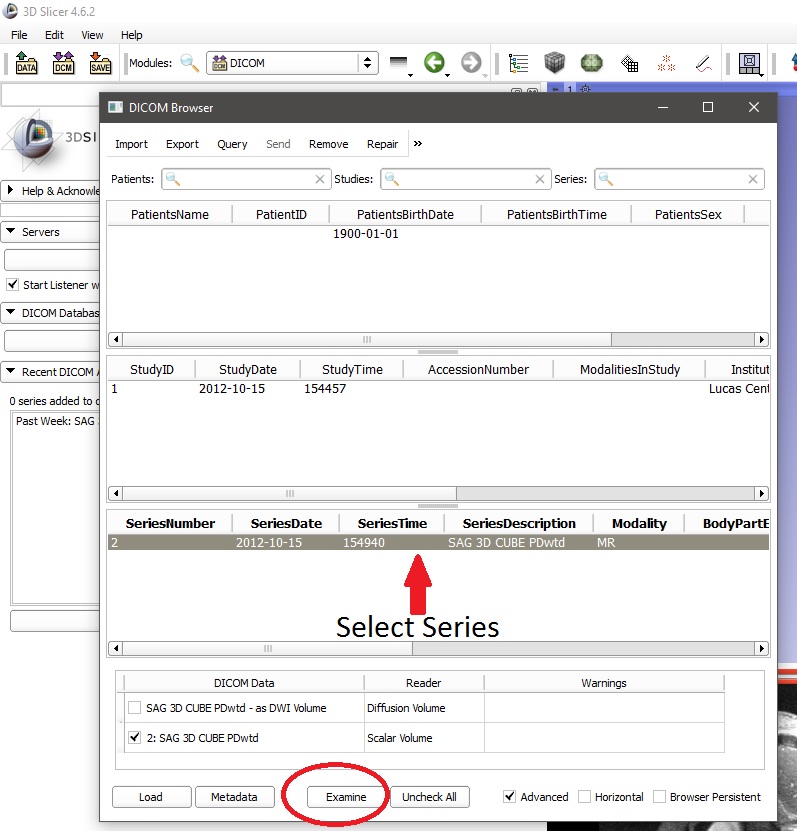
Here’s where things get tricky! You need to select your series. Now a series is literally the series of images taken. A MRI for example will normally have a structural scan, but it will also have several other scans of whatever the doctor was interested in. The catch is, we don’t know what is what until we import it, so just poke around and try to find the series you want to use.
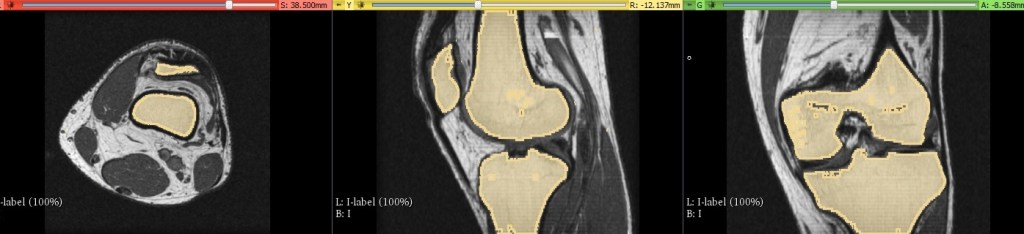
Lastly, just click the load button and your model should be loaded into the software… but you may not see a huge difference. That’s okay though! Once you have the model loaded we just need to change our view so we can see it. Depending on your view, it should look something like this (below), link the view options by clicking the two rings (first red circle) and show them in the editor window (large window) by clicking the eye (the second red circle.

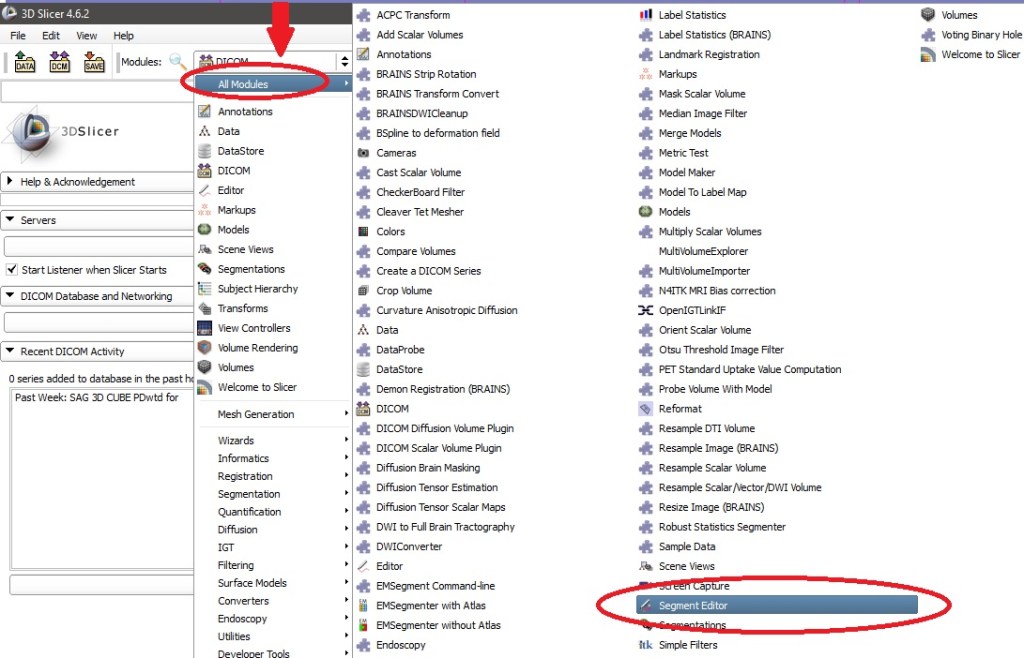
To create your model you will need to select the dropdown menu shown below, then all modules and select Segment Editor
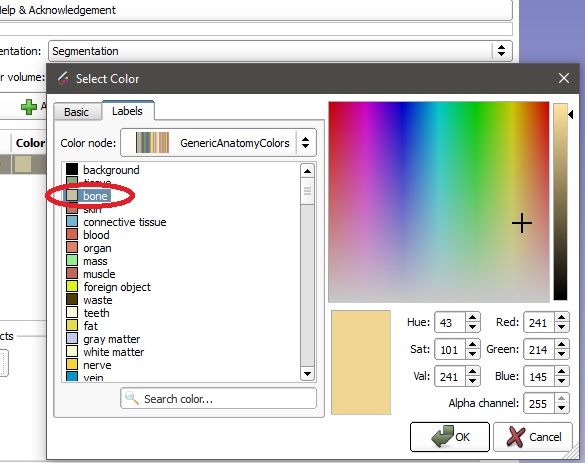
Since we are creating a bone model, we will select add segment then double click on the color box (red arrow) You don’t need to do this step really, but hey you may decide to add more stuff so it’s best to keep track of your materials now.

This will open the select color dialog and you can then select the color for bone It’s labeled bone, so it should be super easy to find.
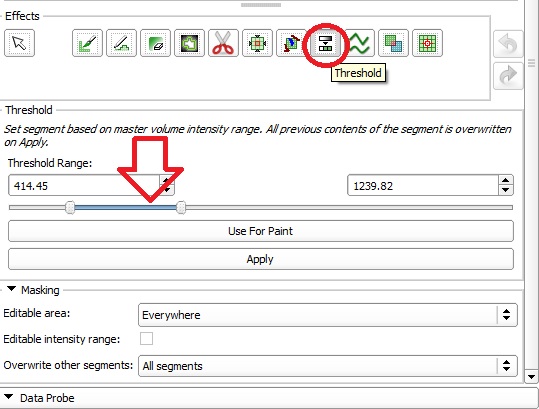
With your bone segment now selected we can create the actual model. Select the threshold tool and adjust the high and low values (arrow) until you see the area you are interested in modeling blinking the bone color.
Because there was not a lot of contrast between the bone and rest of the model, there are a few structures selected that we do not want. We will need to erase some of this by hand. You could theoretically do the reverse under select the bone and reselect it, but this way seemed better to me when I came up with it and I still use it to this day.

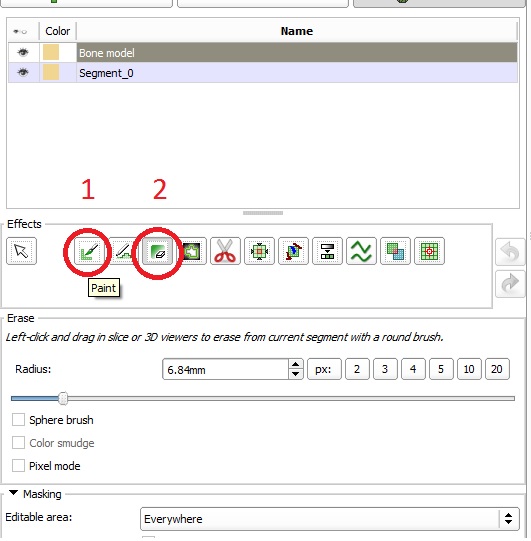
There are quite a few ways to process your model, the easiest way I have found is to use the paint tool (red circle labelled 1) then click on the eraser button (red circle labelled 2). This will allow you to use the paint brush as an eraser and you can adjust the diameter of the tool using the bar or by selecting one of the premade sizes from 2 px to 20 px.
This takes practice, but not a lot of time, after about an hour or two at most, you should be able have processed the model well enough for the computer to do the rest. I suggest you start with the top view (the far left) and erase the extra selections from each slice, then go through one of the other views and check to make sure you have erased what you wanted. You can also add selection the same way, but without clicking the erase function.
After you have erased everything that is not bone, you should end up with something that looks like what I have below.
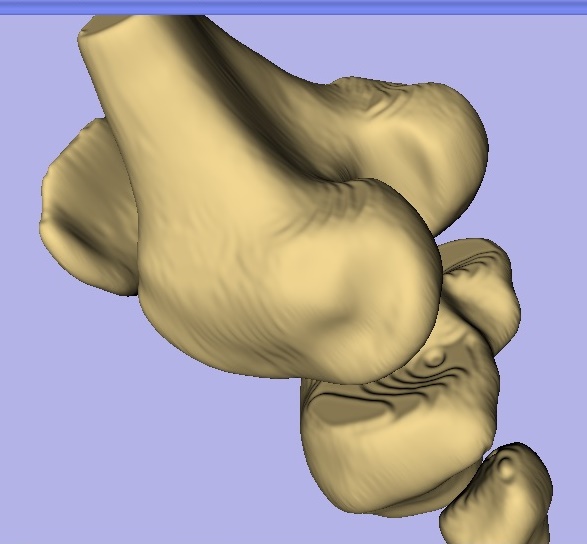
Let’s see what our model looks like in three dimensions, you can do this by selecting the create surface button in the segment editor. It will look very rough so you will want to select the smooth function . This should smooth the model making it look considerably better.

Once you run it, it should automatically clean up your model and you should have something like what we see below. Obviously some of the areas still needs to be processed, but we will do that with another program.
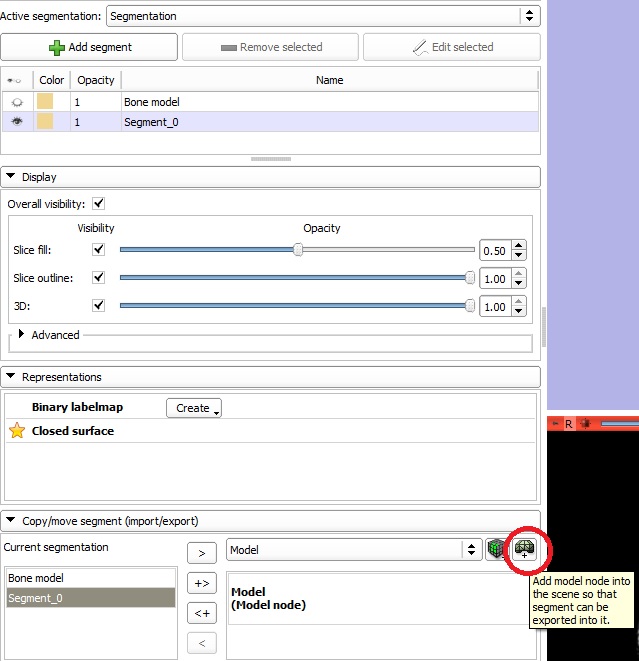
You have your model mostly done now, but we want to export it so we can clean it up a little more and do some cool stuff with it. To save your new model you need to create a model node. To do this use the drop down menu to select Segmentations (not the segment editor) You should see a menu that looks like the image below Click the Copy/Move segment (Import/Export) tab. Next select the segment you want to make a model of (you should have only one, but I made two models because I redid it for this tutorial). Lastly click the add model node button (red circle) and a new section will appear labeled Model (Model node) This can be renamed however you like, but we will stick with this naming convention.
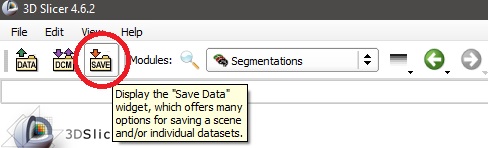
Once you have done this, you can now save your model. Click the save button at the top of the screen (red circle)
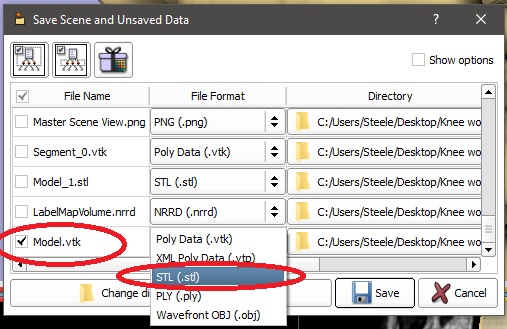
Make sure anything you want saved is checked, for our purposes we just want to save the Model file so we scroll to the bottom and check the Model.vtk file (red circle to the right) then in the file format drop down select STL (.stl) and click save.
We have our file! But wait… we still need to clean it up a little bit so it doesn’t look so rough around the condyles (see what I did there?). To do that I use a software called meshmixer, which is SURPRISE! also free. Once you install and open Meshmixer, select File and then Import. Select the Model.stl file (or whatever you named it) and open it. It should look like what I have below, which I changed the color to make it easier to see, you can do this by selecting shaders and selecting the profile you like best.

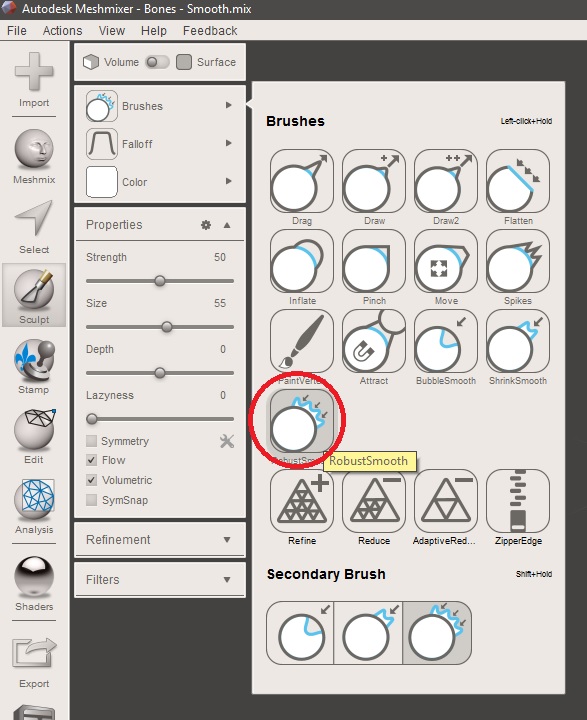
Now that we have it opened, we can finish processing the model. Click the Sculpt button on the left and select Robust Smooth (red circle). You can adjust the strength of the tool, size, depth, and several other parameters from the window shown here in the middle. I would suggest staying with the default until you are comfortable with the program.
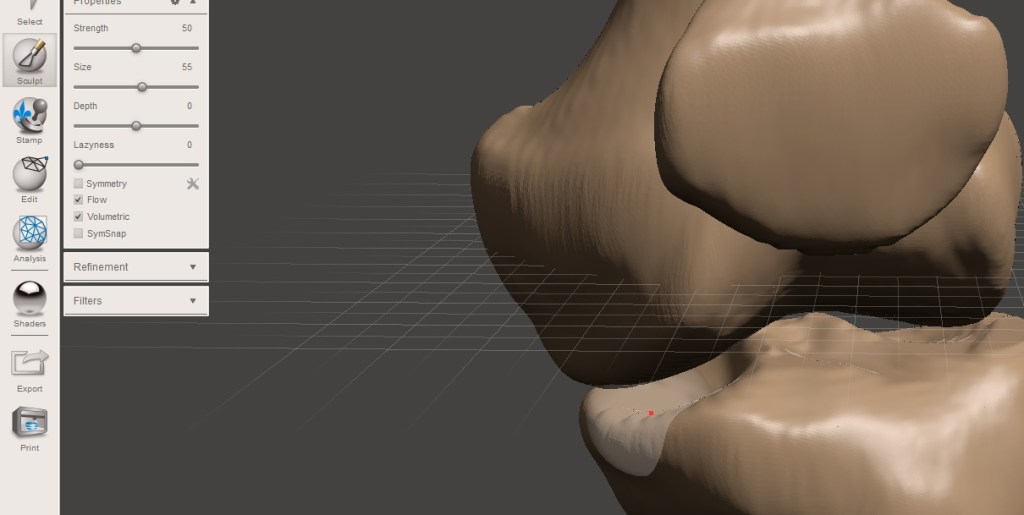
As you can see below the red dot is the center of the brush tool and the white semi-transparent sphere is the range of the tool. Start smoothing the areas you feel need to be smoothed (this will depend on your model). Take it slow and don’t over smooth or you’ll end up with something… less than accurate.
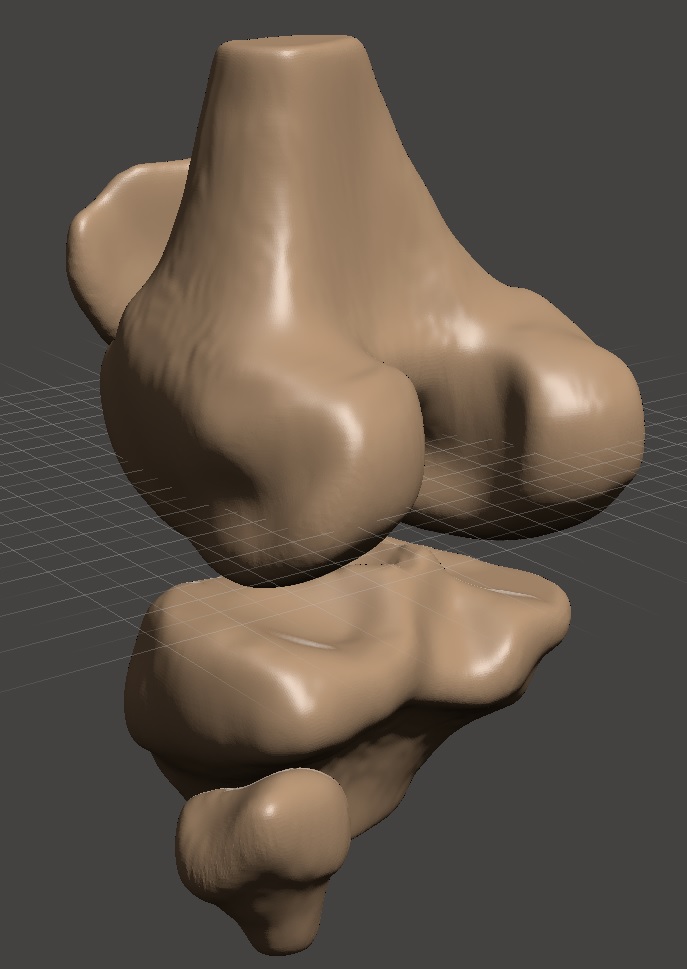
Once you have finished smoothing you should have something that looks similar to what is shown below. Now that you are finished you can save the file as a Meshmixer file (this way if you need to go back and rework the model, you will not have to start from scratch). Lastly under the file menu in the top left hand corner, you can select export which will allow you to export your model as an STL file.
Well that’s it! You don’t have to do bone either, you could do ligament, tendon, muscle, basically anything else you want to make a model out of. All using free software and a few hours of your time!
Okay, so you don’t have a medical scan of your own to play with, but you still want to try this. Well I’ve got great news! There are whole repositories of scans for you take your pick of! It’s actually how I did my master’s thesis, that’s not my knee! I used other scans to create the models I used to build my robot. You can find your own set of DICOM files at embodi3D for example. There are others, but this is one of my favorites.
So there it is! Go create something cool and …. well you! Good luck and feel free to share your result! I would love to see other models.


But enough about us, what about you?