3D Print… yourself!
You know what’s boring? Going to the doctors office and getting an MRI. You sit there forever! Of course a CT scan is faster, but there’s still a lot of waiting involved and in the end, you get to see a quick glance of the images captured if you’re lucky. Where’s the fun in that? Well I’m here to help you do something with that information. Useful? Maybe. Fun? Definitely!
CT, MRI, they are just fancy names for ways to take images of the stuff inside of you. The easiest way to remember the difference, and the way I talk about it when I do outreach is this, CT scans are fancy X-rays. They create a 3D map of bone essentially. MRI on the other hand looks at water in the body, so all the squishy bits.
Can you see bone in an MRI? Yep. Can you see some squishy bits in a CT? Sure. However, they do a better job of showing certain things, squishy bits or bone for example. I know you’re wondering, but yes squishy bits is an extremely technical medical term. Both create very thin slices of you! Not only that, but you get sliced in different directions, we can adjust slice thickness and everything. It’s pretty wild to think that we can quite accurately look at the stuff going on inside of you without ever having to open you up to see it.
In my case I recently (pre-pandemic recent anyway) had a few CT scans done of my back. I have problems, a lot of problems, so this isn’t the first scan I’ve had done, but it did give me an idea to do something useful with the result. So before the summer started I had an idea!
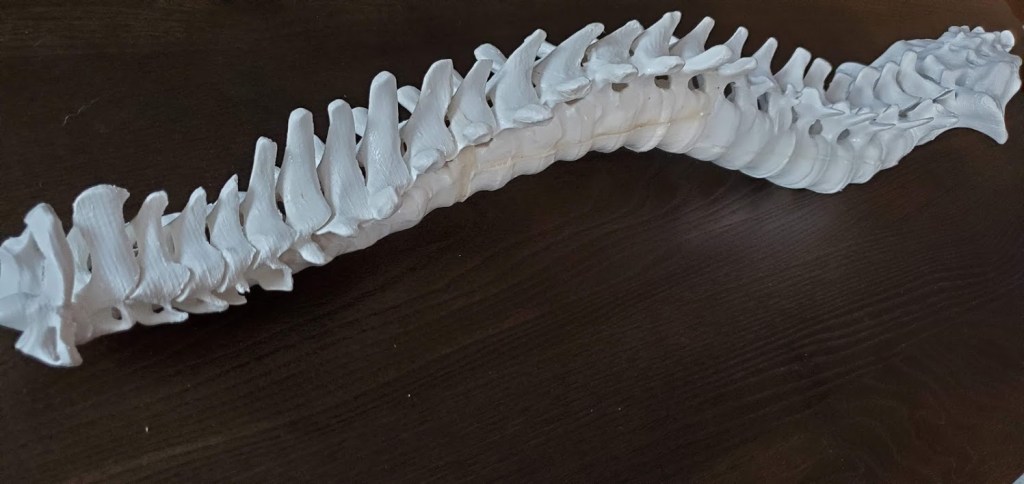
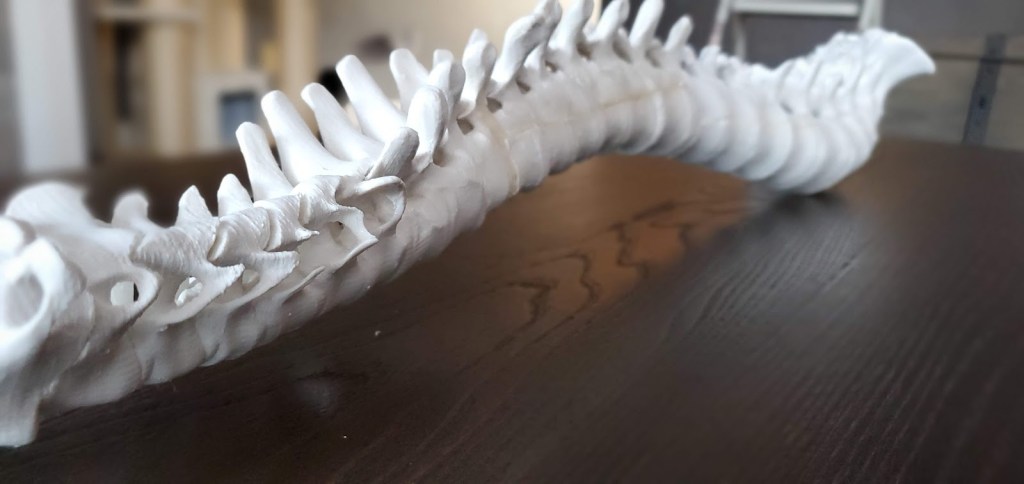
You see, I study the spinal cord. I really enjoy it. I did a whole spinal cord series if you want to learn more (which you can find here). I also work in a brain machine interface lab and some of my colleagues had 3D printed a copy of their brain. Well I didn’t want to be a follower, I wanted to do something different and so I set out to 3D print a 1 to 1 (or full sized!) copy of my spinal column (the bones that house the spinal cord).
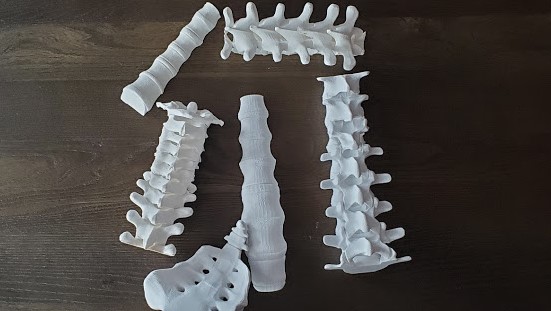
It was a huge undertaking and my poor 3D printer, well it had seen better days when I started. Things broke, parts had to be replaced, it was a battle. In the end though, I did it! There was some assembly required of course, my printer couldn’t handle something that large, but after a few weeks of printing (seriously) I ended up with something… not quite perfect, but definitely something unique that I can use for talks, impress my Co-PI, and just have a cool thing hanging around the house.

I printed it in ABS so I could use acetone to glue it all together and clean it up once I was finished with it. Once you apply acetone, the ABS sort of melts and becomes mushy. Another technical term for really gross feeling. Printing took a few weeks, but I could walk away from it and go do other things. Assembly on the other hand took almost 6 hours to get right, so it was very labor intensive. Overall I’m really happy with how it came out. Although, I may need to go back in and fix a few of the joining seams that were made in this process.
Don’t worry I’m going to break down step by step how to do this yourself. I used the same process I used for my master’s thesis project so I have some slides and everything ready to go. The best part is the software I used is free, so if you had a CT scan or an MRI you can request the files from your doctor and with a little work (and access to a 3D printer) you can 3D print yourself too. Now you won’t be limited to the spine, you could print your arm, your leg, the bones from that time you broke your toe, whatever you want! All you need is a copy of your scans.
Fun fact, I’ve printed basically a whole skeleton at this point, I’ve printed a leg and foot, a arm and hand, a skull, and now a spine. All of which were done full sized mind you! Not all of which were my own medical scans, but they were all printed with a purpose. My spine will help me in my outreach, when I defend my PhD proposal, and will be an interesting conversation piece. While it’s one solid piece, it’s still plastic so I need to treat it gently. We’ll see how long it lasts, but for now I’m just happy to have finished it and I’m excited to show you all how to do it yourself!


But enough about us, what about you?