Day two, the computer teardown
Well it’s day two of the big computer watercooling loop install and I’m already running into several problems. Some of them can be fixed quickly, while others… let’s just say I needed to get different parts so I’m in the process of doing that. As promised, there are tons of photos and explanations of everything I’ve done so far and why this is turning into a headache. Sometimes doing a custom job means getting extra custom.
My poor, poor computer! She’s sitting feet away in pieces and there’s not a lot left I can do without the replacement parts that I needed. Before we get into that though, let’s take it from the top. First things first, the computer was fully built, was. Because the AIO watercooler (all in one) stopped working I needed to rip it out and put a new one in. Since I was annoyed that yet another watercooler has broken in less than a year of use, I’m doing the thing I should’ve done the first time and put in a custom watercooling loop. This will cost more upfront, but will save me money, and to a certain extent time, in the coming years I plan on using this computer.
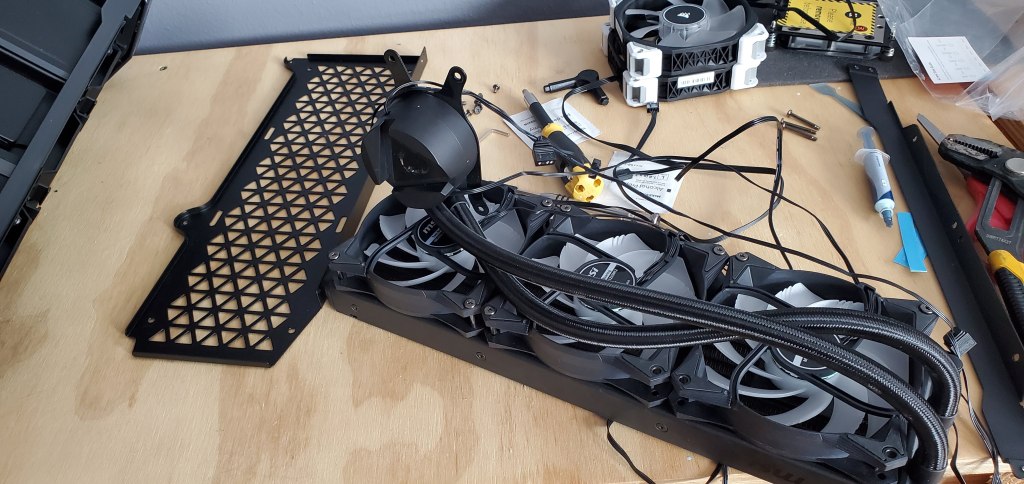
First things first, let’s look at the parts I selected for this build.
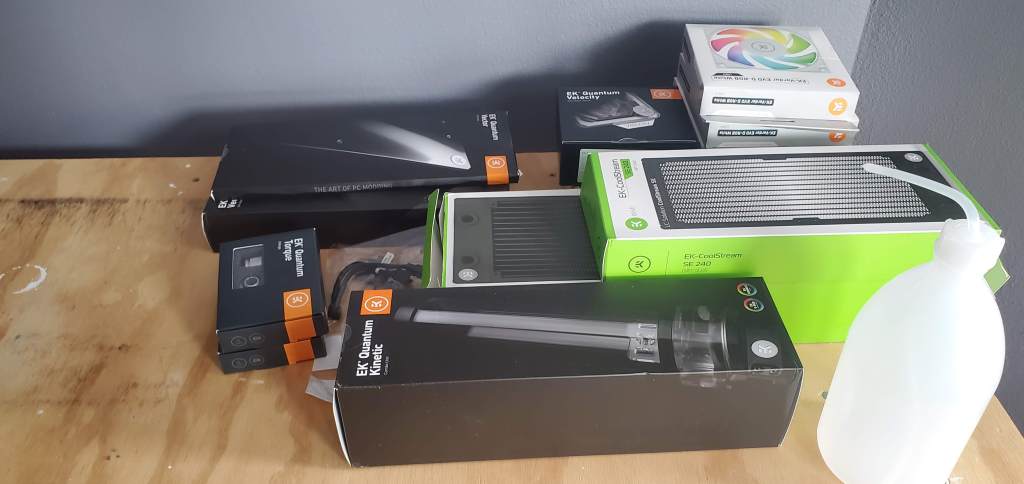
In no particular order in this photo we have two radiators (green boxes) the pump (front and center), fittings (left side small boxes), the GPU waterblock and backing plate (left rear), the CPU waterblock (middle rear) and all the fans for the radiators (right rear). The bottom up front, that’s for adding the liquid to the pump, it’s not needed, but it will make my life easier when it comes time to fill the loop. But wait there’s more!
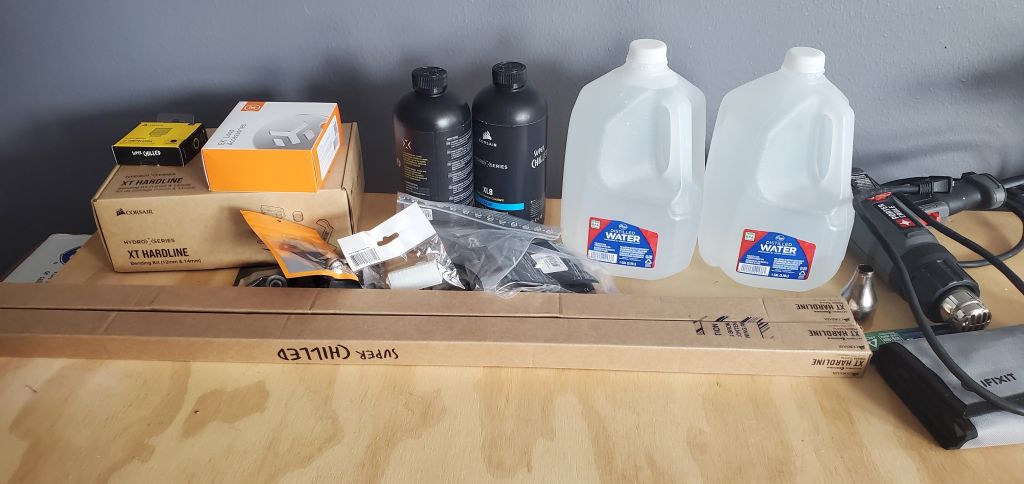
In addition to the main loop pieces, we have more fittings (middle plastic bags) some distilled water (jugs on the right), a heat gun (far right), my tool kit somehow made it into the shot (ifixit right front), the hard tubing (front square super chilled boxes), the hardline kit for cutting and bending (left rear XT Hardline box) some more fittings (on top of the box), and the fluid to add to the loop (black bottles in the middle). The fluid can come colored, I picked a blue because I thought it would look good with the rest of the loop. Clear is probably the easiest to work with and won’t clog the loop, but since I plan on maintaining this regularly I don’t mind doing the extra work for a little flair. I also picked the blue because it will look really nice in the lines. They aren’t clear.
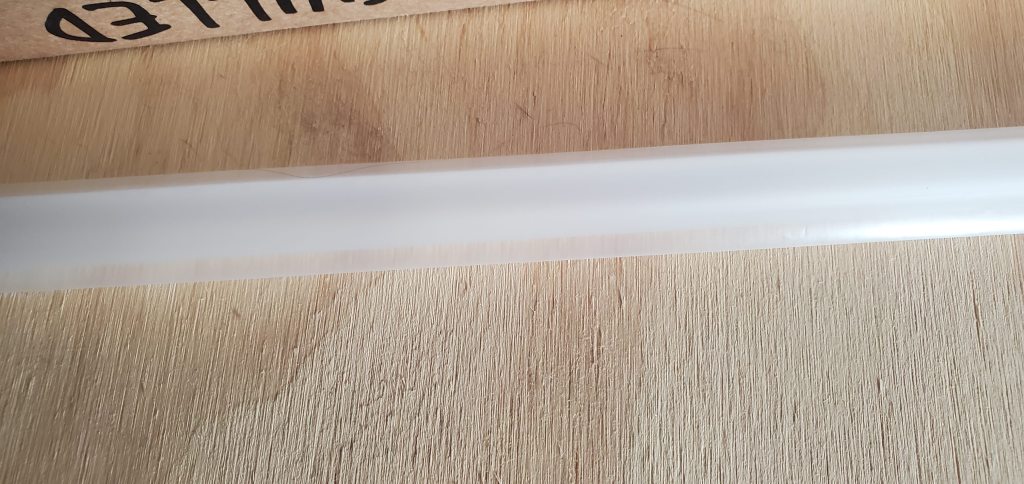
Above is one of the hardlines in the box. It’s still in the plastic so it’s kind of hard to see, but it’s frosted so it will make the blue really pop I think. Basically at this point the tubing and fluid color are purely for looks. I selected a 14mm tubing because I thought it would fill the case our nicely, which brings me to my case!
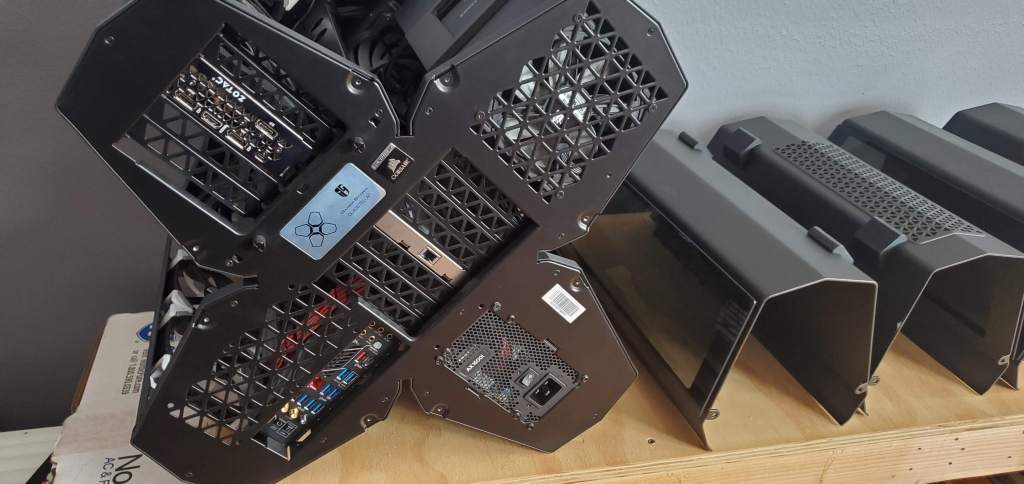
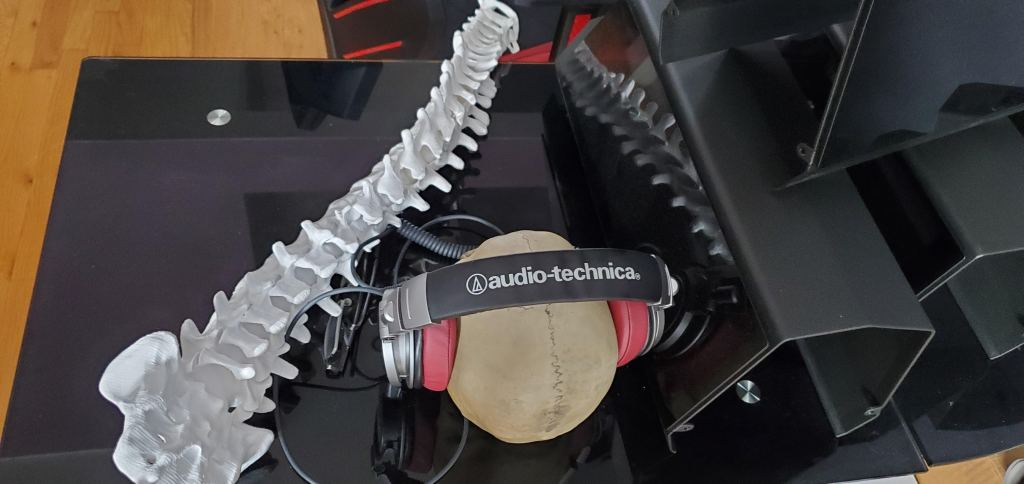
Here’s the back with the four covers removed, they come off super easy and while the case itself weighs more than a small child, it’s super sturdy and mostly easy to work with… mostly. For reference here’s my full sized spine (as in my spine, I made from CT scans here) next to the covers. Basically the case is huge. Also, this taught me a valuable lesson, don’t 3D print something that big because you’ll have nowhere to store it, hence why it’s just chilling on my desk.
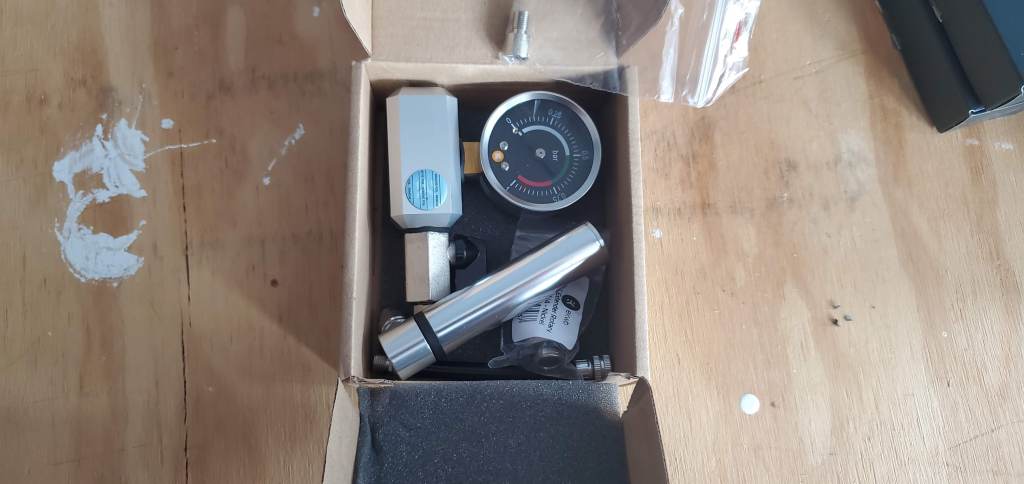
I also have a pressure tester, this will let me check the loop for leaks before I fill it and hopefully will keep me from making a huge mess if I screw something up. Remember this is the first time I’ve ever done a custom loop before so all this is new to me. The tester cost like ~$20 USD and it could potentially save my computer. Water and technology don’t mix!
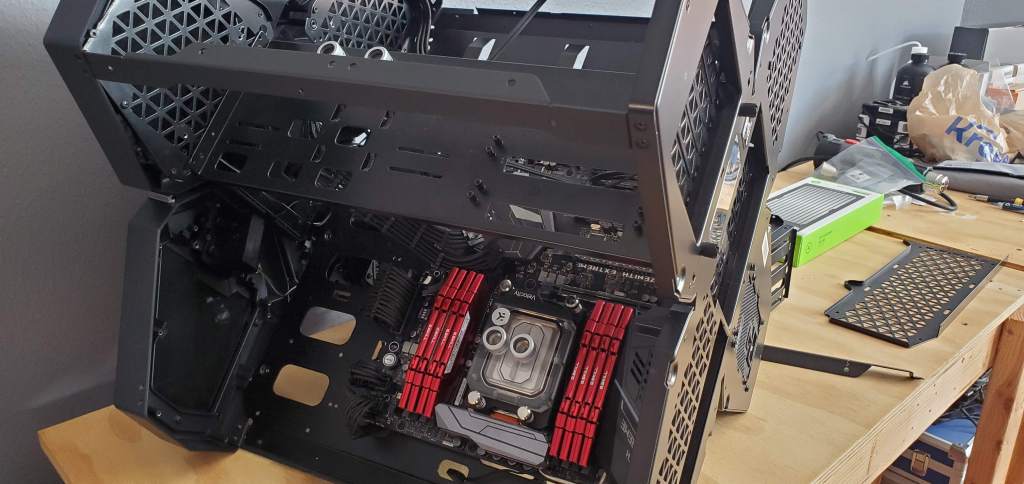
Now let’s take a peek inside my case so we can see what I’m working with.
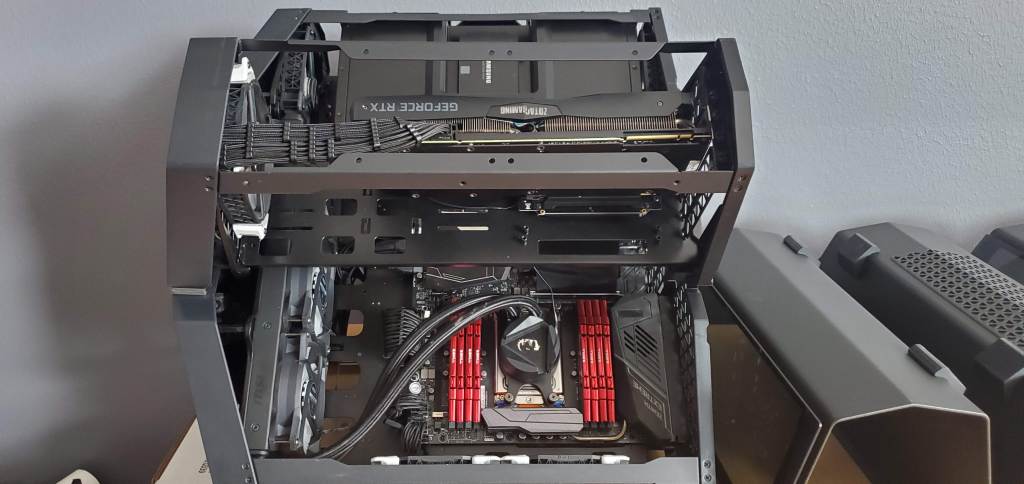
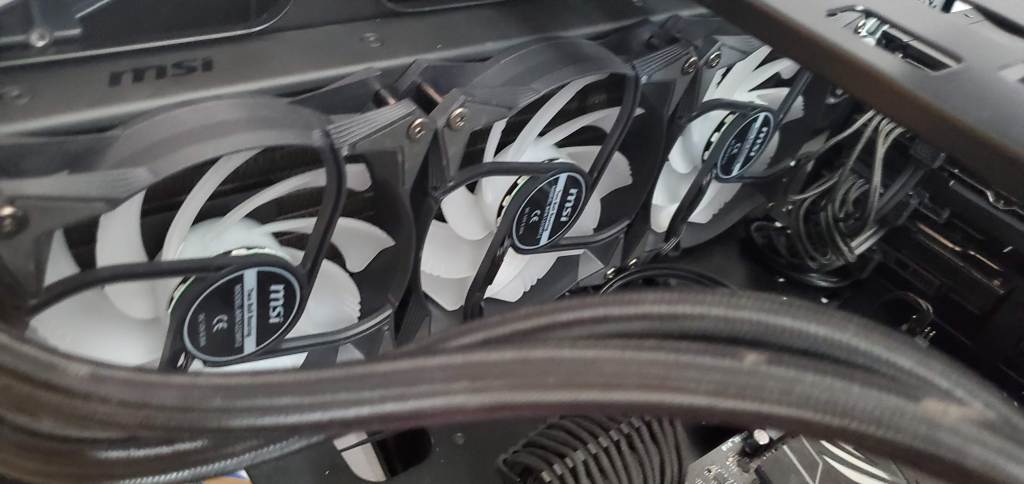
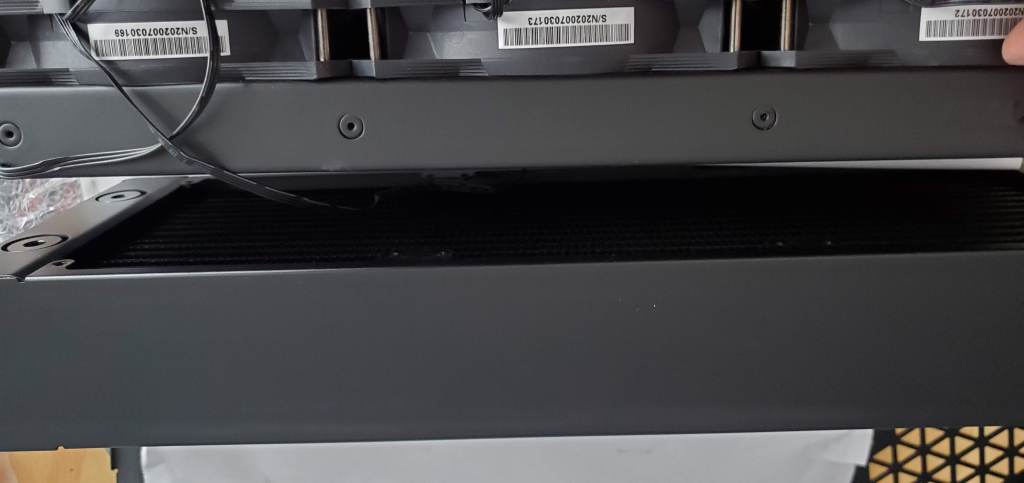
At the bottom of the case you can see my CPU with the old watercooler still attached. This was right after I cracked the case open for the first time in about a year. The graphics card sits in the compartment above the motherboard (top of the photo, GEFORCE RTX) and it’s not staying that way, but we’ll get into why shortly. Here’s a closeup of the radiator that is in the system now, this is creative foreshadowing, hint, hint.
Now that I had it all exposed I could rip out the old stuff and make room for the new stuff! But first I needed to make note of where my cables plugged in. I could consult the motherboard manual, which I always save, but this seems easier since I’m reusing the same connections.
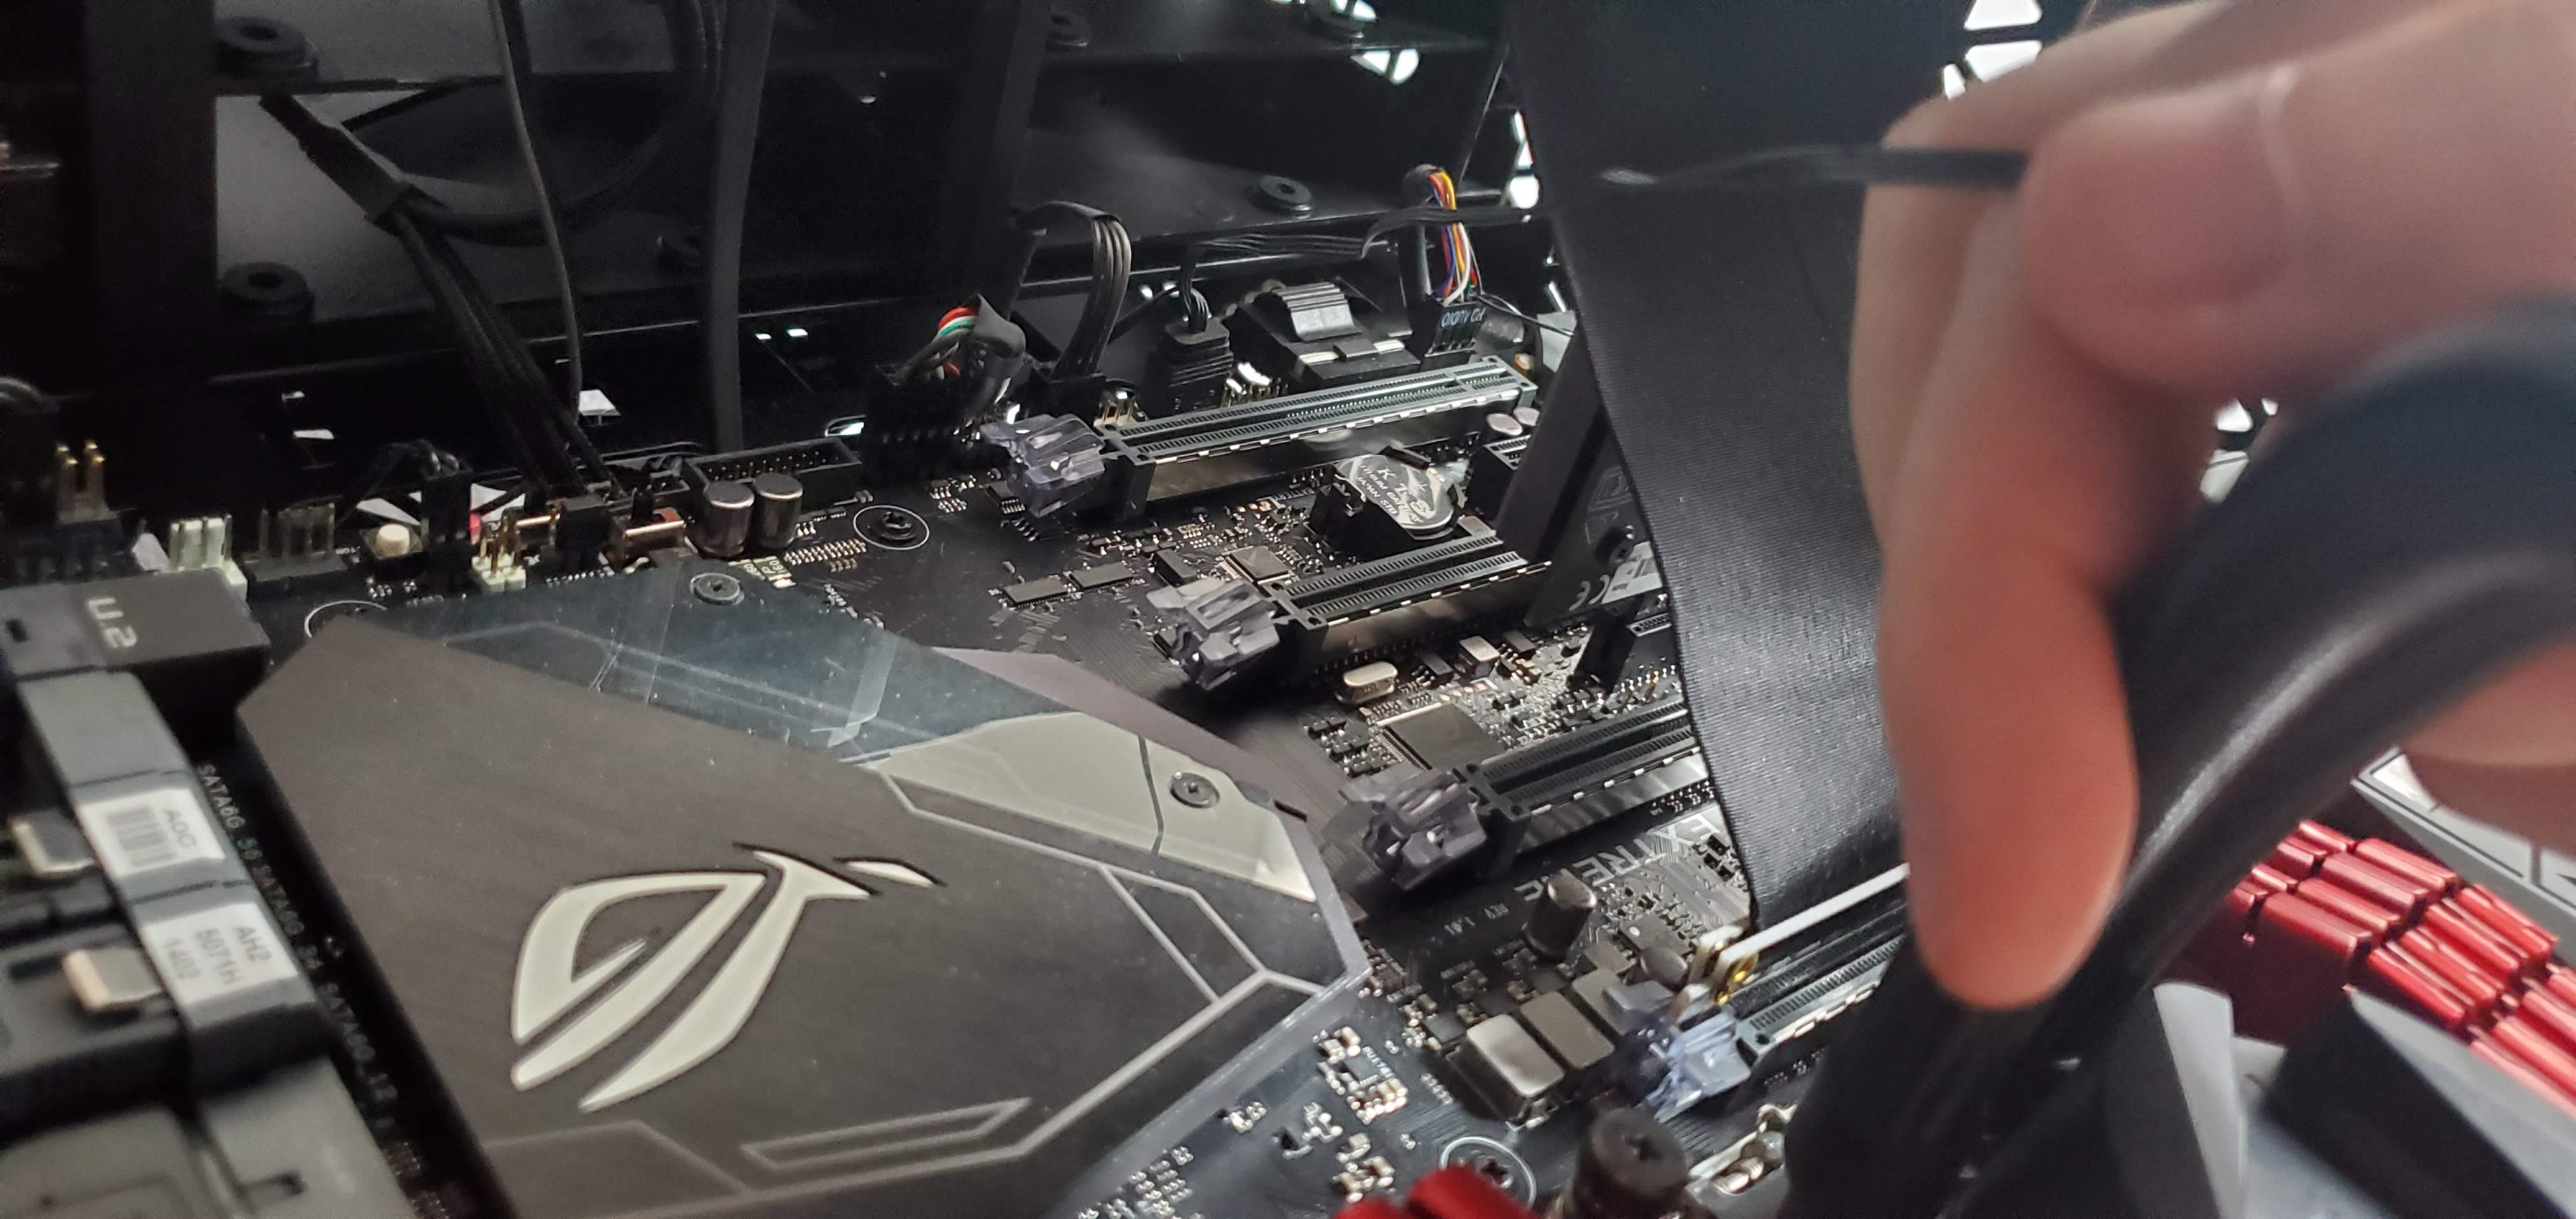
Once I had all my wires figured out, I could remove the system. 99% of what’s holding the stuff in is hand screws. I think I had to remove four screws to take out a bar that was in the way and two holding the radiator in place. The rest were handscrews so not a lot of effort once I had everything figured out.

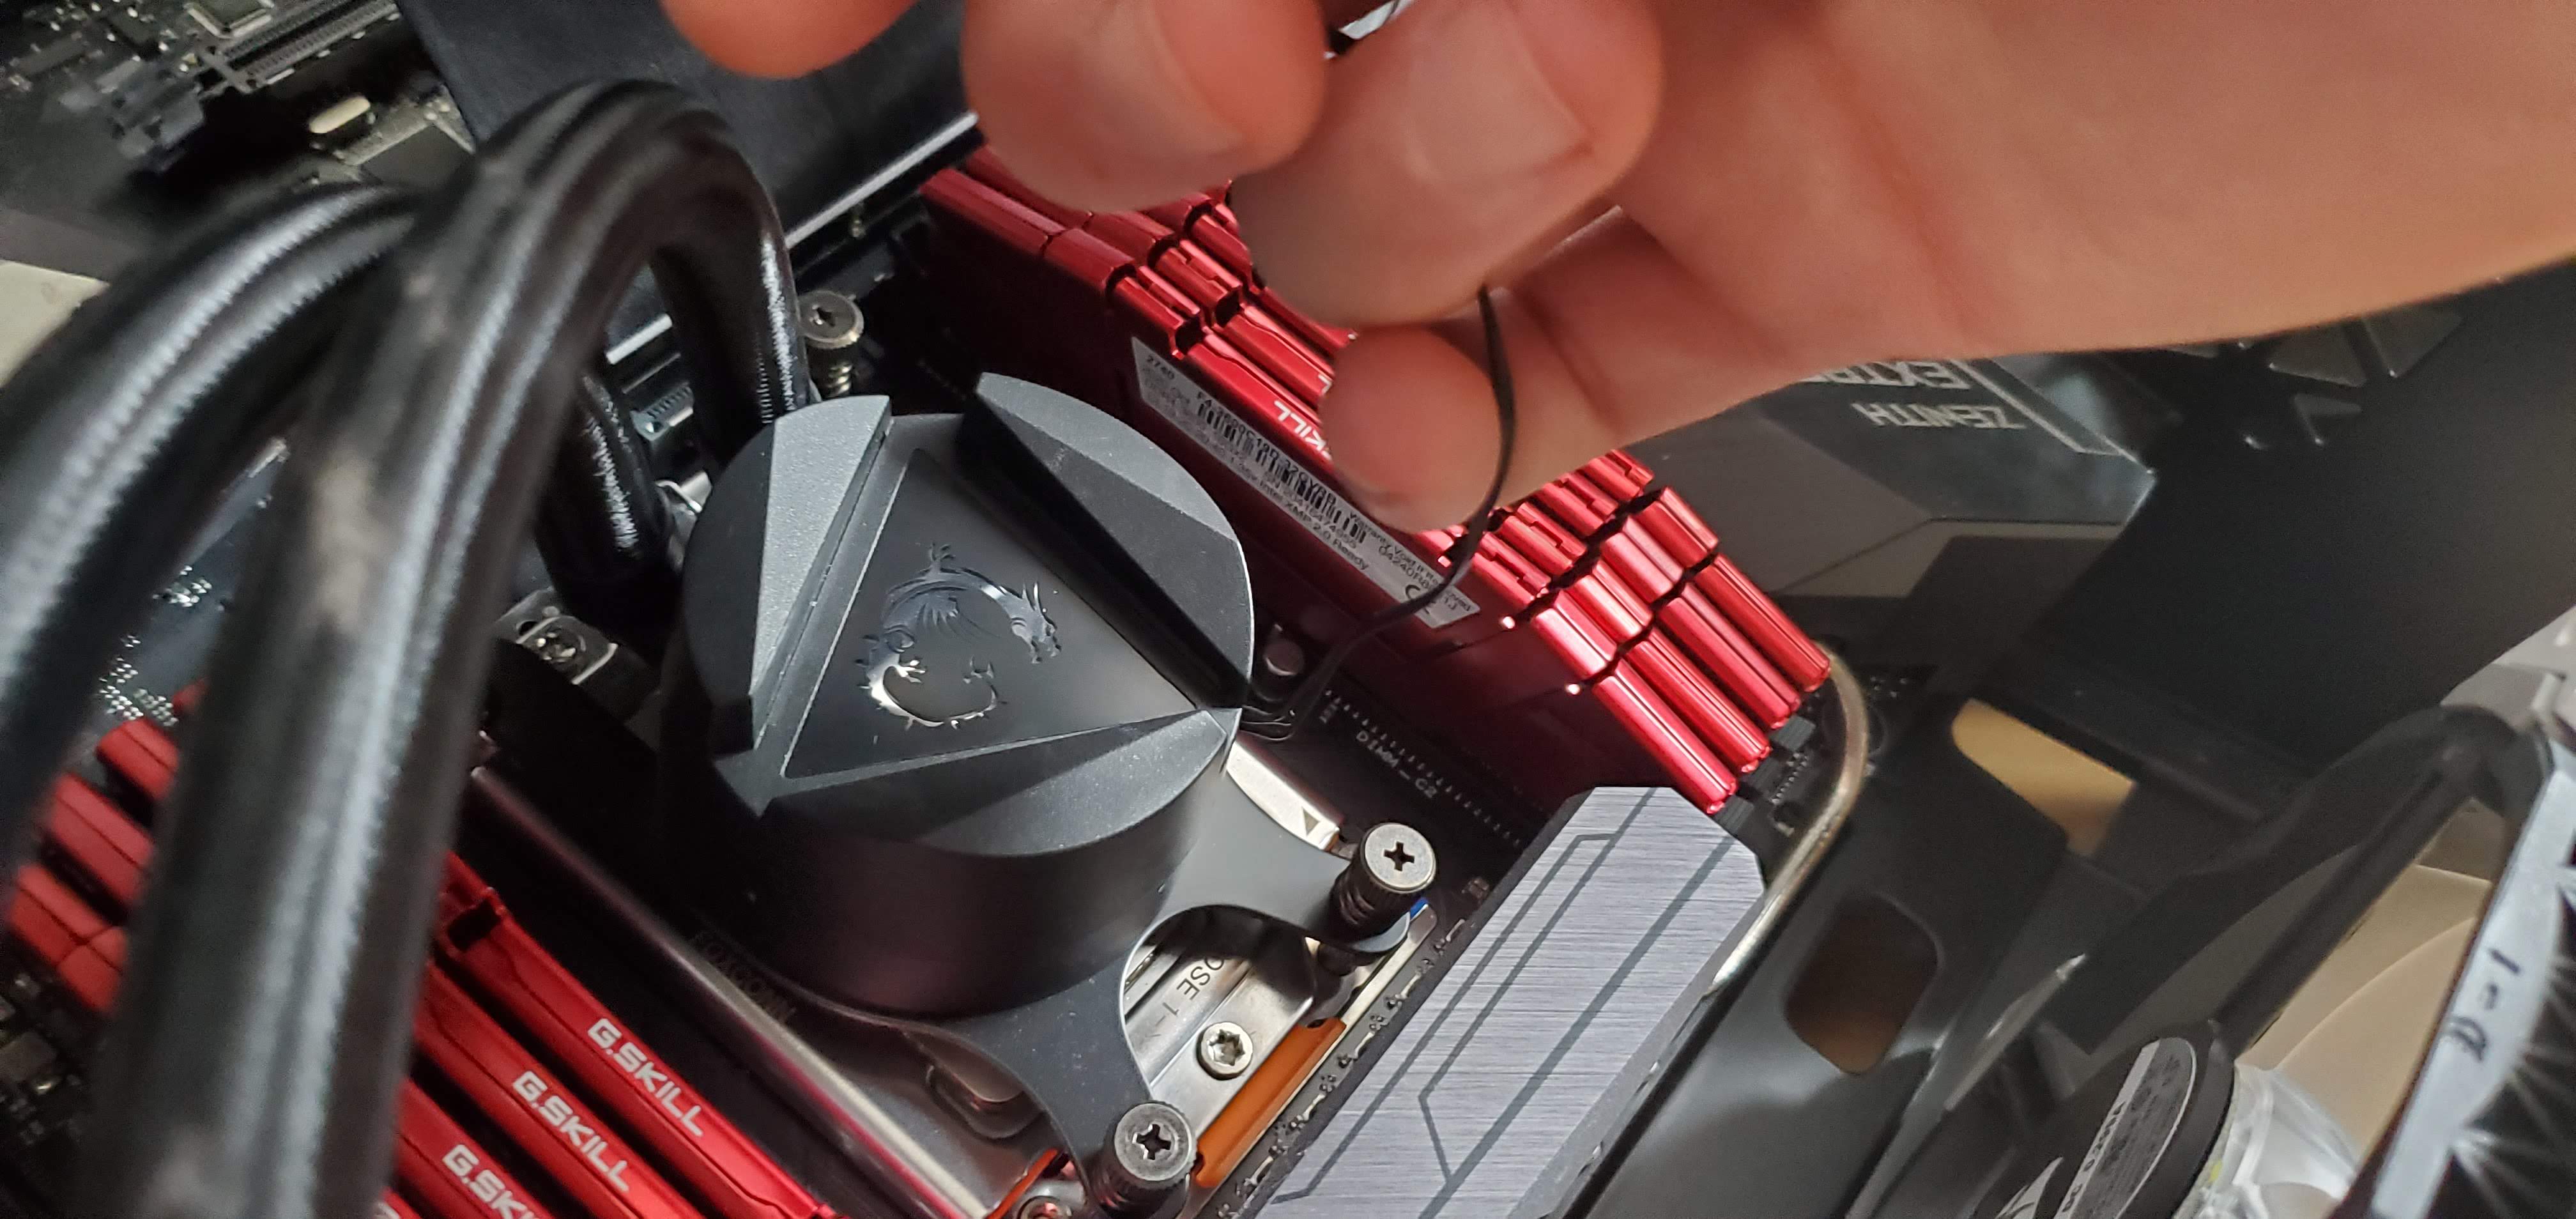
Tracing the fan wires back to the motherboard 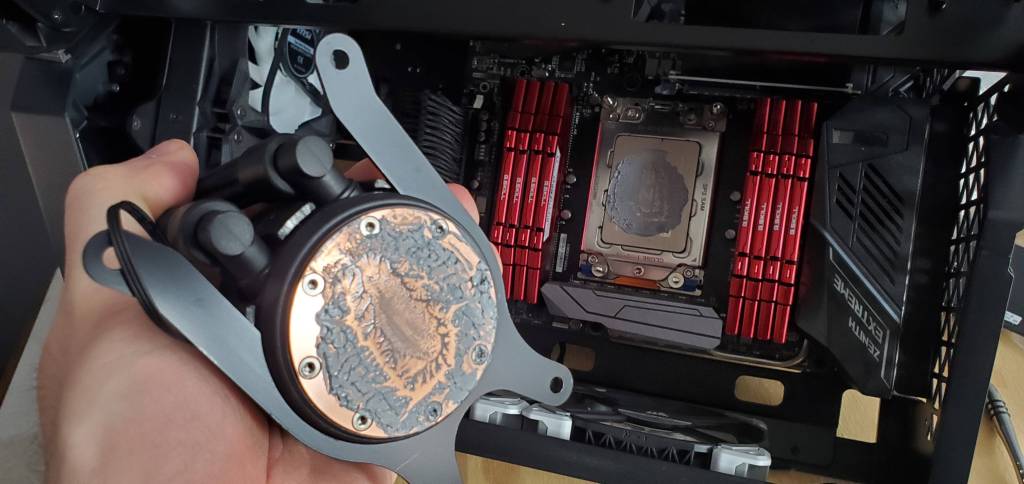
Removing the old heatsink 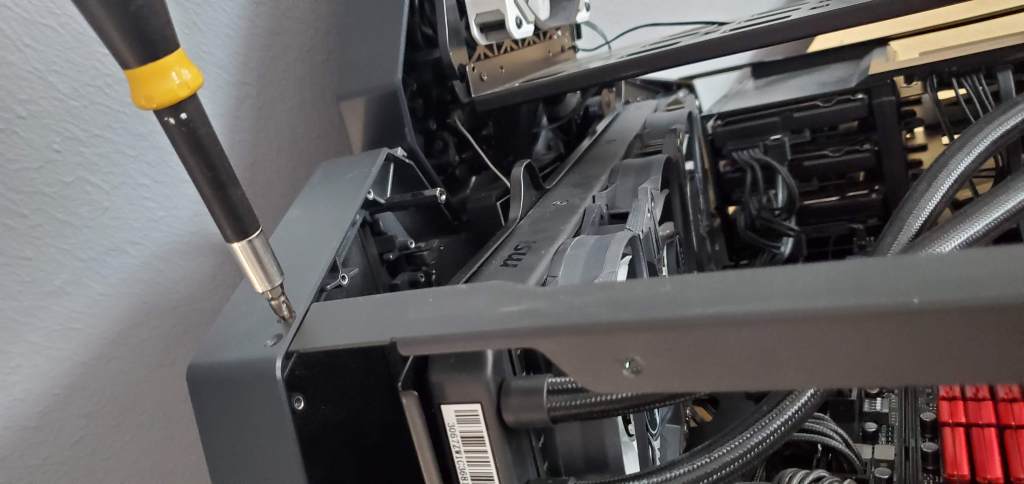
The bar that was in my way needed to come out, just four screws so no big deal 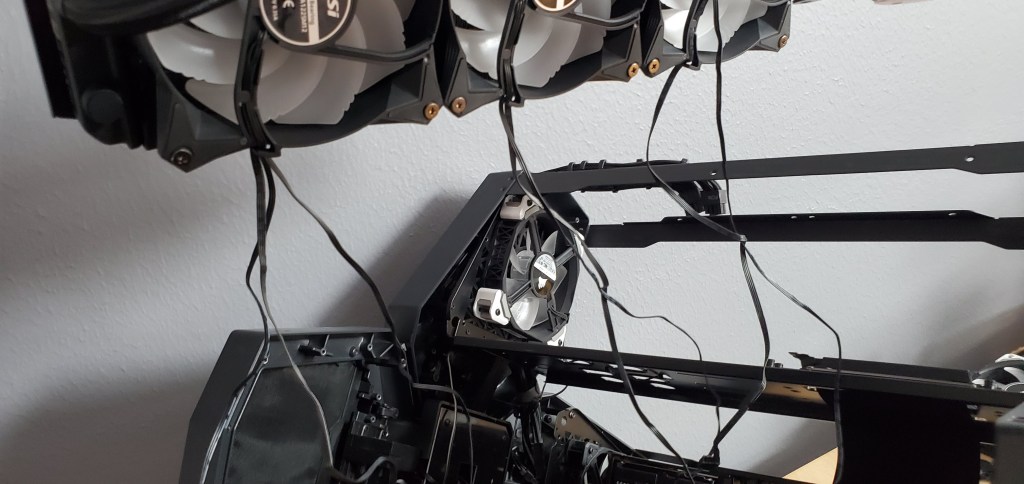
Out comes the radiator with it’s mess of wires.
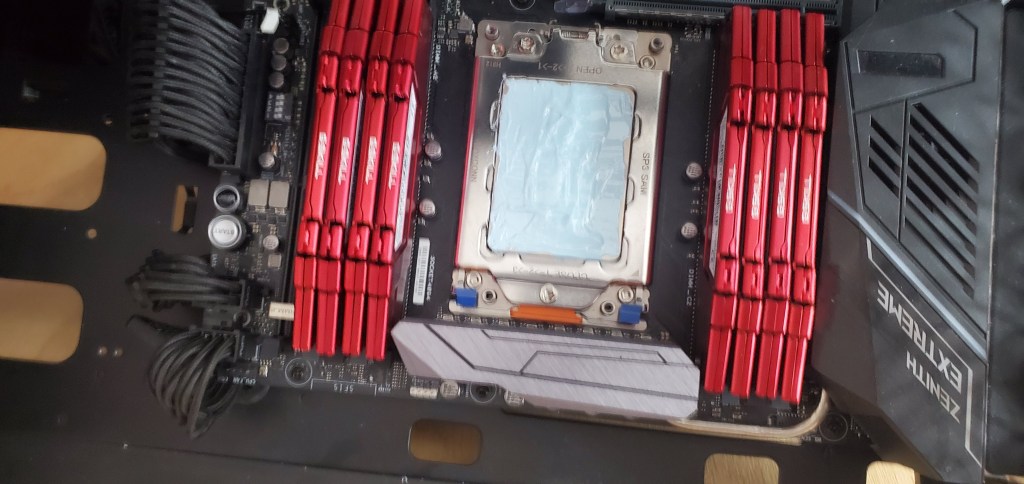
Now would be a good time to talk about the heatsink or waterblock. Basically it is the thing that takes the heat away from the CPU. Now that the old one came out you can see the thermal paste circle around the CPU and you’ll notice the CPU was not completely covered, it was only mostly covered, if that.
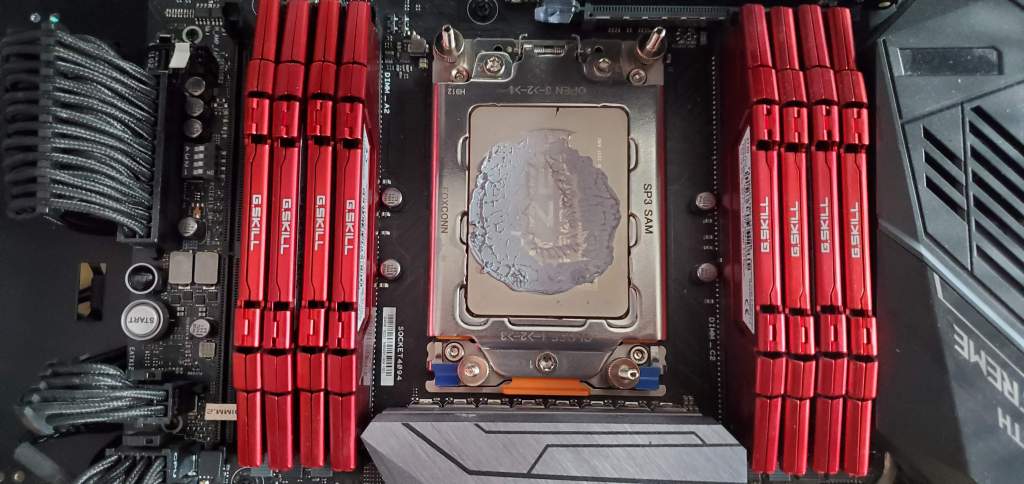
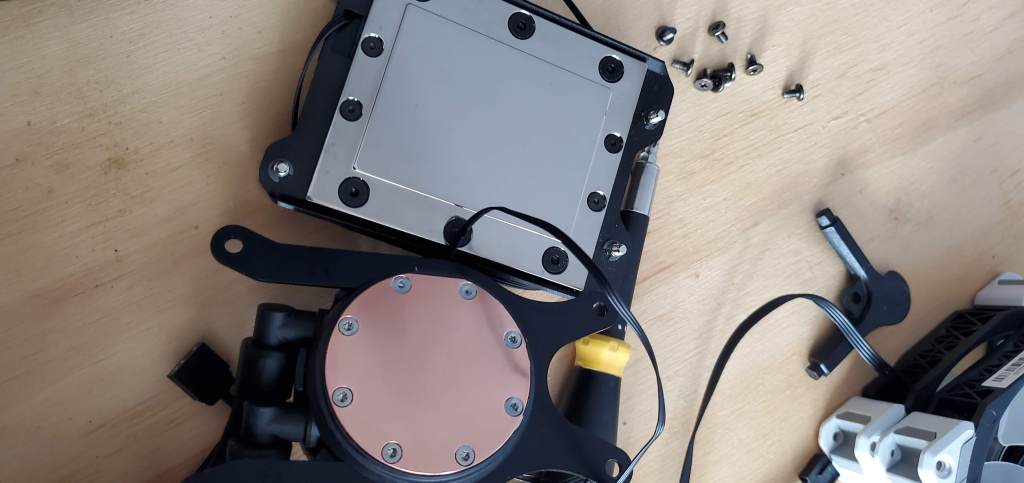
As a quick aside, thermal paste closes the gap between the waterblock and the CPU. Air is a poor thermal conductor, so thermal paste is added to improve conductivity. You can see that the old waterblock was not covering the CPU, but thanks to heat transfer the whole CPU managed to stay cool even if the edges were hotter than the center. This probably increases wear on the CPU, but it was the best option at the time since I didn’t want to build a custom loop at that point. For a comparison here’s the old waterblock, which I cleaned up so you could see it easier (it was also covered in some of the thermal paste) and the new full coverage water block. The difference is huge.
With the old one out, now we could put the new one in… but since that is super easy to do I wanted to get the hard stuff done first. That means putting the waterblock on the GPU (graphics card). To do that I had to pull out the graphics card, poof!
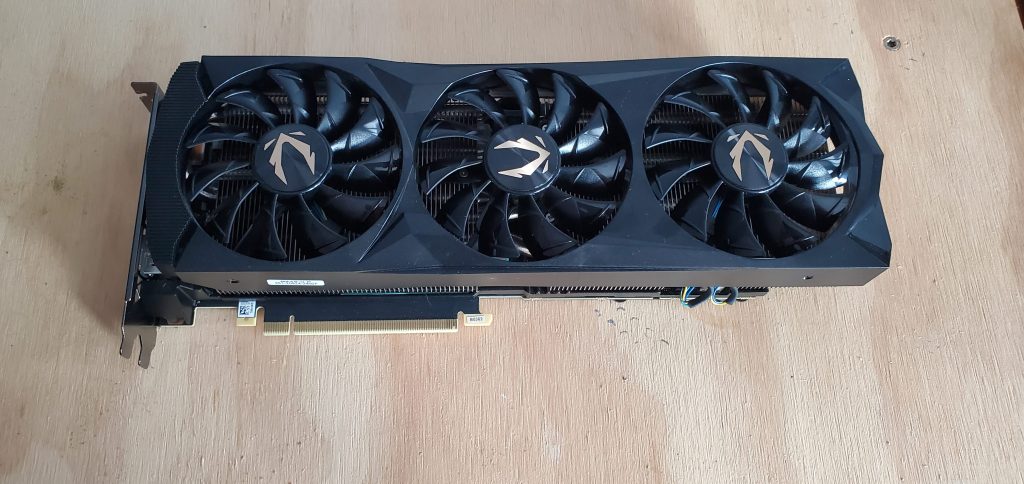
Front of the card 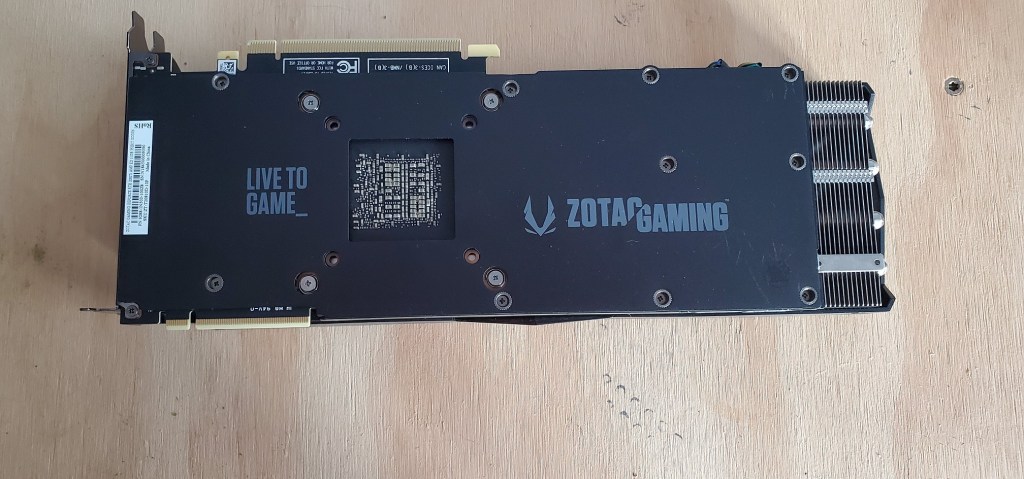
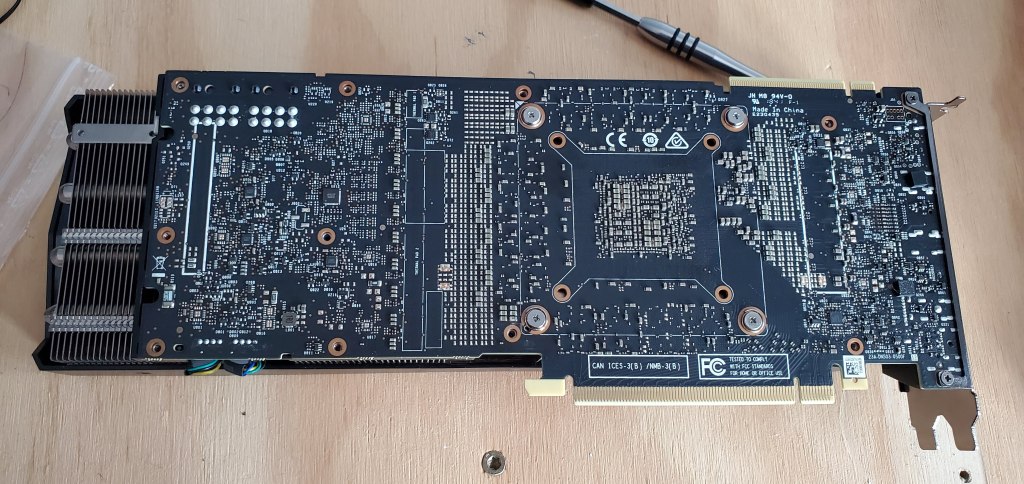
Back of the card
There were two screws holding it in place and a few power cables that needed to be unplugged (you can see them above) so really easy to get out. The hard part is tearing the graphics card apart, which was also the scary part.
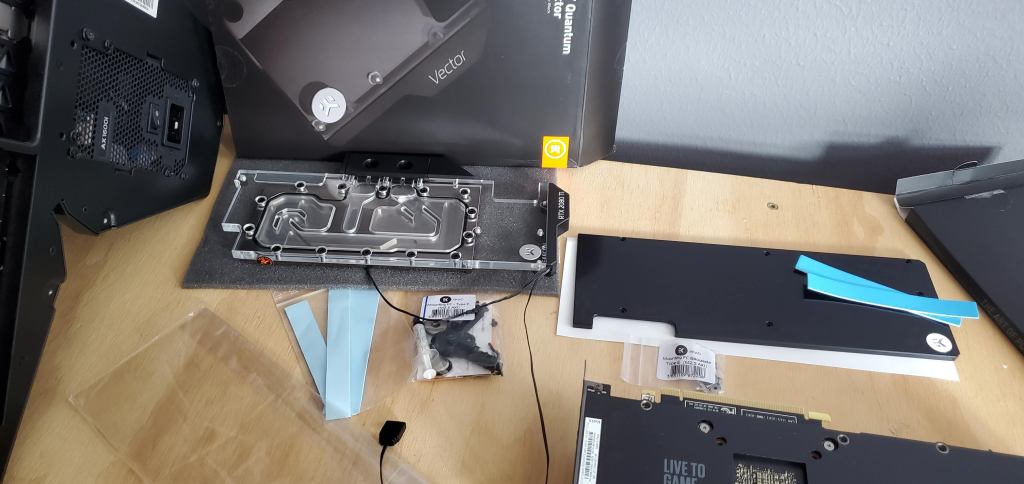
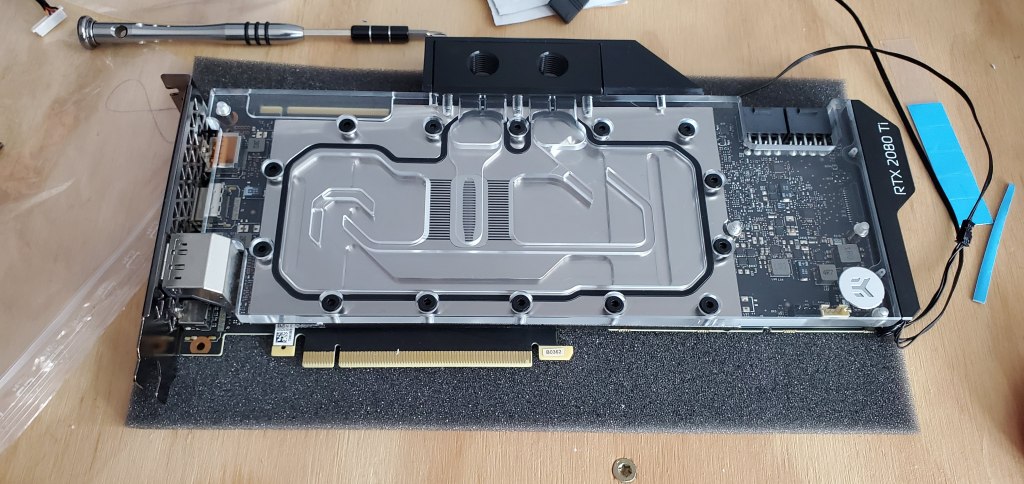
New front of the card, this has the waterblock attached to it, the clear stuff is so you can see the water flowing through it. You can’t tell the water is moving, but it is still cool to see. 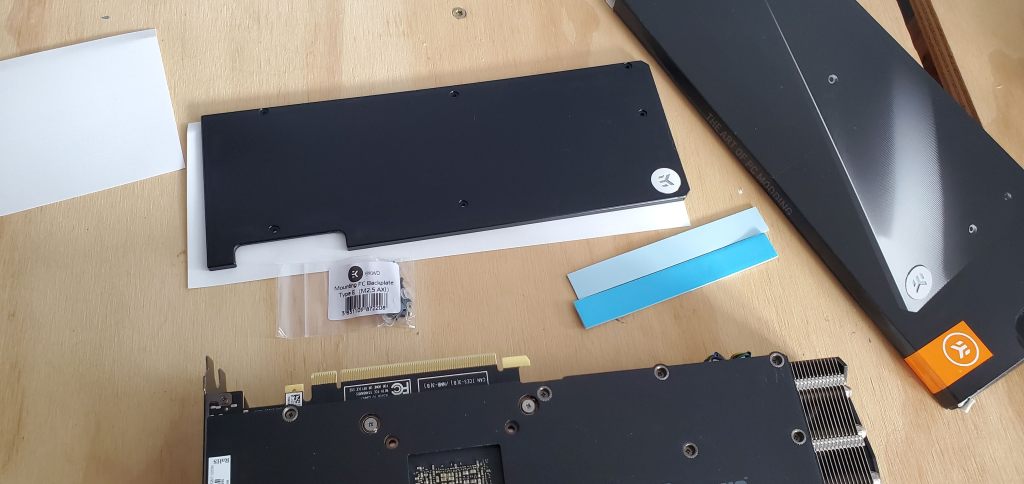
The new backing for the graphics card. Since I can’t really reuse the old one, I needed a backing to keep the card nice and safe.
With the card out and the new parts ready to install I had to remove the old cards back plate, fans, and heat pipe system. This was aircooled so the heat pipes and radiator make the graphics card look much thicker than it actually is. Since I was freaking out the entire time I didn’t snap any photos of the disassembly process, but I did get a photo of the backing off and right after I removed the radiator/heat pipe/fans. Basically right after I stopped freaking out that I was going to ruin my graphics card doing this. Don’t laugh, it was my first time.
Backing plate removed 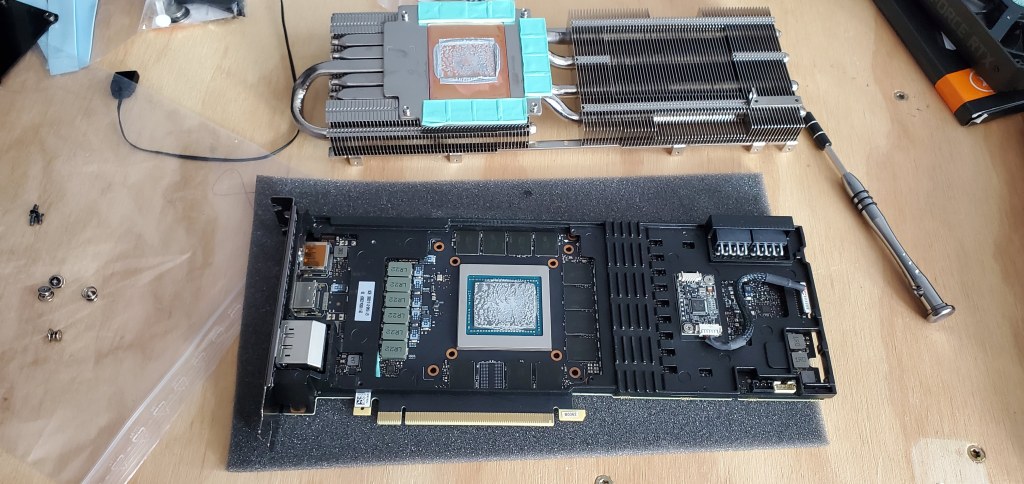
Fan and heatsink stuff removed, with the thermal paste still on the GPU 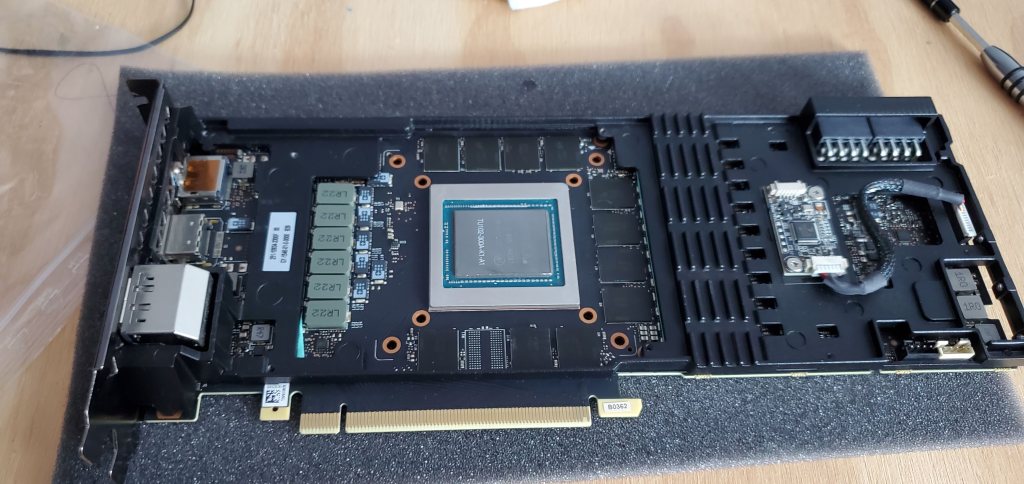
A little rubbing alcohol later and the thermal paste is removed and the chip is ready
The new waterblock had some pre-cut thermal pads (like thermal paste, but more solid) and some pads I had to cut and place myself. So that took a bit of time, but after a lifetime of arts and crafts, I was ready!
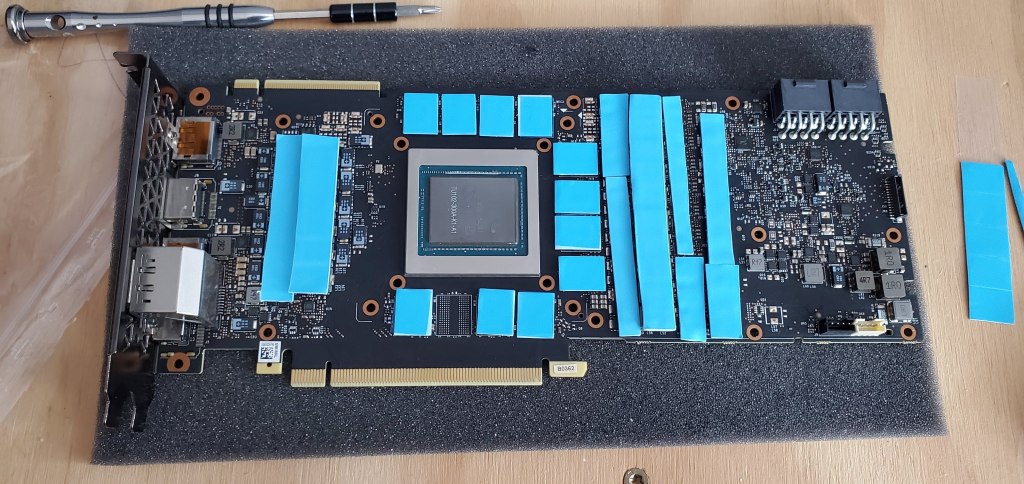
The thermal pads have a blue cover on them to keep them from sticking to other stuff and getting nasty. Think of it as double sided tape, both sides had a protective cover and you NEED to remove them before assembly or you will regret it. The backside had a clear cover so I opted to remove that first so I would remember to remove all the blue covers. 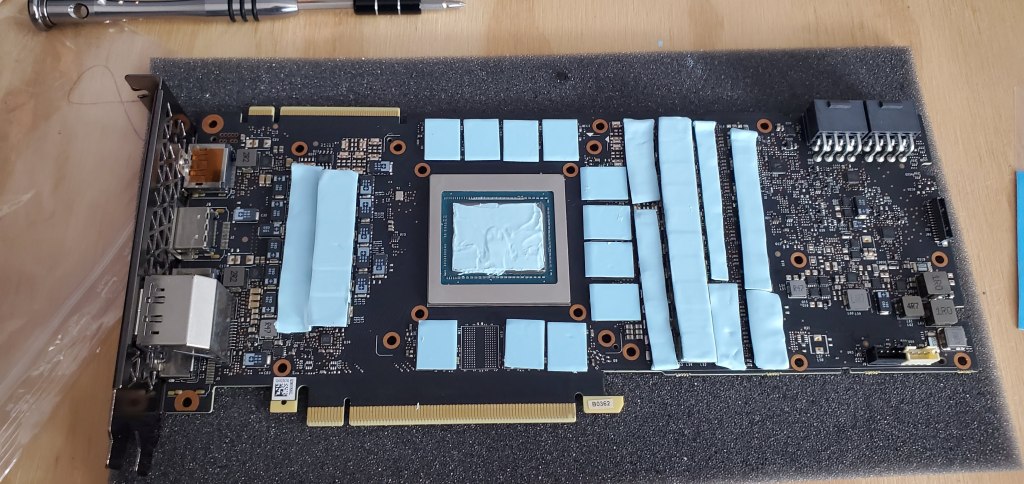
With all the covers removed I added some thermal paste to the GPU and spread it out. Some people use a blob in the middle, others use the line method, I like this way. So everything was clear for the waterblock to be attached now.
Quick aside, the kit comes with thermal paste, but I bought my own (arctic silver since that’s my brand for this sort of thing). It’s cheap enough that you may as well spend the extra money and get something good, not that the stuff with the kit wasn’t good, this was just (in my opinion) better and I want to do it right the first time. Now I could put the waterblock on.
Placing it just right was nerve-wracking, but hey I got it in place on the first try, so heck yeah! From here I just needed to flip it over and put all the screws back in. WELLLLLL except for the screws that hold the back plate on. There was a lot of checking and double checking to make sure I didn’t miss any screws.
And now the backplate gets added…
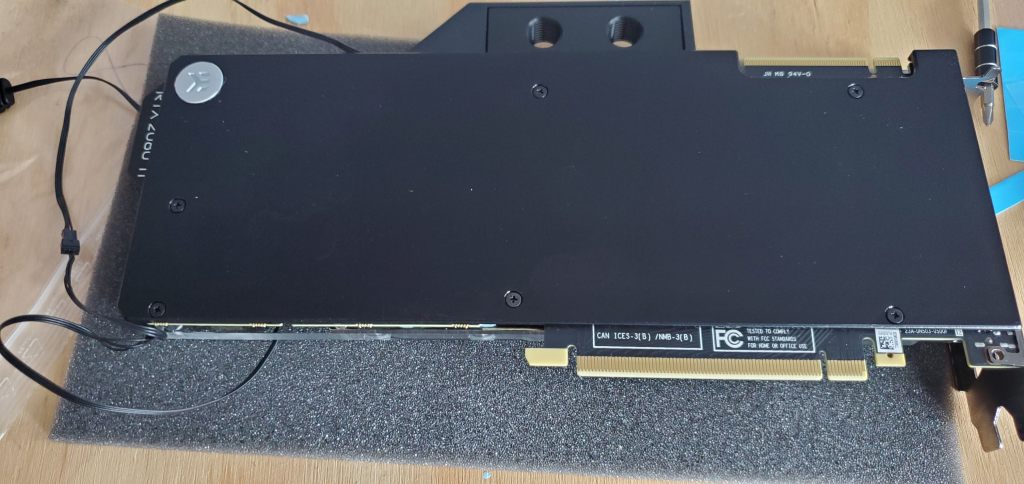
You can see ~6 screws that I needed to leave off so I could attach the backplate. There were about 15 or so screws total so I basically checked each and every screw to make sure everything was placed correctly because that’s just how I am. Oh another note, screws shouldn’t be tightened down right away, place the first set (the ones that are behind the back plate) and tighten them gently in a circular pattern from the inside to the outside. This will make sure you screw down evenly, that all the screw holes are lined up right, and make sure you don’t accidentally cross thread something.
And the graphics card is done!
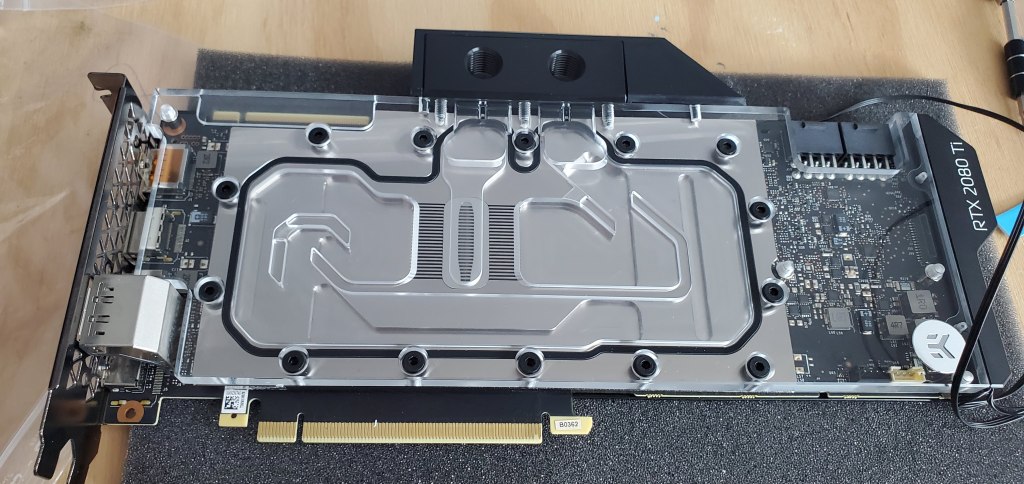
Now I used the antistatic pad to work on (black foam), but the table was wood so I could’ve worked on that. I just didn’t want to scratch the acrylic. Now I could get on with placing the radiator.
This is where my problems started…
I had verified that the radiator would fit the case and it does! It just doesn’t fit the backing plate it attaches to. Unfortunately I don’t have a great photo of it, but here it is on the left next to the old radiator.
It forms a sort of box around the radiator because there is a structural lip all around the frame. This lip makes the piece stronger, but it also means that it interferes with the new radiator! The new one is ~5 mm too tall! So I had to order a replacement for it or I had to modify the bracket to hold it. I opted to replace it and I will show you why. Remember my creative foreshadowing image? (below)
The old radiator sits between the case and the place that holds the hard drives, This was going to cause some issues for me because I really wanted my pipes to run right there. So we’re going from simple mod to extra custom mod with one small error. Here’s the solution I came up with.
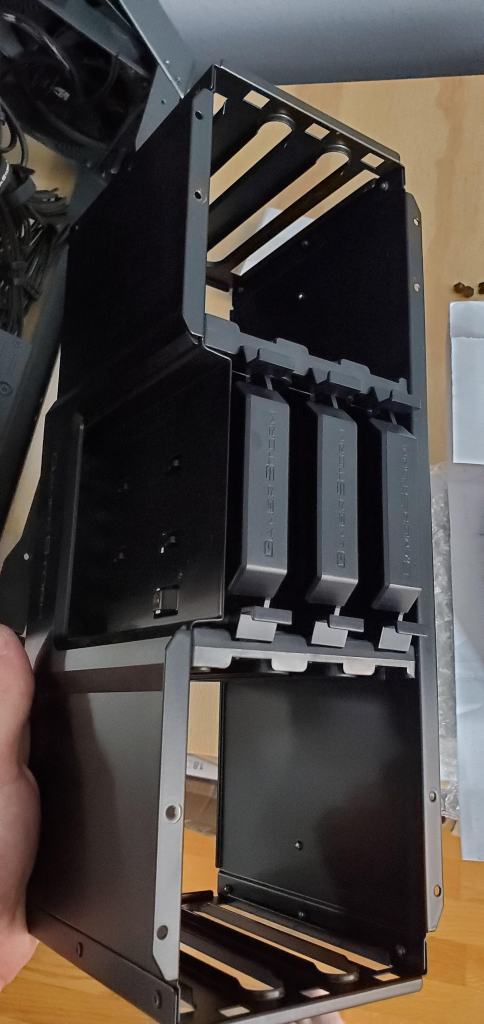
This guy is a pain in my ass. It holds a total of 10 hard drives should I want that many any right now I have four in it so I don’t really need all of this. More importantly the glass viewports are obstructed by this thing so all you see is the big black frame. I’m going to cut out the top and side of the bracket leaving the bottom (for structure and to cover some of the wires). This will cut the number of hard drives I can have to seven (oh no, only seven hard drives…), but I’ll never have that many anyway. The advantage is now you’ll be able to see through the glass port there into the case, that is where the tubes will run for my loop so it will look extra “cool” and because of the way the bracket was designed using a dremel to cut that nice and straight will be cake. Unfortunately my dremel is broken so I had to order a new one, but that should be here soon.
Since I’m going crazy modding the case, I now have space for a 480 mm radiator, which I’m going to say screw it and do that. The new radiator will fit the bracket (I’ve already checked) with some minor modifications, which I already made. So I should be good to go once that gets here sometime this week. Of course this means that my build is now a multi-week build, but that’s how these things go and I went in knowing that this could (probably) happen.
With that figured out I could turn my attention back to the rest of the loop design. I needed to figure out my pump placement and I could go ahead and mount my CPU waterblock since there wasn’t much else I can do without the radiators. I don’t want to put the graphics card back in until the radiator is in, because I want the space to work, so that will go in last.
First the CPU waterblock can be put on. It is super simple to do, just add thermal paste and screw it down onto the motherboard. The screws are hand screws so it’s pretty basic to get it attached, anyone could do it in about 10 minutes tops.
First we clean off the old thermal paste with rubbing alcohol and apply the new stuff 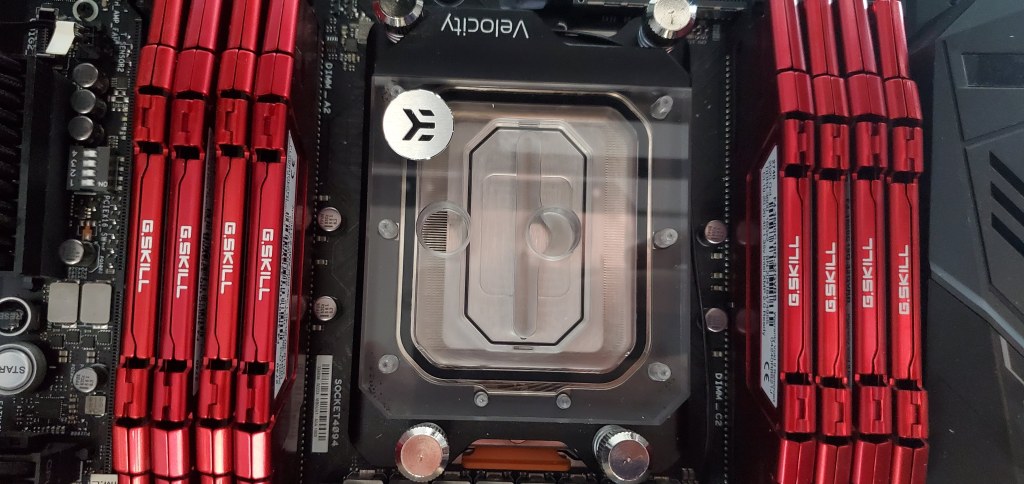
Then it’s four hand screws to get the waterblock on the motherboard 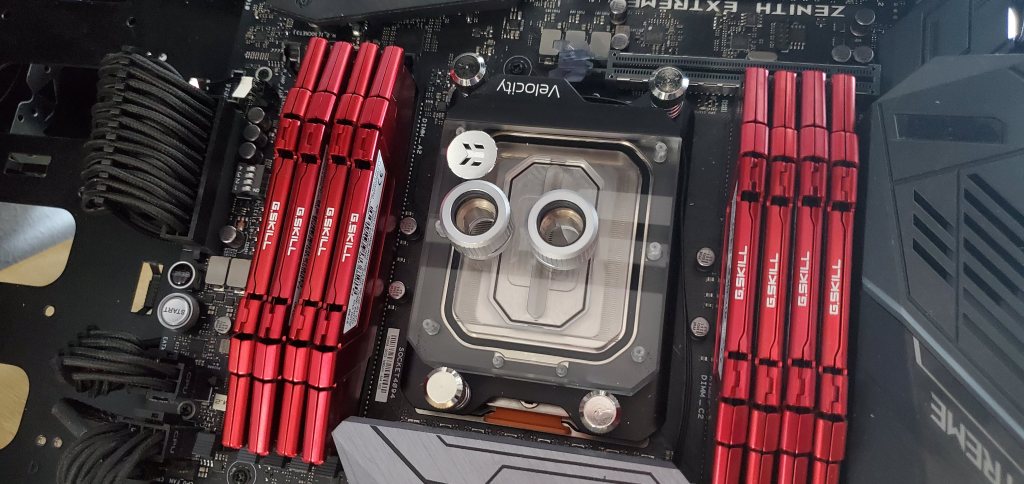
Lastly we can add our fittings, this is how the pipe will attach. I like placing them now so I can keep track of how many I will be using.
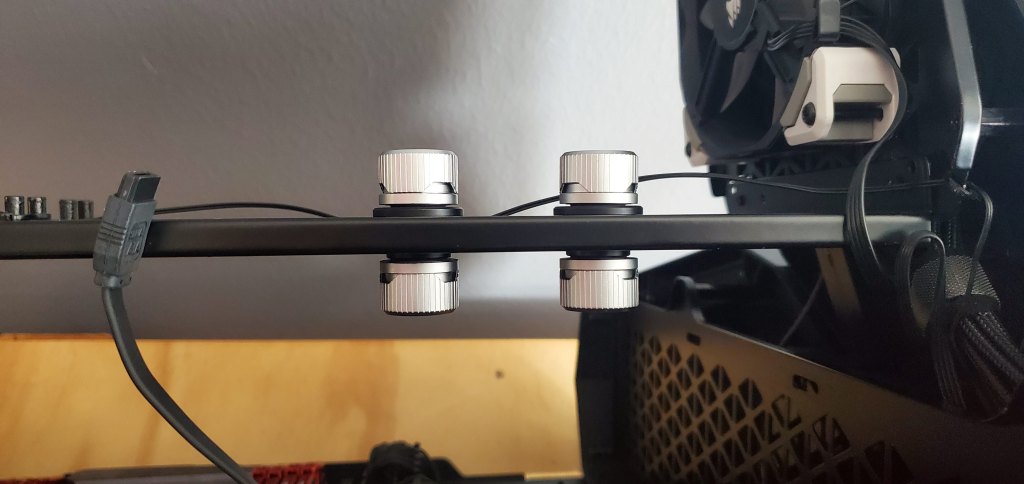
Next I had to figure out where to put the pump. I decided to move the graphics card down to the main motherboard and use the current location of the graphics card to hold the pump and reservoir. That means the lines will need to pass through the case, but I had given this a lot of thought before so I already ordered the passthrough fittings. Since it doesn’t hurt to put them on now, I went ahead and did that.
See where the fan is in the shot above (top)? That’s where the pump will go and it will be run horizontally so the tube will run almost the length of the compartment. It should give the case a really cool look, but more importantly that is the highest place in the loop and it will let air flow to the pump meaning I won’t have air bubbles accumulate somewhere else in the loop. It’s also why I wanted to run the radiator lines where the hard drives where instead of flipping the radiator and running the lines to the bottom of the case, air would collect in the radiator and it would potentially be a pain to get out. Now because I’m an idiot, I ordered the wrong bracket for the pump. I ordered the correct bracket to mount it and it will be here about the same time as the radiator, so it’s not a total loss thankfully (yet anyway).
Now this is where we are today. I hope I can get some of the modifications done to the hard drive bay to make everything fit, I may do a symmetrical cut and only have the hard drives in the center, that would give a better view into the case and free up some space for other stuff, I’m not sure yet. I don’t plan on needing more hard drives, so it may be worth doing just in case I want the space. I’ll have to think about it more as I get to work. This assumes I can get a dremel today, but with the pandemic, who knows if that will be the case.
Once I do that though, I’m basically stuck until the other parts get here. I can’t cut the tubing until everything is in place, so I have to hurry up and wait at this point. Not the best start to a large project like this, but it could be worse and most of the hard stuff is done now. If I can mod the hard drive bays today then I should be clear once the rest of the stuff gets in to finish this off pretty quick. I have everything else I need to finish the build (or at least I THINK!), so things should be a little smoother going forward.
If I change topics tomorrow, it’s because nothing got done today, but fingers crossed. I really want to get as much done as possible before the replacement radiator arrives.


Your spine is super cool! I was going to ask where I could order one but then read that it was yours…dang.
LikeLiked by 1 person
October 4, 2021 at 1:43 pm
Haha thank you! I really like it, but it’s full size and a pain to just have floating around the house. It’s definitely a conversation piece though!
LikeLiked by 1 person
October 5, 2021 at 10:47 am
Maybe hang it on the wall and add some of those LED twinkle lights. Yes, a definite conversation starter.
LikeLiked by 1 person
October 5, 2021 at 11:51 am
That’s a great idea, maybe I’ll hang it above the computer.
LikeLiked by 1 person
October 5, 2021 at 12:20 pm