Day 334: 3D printing, my final summer class
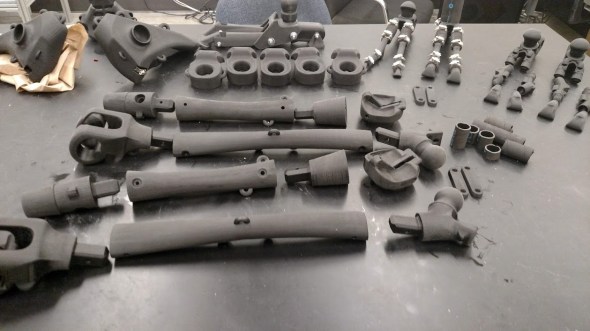
One of the slides I used in my 3D printing course, this was the robot I designed and 3D printed (prior to assembly) for my Masters degree.
Well I got a chance to give my last lecture yesterday (virtually of course) on 3D printing. I worked literally weeks to get everything ready and it went off (mostly) without a hitch. The world of 3D printing is full of vast, multifaceted, and divergent technologies with more applications than I could possibly list in a single lecture. In fact, they offer entire 12 week courses on 3D printing, so I had to cram everything together into a nice 1-2 hour presentation, where to start?!
Being the practical person that I am, first I curled myself into a tiny ball and cried for about a week. Then once I was done I got down to business and put together some slides. My first classes were more show and tell, this was going to be an actual lecture style class where I had nice pretty slides with fun transitions and some hands on demos. About half way into making the slides I decided it was best to curl myself into a tiny ball again and just cry some more. I find my best ideas come to me when I’m doing this.
I covered the big three when it came to 3D printing. While we have other tech out there, most of you who even are remotely familiar with will know FDM (fused deposition modeling, which is the style printer I own) and SLA (stereolithography apparatus). I also covered SLS (selective laser sintering) since it was also a semi-common approach to 3D printing.
In between all that, I got to show off my printer. I had planned to have it running when the class was going, but of course it finished my print about 15 minutes prior to the lecture. Don’t you hate it when that happens? It gave me a chance to go over the parts to the printer, why things were the way that they were, and I covered why the enclosure was made. Then I showcased a few parts that I had printed, some of which were total failures so they got to see that not all 3D prints come out looking super clean and ready to go.
Then I had the demo I was looking forward to doing. I printed two different dog bones, basically parts we use for materials testing to demonstrate that even though the layers fuse together, they aren’t exactly solid. One was printed flat, the other standing up and then I applied a bending force to show just how easy the one printed standing up could break. The demo went off without a hitch and worked exactly as I had expected it to. The part printed standing up broke cleanly at a layer in the center of the part very easily. The one printed laying down broke eventually, but (and this wasn’t planned) it only broke about half way then started splitting along the layer, making it a very good demonstration about why print direction is important (see the image below for my printed dogbones).

They are called dog bones because of the shape, they look very dog bone shaped because they are wider at the ends then they are in the middle. (you can also see all the air bubbles before I pulled off the pei sheet to replace it).
The class ended up being an hour and 15 minutes long, so right in the middle of the range I gave myself, I don’t like having two hour courses online like this, it feels like sitting around for two hours is unfair, so I like to be shorter than longer. They actually had questions for me this time around, which was also good! Overall I think it was a hit and I really enjoyed being able to show the people who attended all the fun stuff we can do with 3D printers and some of the different types that they will likely encounter. I didn’t go over bio 3D printing, or some of the more exotic 3D printing technologies, but for a single class I think I packed it with some very useful information!
Tomorrow we’re back to our regularly scheduled solid modeling for beginners course so you can join in and we’ll make some cool stuff together that you could 3D print if you so choose!
Oh why not, since I showed my robot in parts above I figure I can throw in the mostly assembled photo too. The lumbar spine wasn’t attached yet in this photo, but everything else was fully assembled at least.
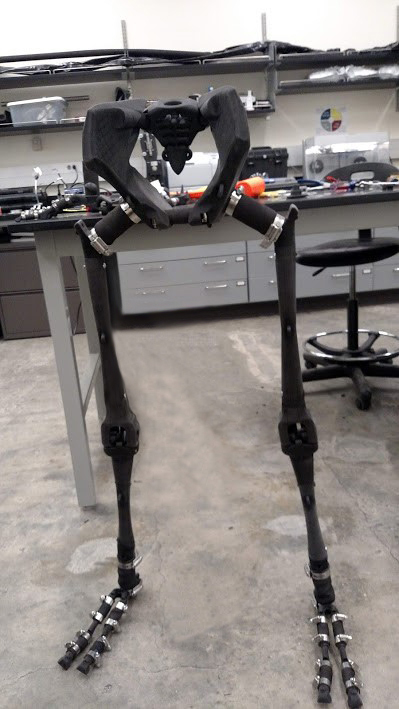
It may be hard to tell from the photo angle, but this guy is standing all on its own. He was a very balanced set of legs.


But enough about us, what about you?