PC build part five, the first bends
We’re getting bendy! After all the work I had to do yesterday I didn’t think there would be time to bend tubing yesterday, but I was determined to get started and I did. The good news, some of it’s done. The bad news, bending tube isn’t easy. There was a lot of trial and error, even more waste, and even now it’s not perfect *sad face* … but it’s almost time to wrap this project up!
Okay quick recap for those just joining in, all the computer build posts are in a super handy computer build category. The story goes like this, I had an all-in-one (AIO) watercooler, it clogged in a little over a year, got a second one, same thing happened in less than a year, so I said screw it and we’re building a custom hard tube water cooling loop. Since this is all custom, I’ve run into problem after problem, but you can read about all that in part one, part two, part three, and part four if you want to catch up. Once I actually finish this build, I may just put a whole how to guide together.
So yesterday the computer looked something like this
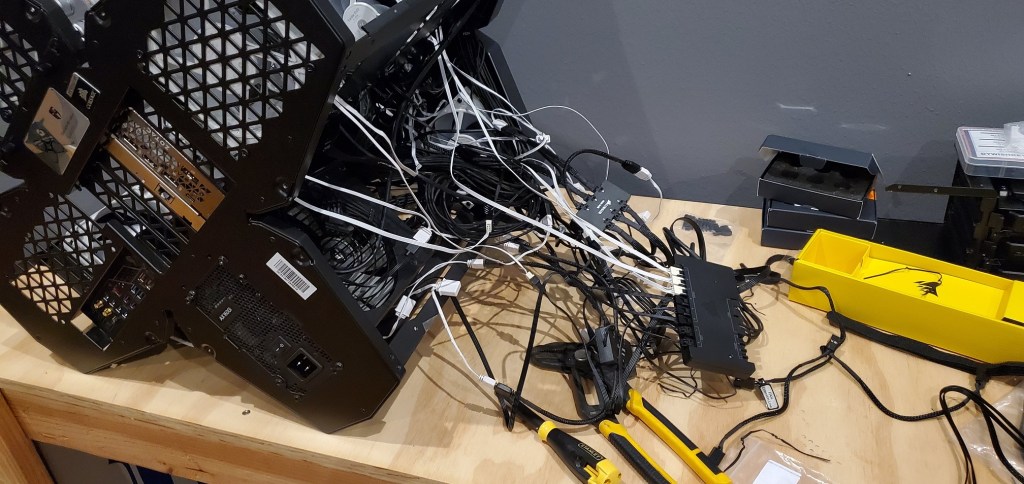
Give or take. I had played around with the wiring some, but anyway there’s a reason why it looks like my computer just coughed up its insides. Everything plugs into something, so I need to route the cables through the case in a way that makes sense, but also I want all the visible cables hidden as much as possible. Note I said visible, the stuff that you won’t see, it can be as ugly as you want and trust me when I say it’s going to get ugly!
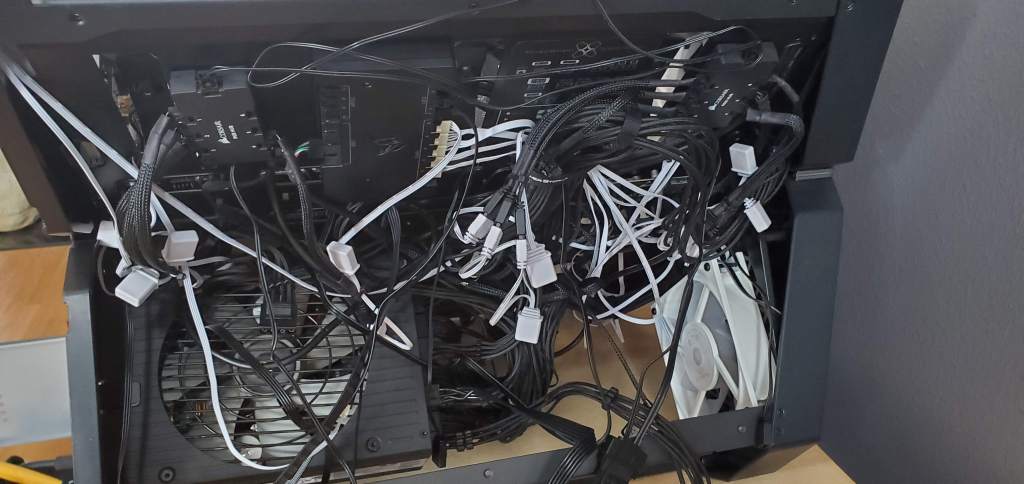
Once I had everything plugged into the order that I wanted I could reroute cables, figure out where to mount the new icue controllers (there are 2 rgb controllers and the main icue commander pro, which is the “brains” of the system that now need to find a home somewhere inside my case. For such a big case, I’m having trouble finding extra room…
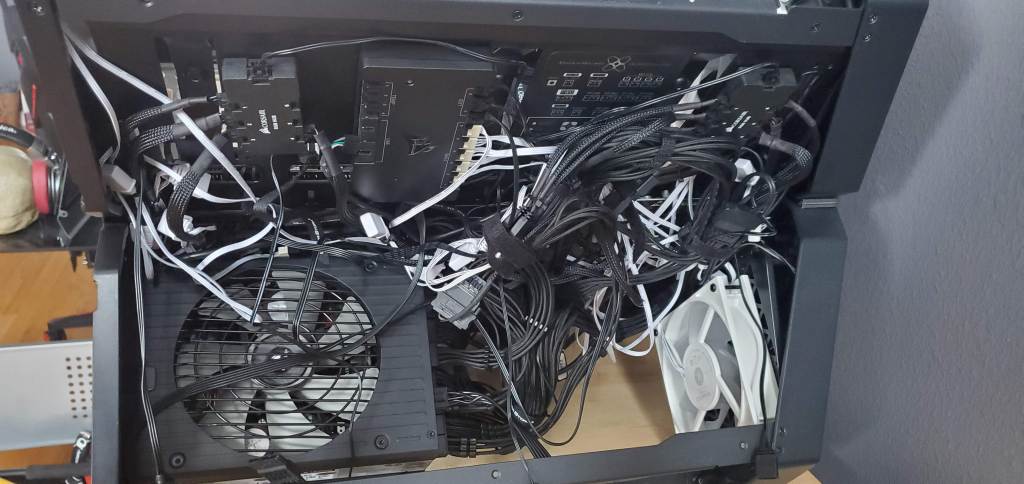
I’m not 10% done yet, I still need to strap things down and put things in the final place, but you’ll see in the photos below, I’m tucking all the cables behind something that you can’t see. Keep in mind some people do crazy amazing cable management jobs. I have a lot of skills, managing cables is not one that I’m great with. I try, I really do, but it still somehow ends up looking like a disaster. The good news is that it’s a hidden disaster at least! So enjoy the horrid cable management as I try to shove everything into its semi-final place. It will look more organized (only slightly) when I’m done, but I still have a few things that are not plugged in yet so nothing is in it’s final place until that happens. The cable I need should be here tomorrow. Hopefully. Maybe.


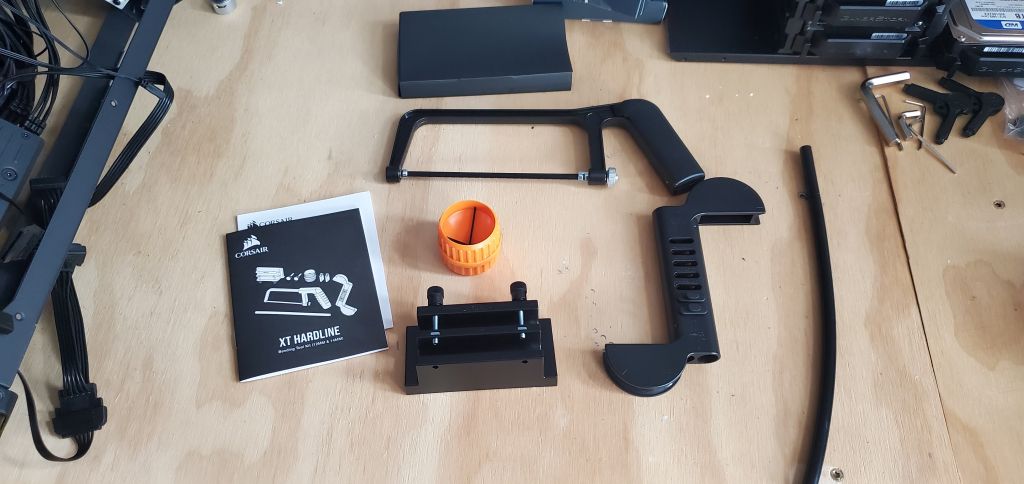
With the cables mostly back into the case and again I apologize profusely for destroying any hope I have of coming of as professional with this build, we can get started on the final bit! FINALLY WE ARE BENDING TUBING! To do this I planned ahead and got the corsair tube bending kit. Let me just say now, this kit is great for someone who’s never bent tube in his life. It’s basic, but has everything you need and the mandrel bending tool (the somewhat s shaped think below the saw) makes life so much easier.
Then I went to work cutting the tubing to size before I put my first bend. Unfortunately all the bends in this loop are going to be complicated, but I wanted to start with the “easiest” and I thought that was the bend for the outlet of the pump so I decided to tackle that first. Okay, back up, first I tried to bend a test piece to see how it felt and how it worked. It turns out this stuff takes a lot of heat to bend, but if you take your time and (in my case) heat past where you think you need to heat, it will bend very nicely.
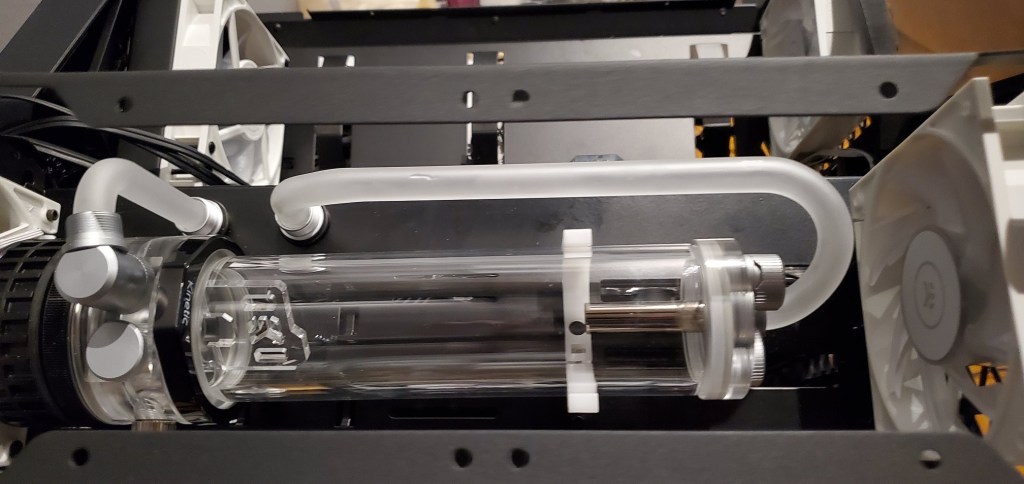
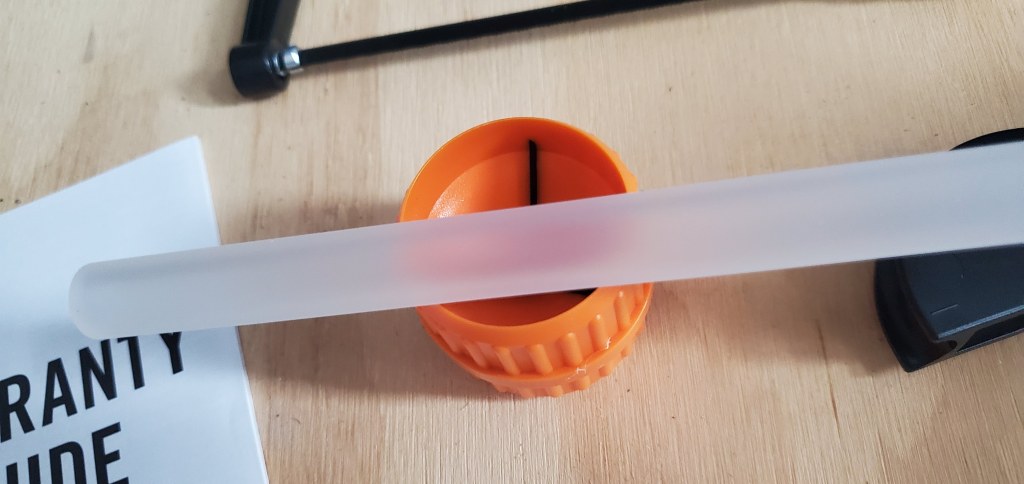
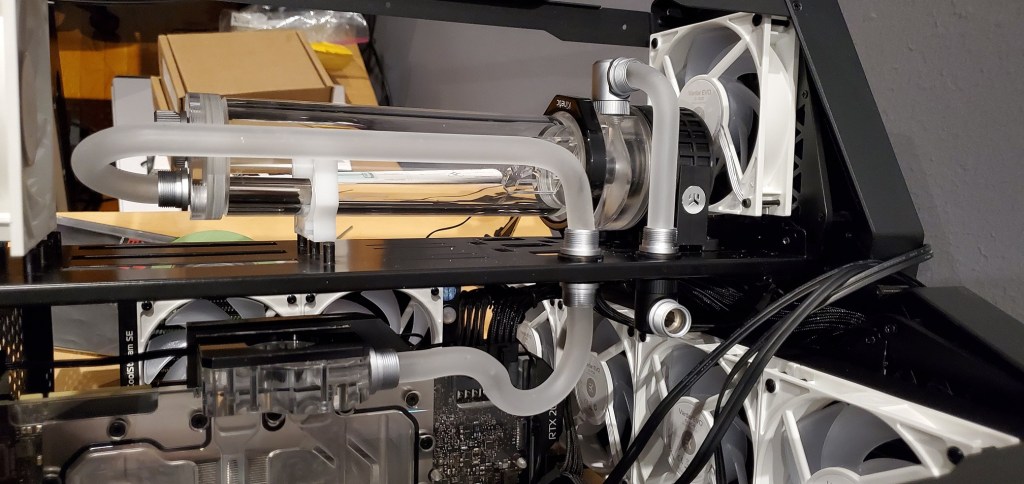
Since we haven’t really got a good look at the tube, here’s a good photo of what the finish looks like. It’s not opaque, but it’s not see through either, it’s more of a frosted look. If I wanted to do a christmas theme this would be the tubing, but I liked it because it will diffuse the color of the liquid I’m adding to the loop and will give it a cool (pun intended) look.
Then I could get to bending… and bending… and bending… measure twice, cut once. Wait, cut a little more? Too much, start over. Yeah that pretty much sums up how it went. The bends didn’t go where I wanted them, sometimes my bends ended up being a different angle than I wanted, more often than not I just couldn’t get things to line up.
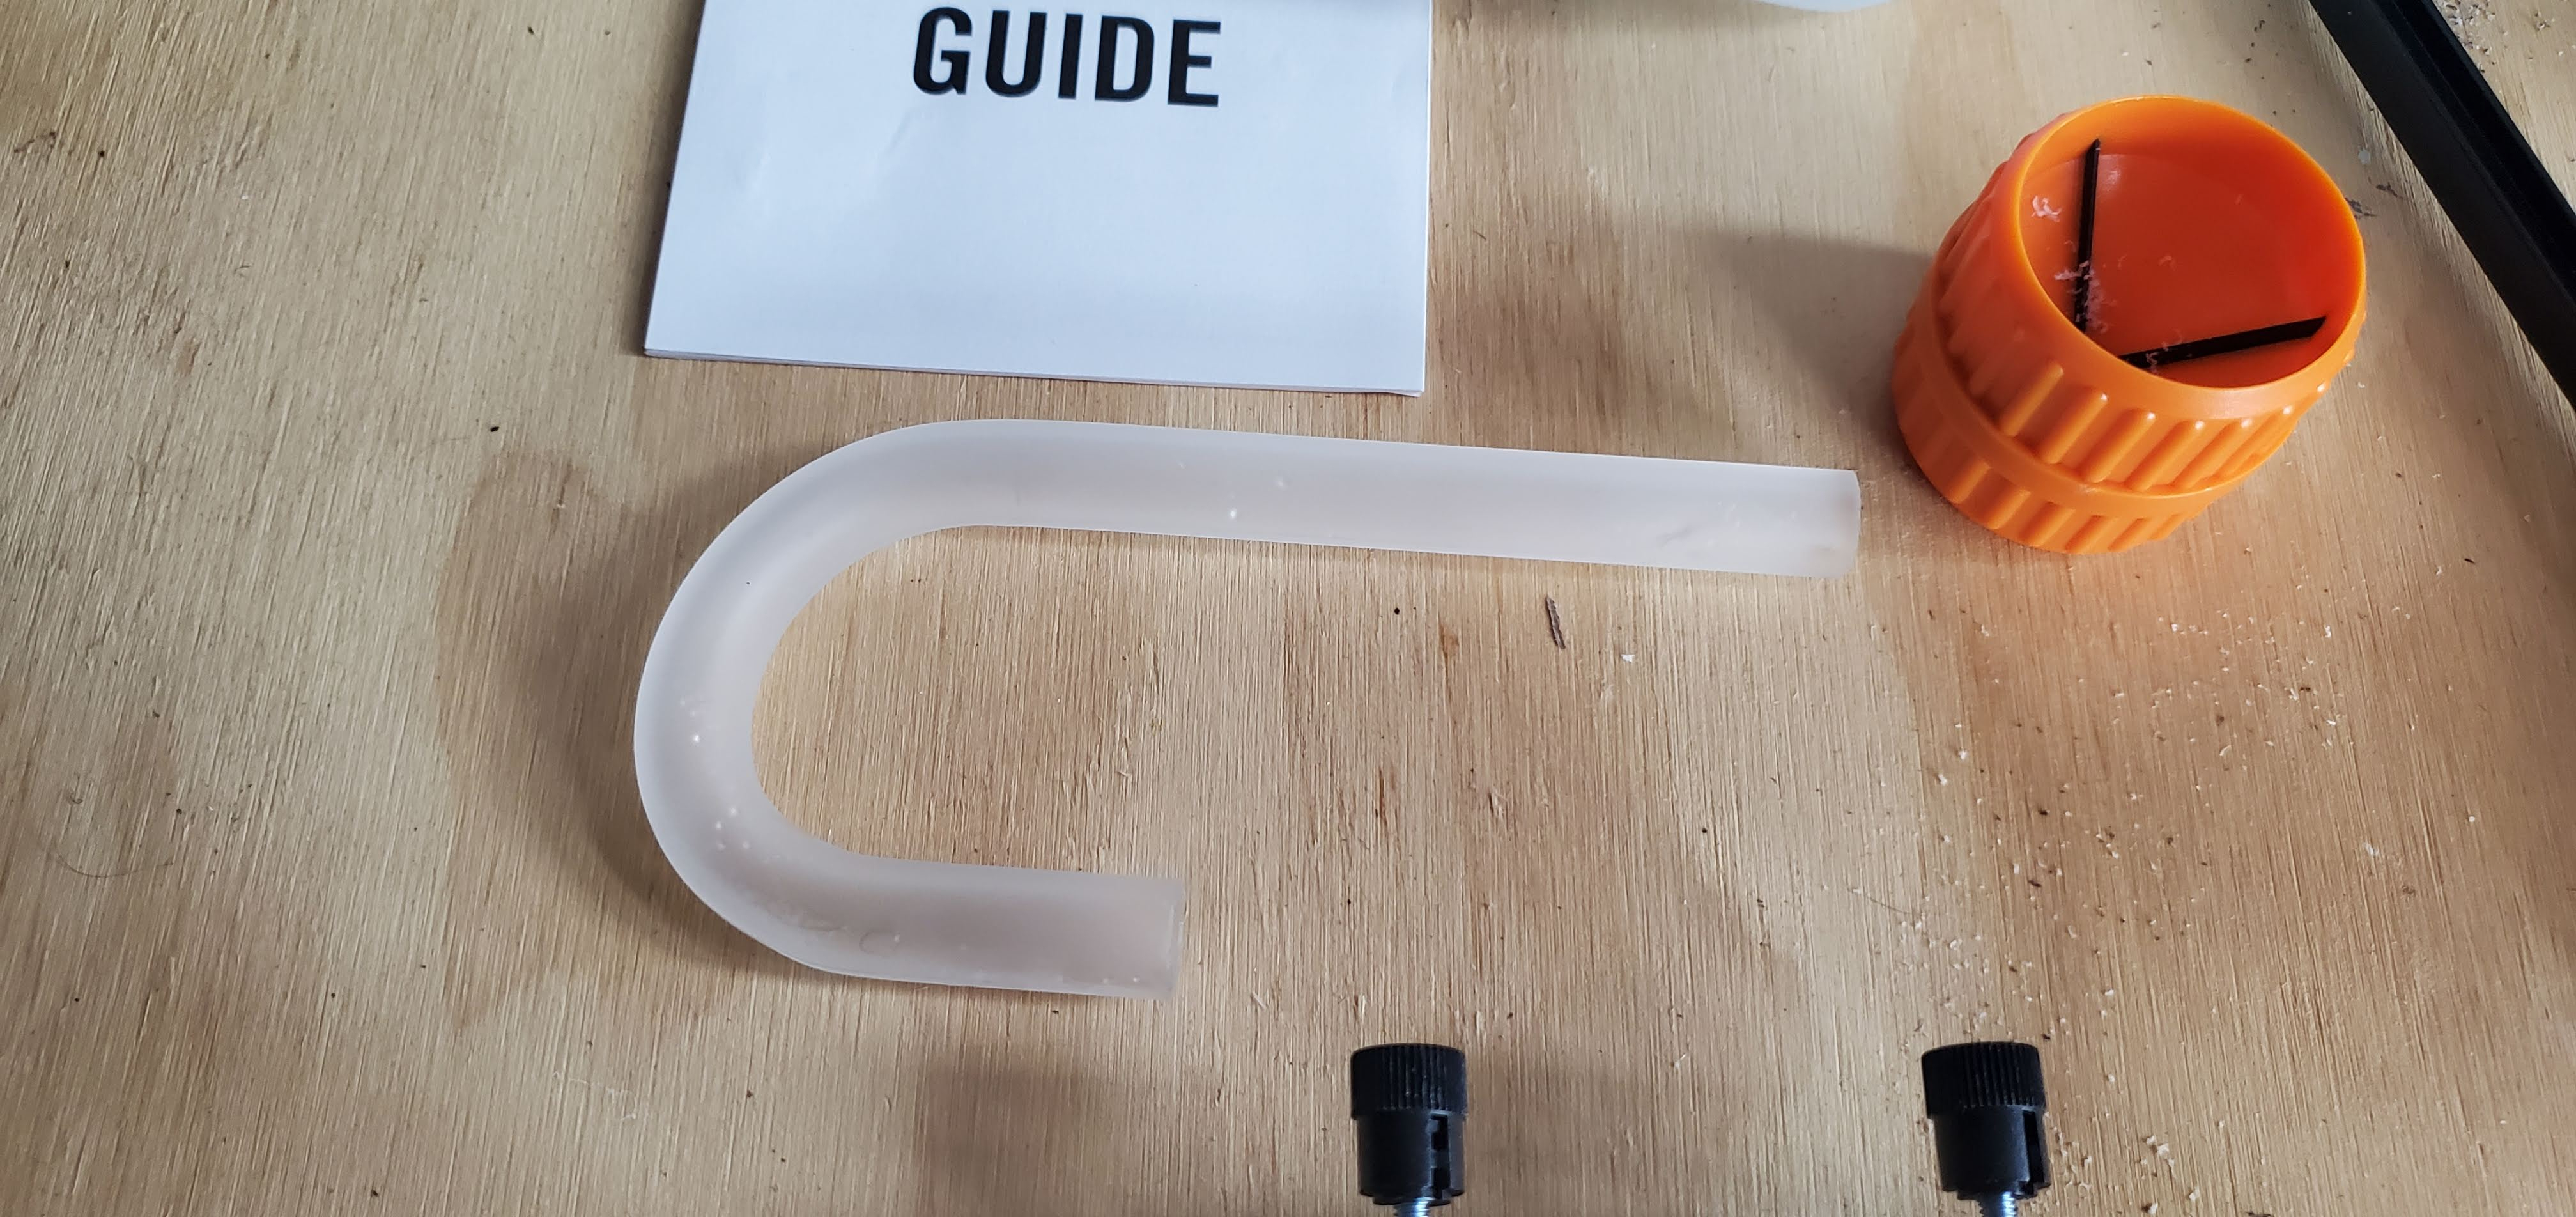
If that was the start it wouldn’t have been an issue, but no I got my first bend almost perfect the first time. Seriously, I thought this was going to be so easy. Below is the first bend in the loop, it’s no longer there, but we’ll get into that shortly.
Once I had the tube bend how I needed it, I could test fit the piece and just like that I had my first tube placed!
This is about the time it all went to hell.
I decided it was time to bend (what I thought) would be the next easiest piece, the one that connects the graphics card outlet to the bottom passthrough. This would be the return line so it would go up through the pass through, run to the back of the pump and dump the fluid back into the reservoir.
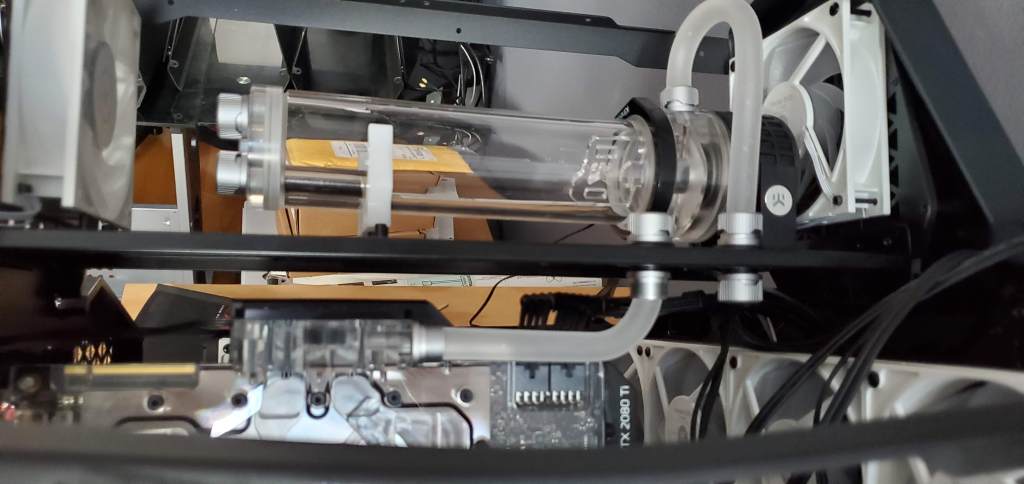
Nothing was going right and while the photos don’t tell the whole story, it goes something like this, the graphics card outlet doesn’t line up perfectly with the passthrough, so there is a bit of an angle that needs to be made to the tube to get it to go correctly. Moreover, I really didn’t like that it wasn’t straight. I bent the tube too early and while it looks somewhat okay in the photo, I wanted it to be more straight on when it hits the pass through.
The top part was also an issue, none of it was straight because it too was at a bit of an angle. The photo shows it a little, but it’s more noticeable at other angles, so I was back to square one pretty quickly. After awhile of trying I opted to use a 90 degree fitting on the pump and just have one 90 degree bend. Not 100% sure I like it, I may go back to the 180 degree bend, I’m not sure yet.
I’m not 100% happy with it, I need a very tight bend here to line up with the pass through so it looks like it angles at the outlet of the pump. It’s sreighter though so I am going to keep it for now and when I finish the rest of the loop I may go back and try to redo some of these first bends (depending on how much I can improve between now and then).
Since the graphics card turned out to be a pain, I decided to tackle the return line to the reservoir. This has a 180 degree bend and a 90 degree bend, so it’s more complex, but at this point it felt like the easiest bit of bending I could do. This was about the time I realized why people buy all the angled fittings, bending tubing is a lot of work and takes skill I just don’t have yet, but you never get better at something by not doing it, so we’re bending the tubes damn it. Each pack of tubes comes with three, one meter tubes and I have two packs. Spoiler I went though one of them just last night so I ordered two more because I’ll need them. Not pro tip, get more than you think you’ll need, then double that because you won’t have enough.
So I made my cuts, I made my bends, repeated a bunch, and ended up with the perfect piece. It was exactly correct and I would be cheering right now if it weren’t for one problem. It’s the only piece I had throughout the ~4 hours or so I spent working on this that blistered. Of course it would happen with the perfect bends!
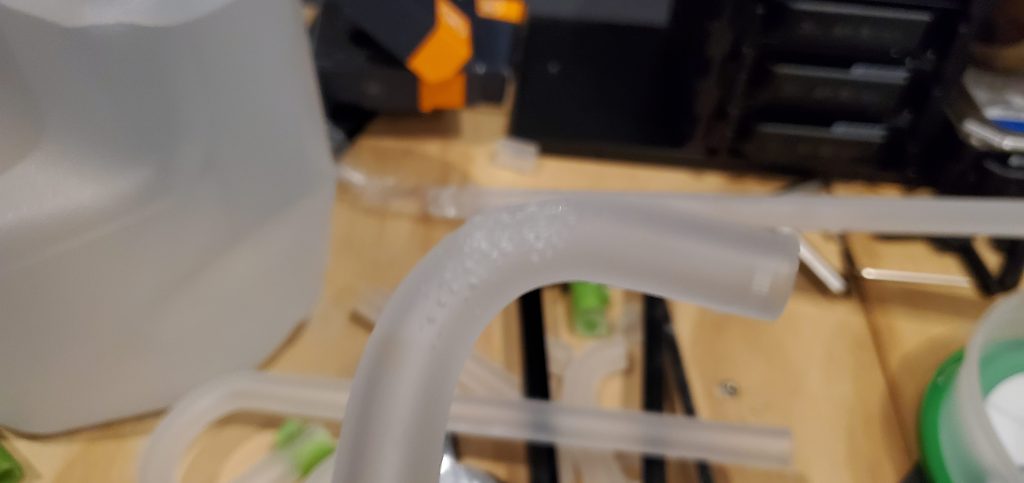
Something to be careful about. Bonus! You can see in the background the pile of failure tubing.
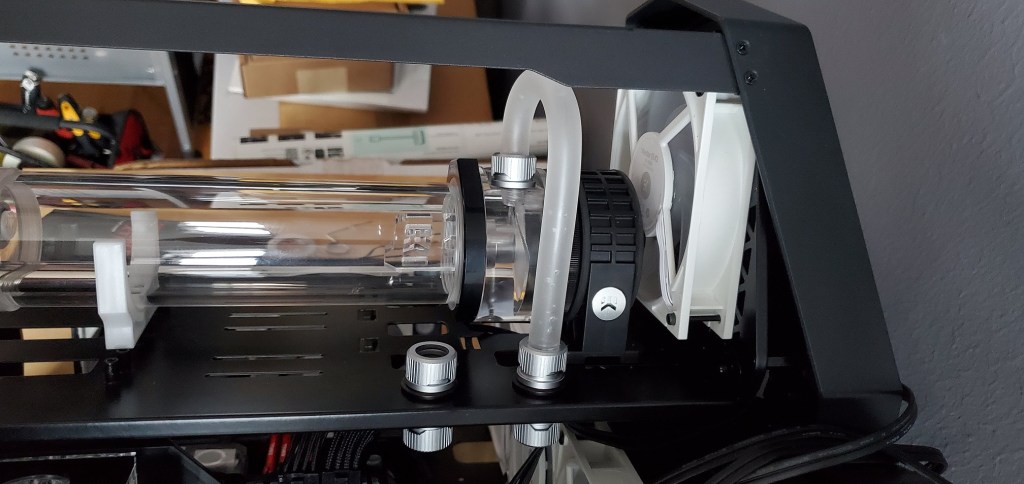
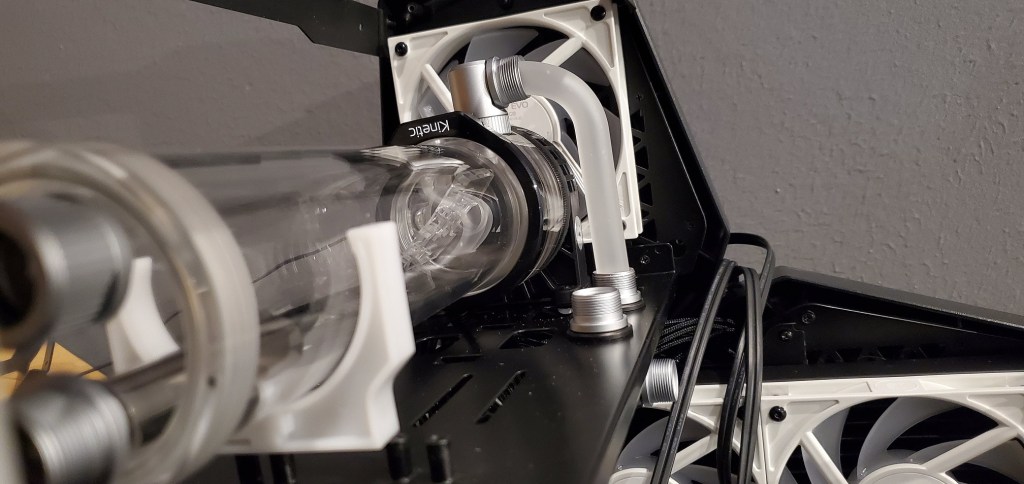
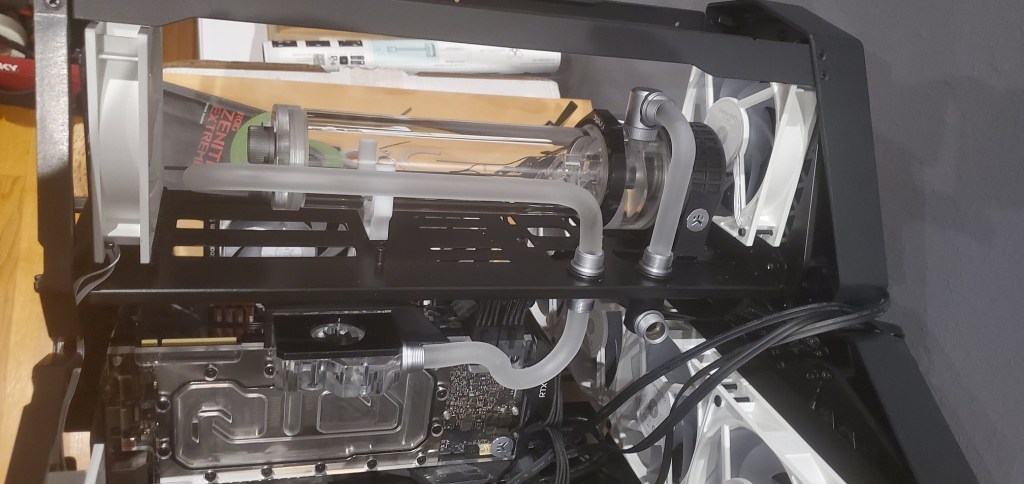
Eventually things got (slowly) easier and I got the hang of it somewhat. I’m still having trouble figuring out how to put my bends exactly where I want, but I bent a new return line and it came out almost exactly how I wanted it. The 90 degree bend is a little early so it goes into the fitting at a slight angle, but the collar goes on just fine so I will keep it for now and when I’m done this will probably get rebent too.
The return line (left) has the 90 degree bend slightly too early, so it’s angled into the fitting, which may not be noticable with the cover on, but I will probably rebend that too. From the top it looks perfect at least
Sometimes good enough is good enough and I really don’t want to spend hundreds of dollars just to get the tubing perfect, so this is how it will remain until the end and if I have extra tubing I’ll go back and try to bend these two pieces again.
I was going to call it a night at this point since it was late and I didn’t have the energy to keep working, but I decided to try to get the outlet from the graphics card to the pass through (the return line side) bent. This was tricky because as I said the outlet from the graphics card and the pass through fitting aren’t aligned and worse, they aren’t very far off either! So this took some creative bending. Luckily I had some scrap from all the 180 degree bend attempts for the return line I could cut and use, so I did.
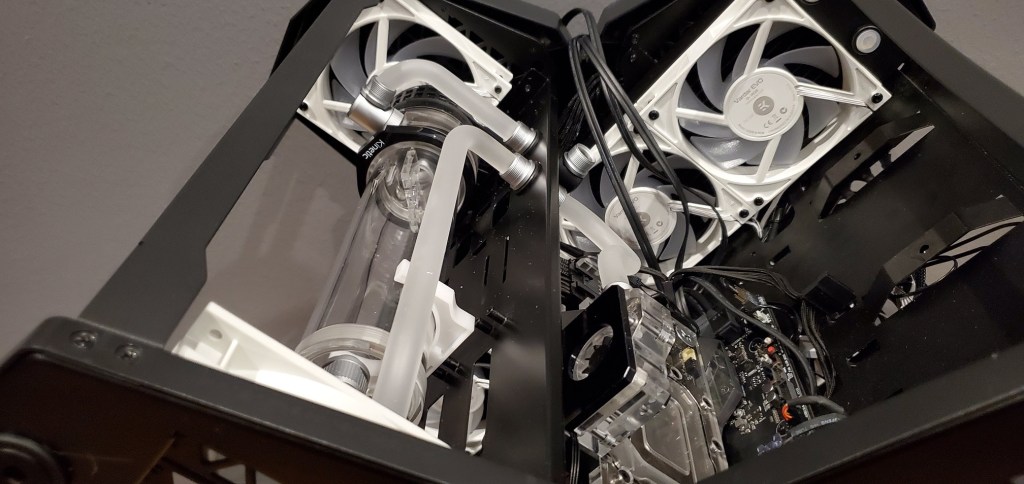
Thankfully this bend ended up being more straight on to the passthrough. I’m not 100% happy with this either (I mean do you see the theme yet?), because there is a small flat spot on the tube, but I don’t honestly think I could ever bend something that fits this well again so we’re almost certainly not redoing this. Unless I become a bending master by the end of this build, there’s no way I’m going to get better. The trick to this was to use the u shape, then bend and twist the end that attaches to the graphics card.
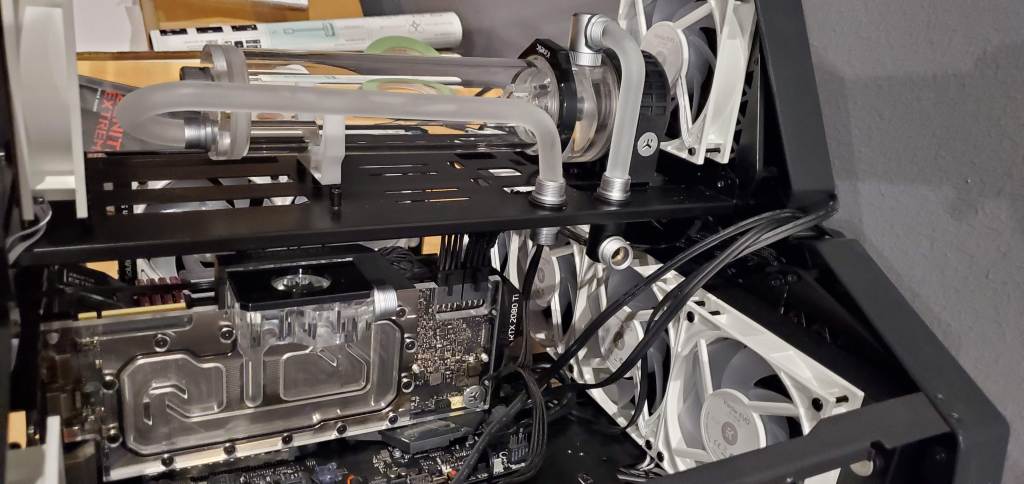
This is where I left it last night. I got a lot more done than I expected and today I may try to get some other bends in. The outlet from the passthrough (pump outlet side) doesn’t line up with the inlet for the radiator, so that will be a fun bend, basically nothing lines up so the tubes are going to have more twists and turns in them than a mystery novel.
So reminder, I ordered 2 boxes of tubing, that’s 6 meters or about 20 feet, waaay more than I would need if I could get these bends right the first time. I suspect that most of my trouble is because I’m new, but if you’re here reading this because you’re new and want to do the same, do yourself a favor and get more tubing! As for the waste…
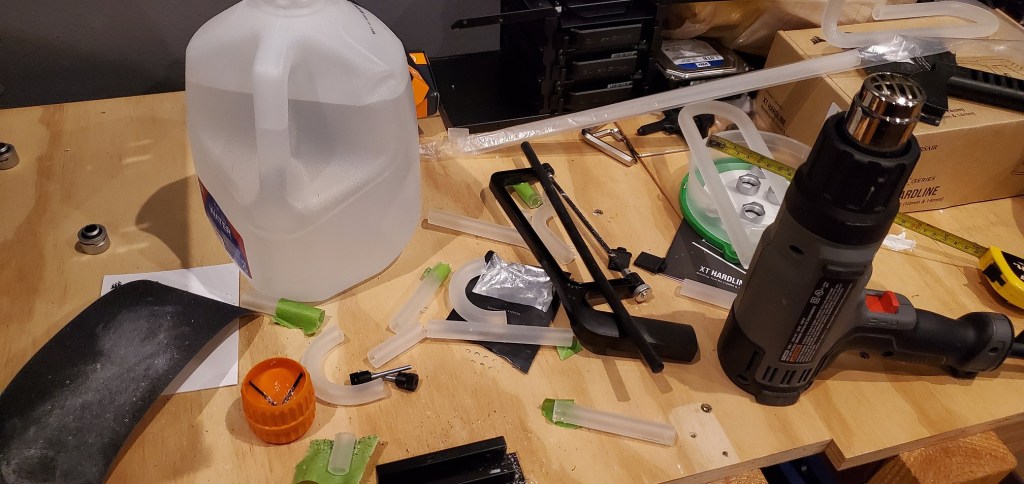
Oh almost forgot! Don’t use marker to mark cuts/bends! Even dry erase will bleed into the plastic when you apply heat staining your tubing! I’ve seen videos about this so I opted to use painters tape, which I have a lot floating around from various paint jobs. It worked great and didn’t stain the tubing. Every piece I cut I rinsed in distilled water (pictured above) before I put it on the loop. I’ll probably give everything one final rinse before the final assembly, but that’s probably overkill (a running theme I’m sure).
Since you’re probably hear for some good hard tube bend photos, well you’re in the wrong place, but if you want extra shots of my bad hard tube bends, here you go!

I really like this shot 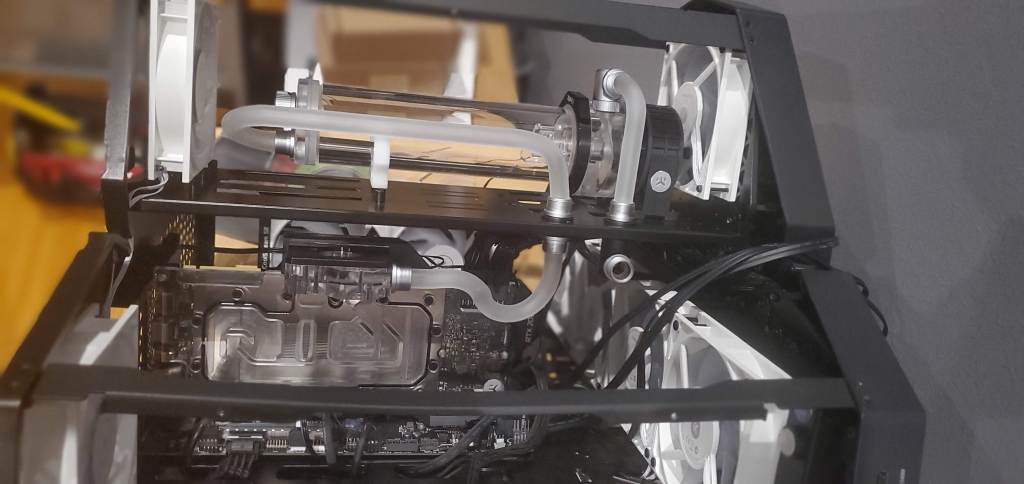
Like I said, not sure how much I’ll get done today since I have work to do, but the end is coming closer! By the way in the big photo above, you can see the inlet for the radiator vs. the outlet for the pump side pass through. It’s close enough that it’s going to be a pain, but it’s a large enough difference that I can’t just run a straight piece of tubing, which sums up the story of this build so far.
More updates soon though! … hopefully.


But enough about us, what about you?