Day 362: Experiment two
Well today is going to be a quick recap of my experiment yesterday. This will be just as much for me as it is for all of you. While I can’t go into the experiment details (since I’m working to publish this) I can give a pretty good overview like I did the last time around.
Experiments are hard. There is a lot of setup and teardown involved. Some are more involved than others and unfortunately mine is pretty setup/teardown intensive. There are some pre-experiment things I can do to make this process smoother, but unfortunately there are limits to what I can do.
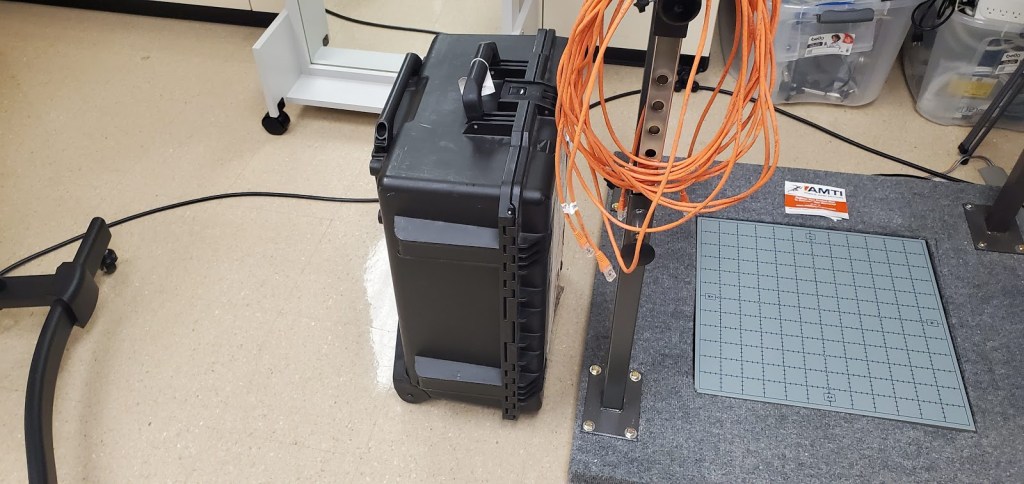
Testing the equipment prior to starting is one of the few things I can do to make sure everything goes according to plan. It sounds silly, but by plugging everything in beforehand I can make sure nothing weird is going on. That doesn’t mean I don’t give myself a heart attack when I forget to do something (like say place the ground electrode… oops), but it means that I can be confident that if something isn’t working it’s because I missed a step somewhere (like turning on the amplifier… really?) and not because the equipment broke.
Thankfully the experiment yesterday went somewhat smoother than the first experiment. For example, this time I remembered my stop flag so I could easily segment my data into the chunks it needs to be segmented into for processing. This means that four of the five datasets (should) be easily segmented now.
I also had an easier time setting up the equipment. If you’ve never been part of an EEG experiment or had to set one up, it can be time consuming. We use something called wet electrodes. This means that when we put the fun swim cap looking sensor array on the head we need to add some conductive gel (basically a gel with a lot of salt in it). The gel bridges the gap between the skin and the electrode caused by hair and reduces the impedance (resistance). That’s why we use a blunt tipped needle to add gel once we’ve put the cap on the head.
Below is a photo I took of some of my lab mates doing just this, it’s a great photo and shows how this is done. Remember, our lab is non-invasive so we don’t puncture the skin. The syringe tip is blunt, so it’s like a metal straw and lets us add gel between the head and the electrode. It’s pain free and we’ve done it to people of all ages (even babies believe it or not).
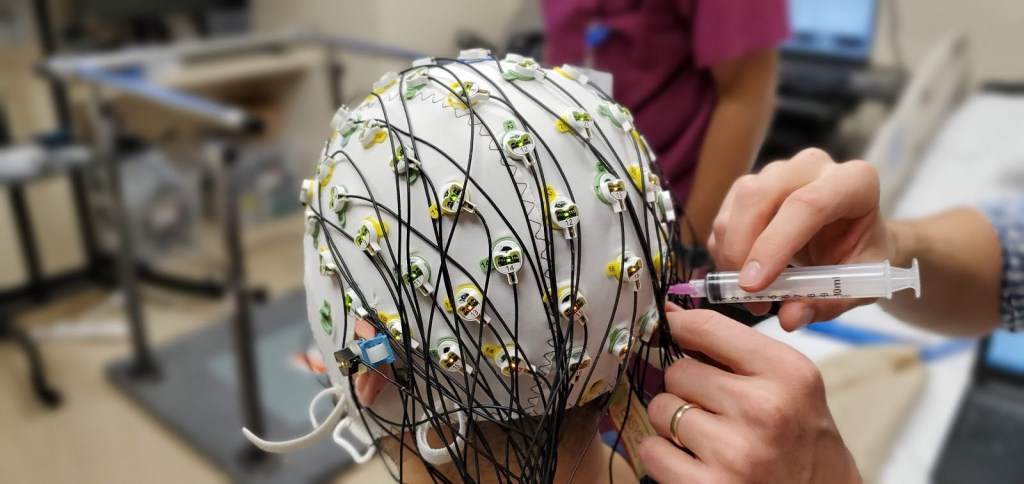
You may have noticed if you look very closely at the image above some colored lights on each of the sensors. The LED changes color depending on measured impedance, when it’s green we have low impedance, red is high, and yellow is borderline. We don’t mind yellow so much because as the gel warms up from the heat of the skin the impedance will drop. We measure impedance before and after the experiment for this reason.
I’ve also been using my test rig which I’m happy to report has worked pretty flawlessly so far. I need to make some slight modifications to it to make it more user friendly, but it works and that’s all I care about for this set of experiments. The experiment itself lasts about 1 hour, setup on average will take about 2 hours, so we’re looking at 3 hours a person.
Of course for something like this I arrive an hour and a half early (at least) to do my pre-experiment setup and I spend another hour and a half for clean up post-experiment. If we’re doing the math, that’s a 6 hour workday just for the experiment. Which is about 2 hours longer than our normal experiments.
I managed to shave off about a half an hour on this last experiment so I’m somewhat optimistic that as I continue the amount of time it takes to perform the experiment will decrease. Of course, I’m only collecting data from 5 subjects so there isn’t a whole lot of time to improve my performance, but this is just the first set of experiments and we’re already planning the next round.
So yeah, two down, three more to go. I’m excited to be taking yet another step towards my PhD. It’s work and a little exhausting, but it’s nice to be making progress again.


But enough about us, what about you?